Initial Setup
Table of Contents
Before first use, a fresh ORE Studio installation must be provisioned — a one-time sequence this chapter describes in full. It sketches the model the steps rest on — tenants as units of isolation, parties as the organisational hierarchy within them — then walks the fixed three-wizard sequence in order: the System Provisioner creates the platform administrator and the first tenant; the Tenant Provisioner seeds a tenant with reference data and, at its first step, forks between the ready-made Acme Corporation reference entity and a Manual path that builds your own house party hierarchy; and the Party Provisioner equips each manually-created party with counterparties and report definitions. The chapter closes with party selection at login, the point where provisioning ends and daily use begins.
1. Overview
The chapter advances the argument that provisioning a fresh installation is a fixed sequence that follows from the data model it serves, and it proceeds in that order. It begins by sketching that model in The model in brief, establishing the tenant as the unit of isolation and the party as the organisational hierarchy within it; this is the premise the rest of the chapter builds on. From there it lays out the The provisioning sequence as a whole — the three steps and the login identity each one requires — before working through each wizard in turn. It walks the System Provisioner, which creates the platform administrator and the first tenant; then the Tenant Provisioner, whose first page forks between the ready-made Acme Corporation reference entity and a Manual path that seeds a tenant with reference data and its own house party hierarchy; and then the Party Provisioner, which equips a single manually-created party with counterparties and report definitions. Finally it shows where provisioning hands over to daily use in Choosing a party at login, and the Conclusion draws these steps together.
2. The model in brief
ORE Studio organises data around two concepts that the provisioning wizards exist to create. A tenant is a fully isolated organisational space — its users, reference data, and results are invisible to every other tenant; typically one per organisation. Within a tenant, parties form the organisational hierarchy: the house — your own legal entities, desks, and booking centres — alongside the external counterparties it trades with. Users log in to a specific party, and their position in the hierarchy determines what they can see. The full model — tenant types, the system tenant and system party, hierarchy visibility, and the house versus counterparty distinction — is covered in the Tenants chapter.
3. The provisioning sequence
A freshly installed ORE Studio backend goes through a fixed sequence before it is ready for normal use. Each step requires a specific login identity:
- System provisioning — no login is needed; the backend is in provisioning mode and the System Provisioner wizard launches automatically the first time any client connects. This step creates the platform administrator account and provisions the first tenant and its tenant administrator. Until it completes, no normal user logins are accepted.
- Tenant provisioning — log out of the system administrator session (or simply connect as a new user) and log in as the tenant administrator created in step 1. OreStudio detects that this account has never logged in before and launches the Tenant Provisioner automatically. Here the path forks: choosing Acme Corporation (full sample bank) populates the tenant with the system's ready-made reference entity in one step (see the Acme Corporation chapter); choosing Manual setup instead seeds the tenant with reference data and creates your own house party hierarchy, step by step, as described below.
- Party provisioning — log in to a specific house party using the tenant administrator account, or any operational account that holds party setup permissions for that party. OreStudio detects that the party has not yet been provisioned and launches the Party Setup wizard. Repeat this step for each party in the hierarchy that needs its own counterparties, books, and reports.
Each step has a corresponding wizard in the ORE Studio UI. The following sections walk through each one.
4. The System Provisioner wizard
The first time you connect to a backend that has never been initialised, ORE Studio detects provisioning mode and launches the New System Provisioner automatically. This one-time wizard creates the platform administrator account, chooses a single- or multi-tenant layout, and provisions the first tenant together with its own administrator.
4.1. Welcome
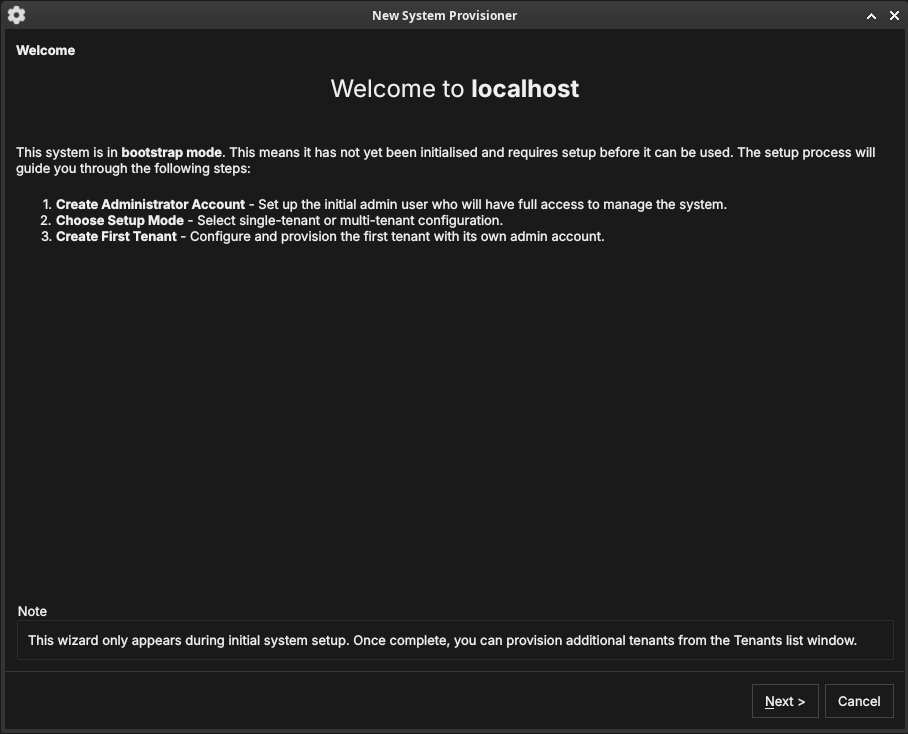
Figure 1: The System Provisioner welcome page, shown when the backend is in provisioning mode. It lists the three setup steps.
The welcome page confirms the system is in provisioning mode and outlines the steps: create the administrator account, choose the setup mode, and create the first tenant. Click Next.
4.2. Create the administrator account
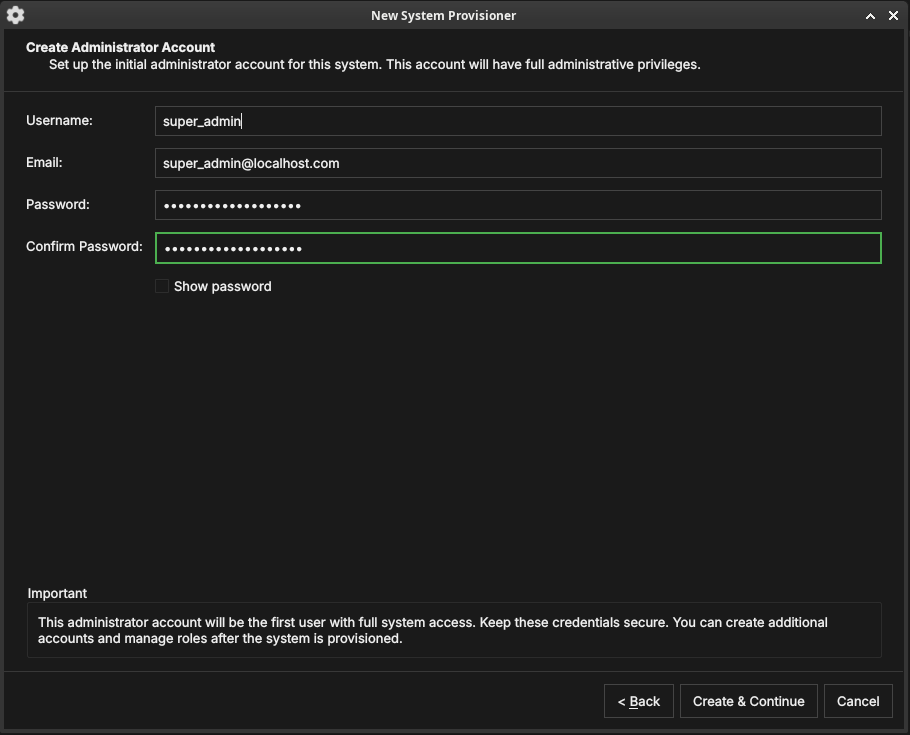
Figure 2: Creating the platform administrator account — the first account, with full administrative privileges over the whole deployment.
Enter a username, email, and password (with confirmation) for the platform administrator. Keep these credentials safe — this account has unrestricted access to the entire deployment. Click Create & Continue.
4.3. Choose the setup mode
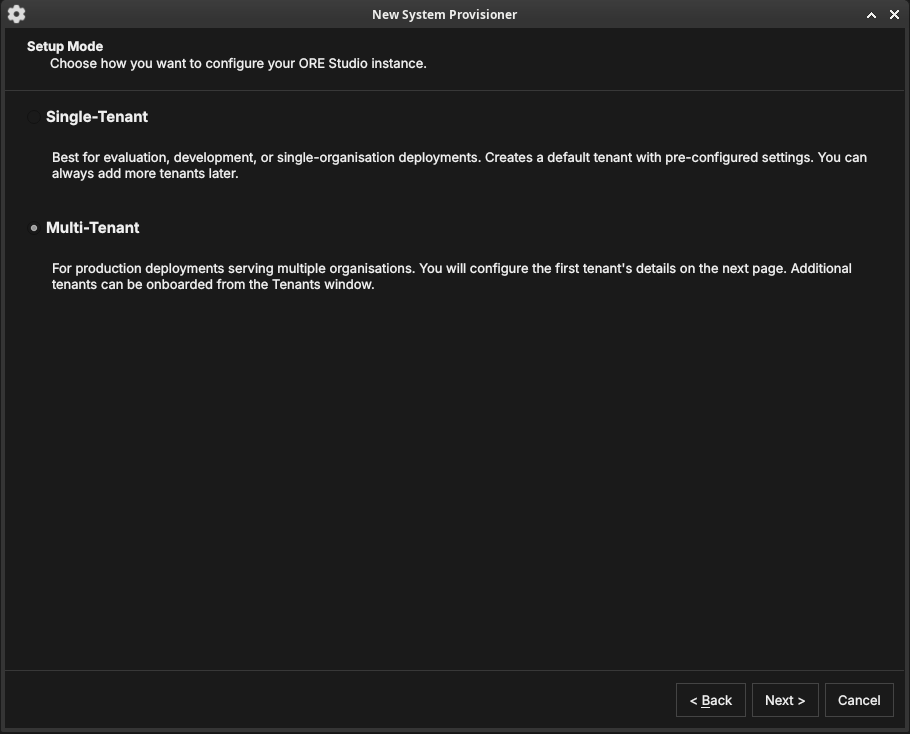
Figure 3: The Setup Mode page. Single-Tenant creates a default tenant with pre-configured settings; Multi-Tenant lets you configure the first tenant in detail and onboard more later.
Choose how the deployment is organised:
- Single-Tenant — best for evaluation, development, or a single organisation. Creates a default tenant with sensible defaults; you can add more tenants later.
- Multi-Tenant — for production deployments serving several organisations. You configure the first tenant's details on the next page and onboard additional tenants from the Tenants window.
Click Next.
4.4. Tenant details
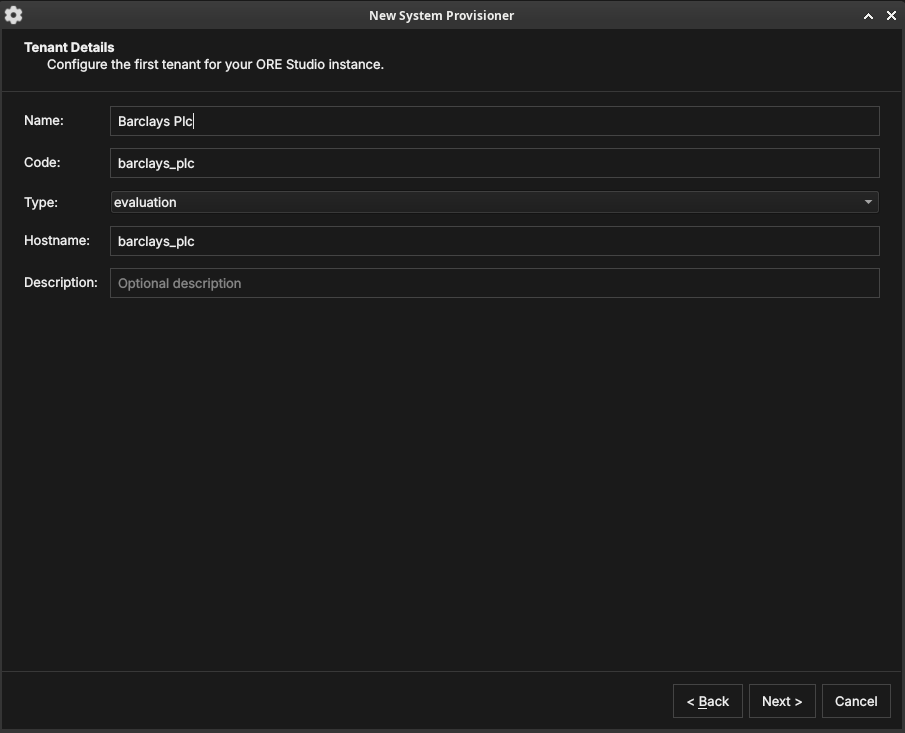
Figure 4: The first tenant's details: a display name, a short code, a tenant type, and a hostname.
Configure the first tenant:
- Name — the organisation's display name (e.g. "Barclays Plc").
- Code — a short machine code used internally (e.g.
barclays_plc). - Type — the tenant type (see Tenant types): System, Production, Evaluation, or Automation.
- Hostname — the host identifier for the tenant.
Click Next.
4.5. Tenant administrator account
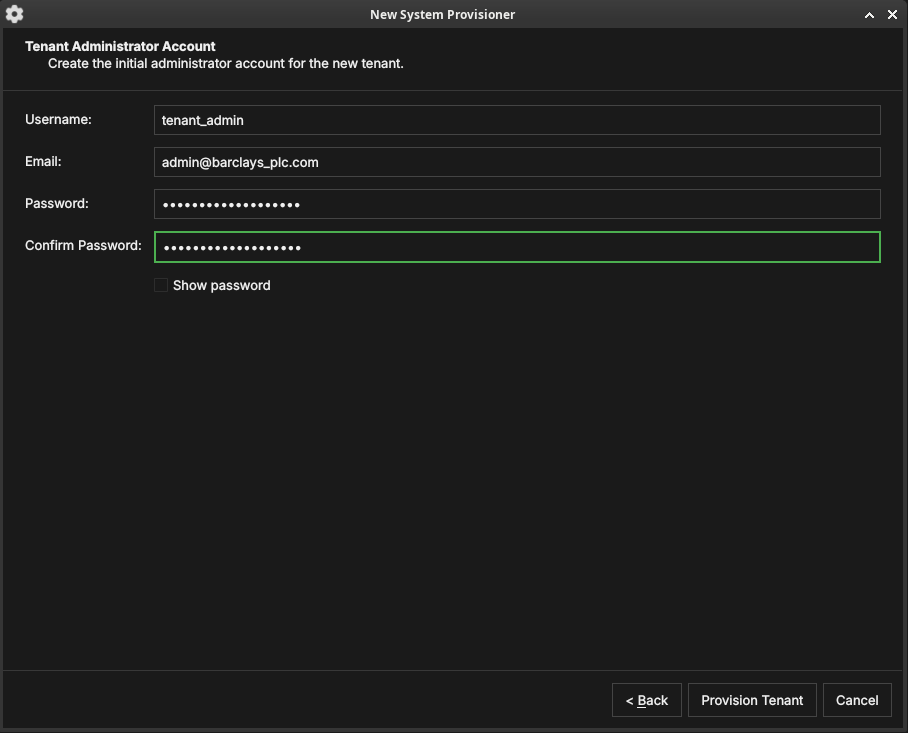
Figure 5: The tenant administrator account. This account administers the new tenant and is independent of the platform administrator.
Create the initial administrator for the new tenant — a username,
email, and password. This account is given the TenantAdmin role:
full control within the tenant, but no cross-tenant access. Click
Provision Tenant.
4.6. Provisioning
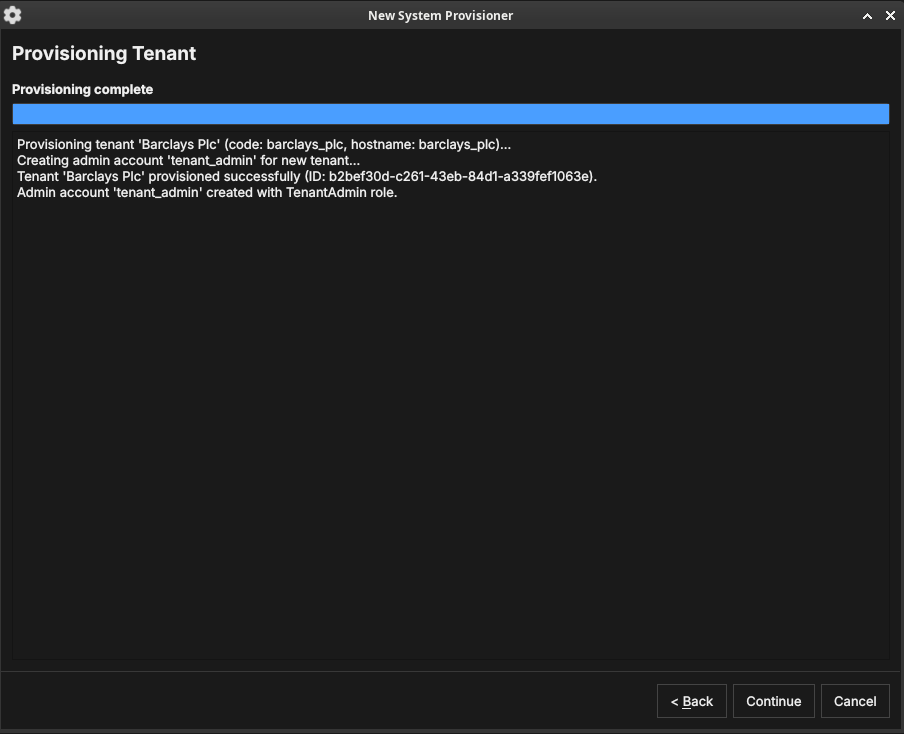
Figure 6: The provisioning step. ORE Studio creates the tenant and its administrator, logging progress as it goes.
ORE Studio provisions the tenant and creates its administrator account, logging each step. When it finishes, click Continue.
4.7. Setup complete
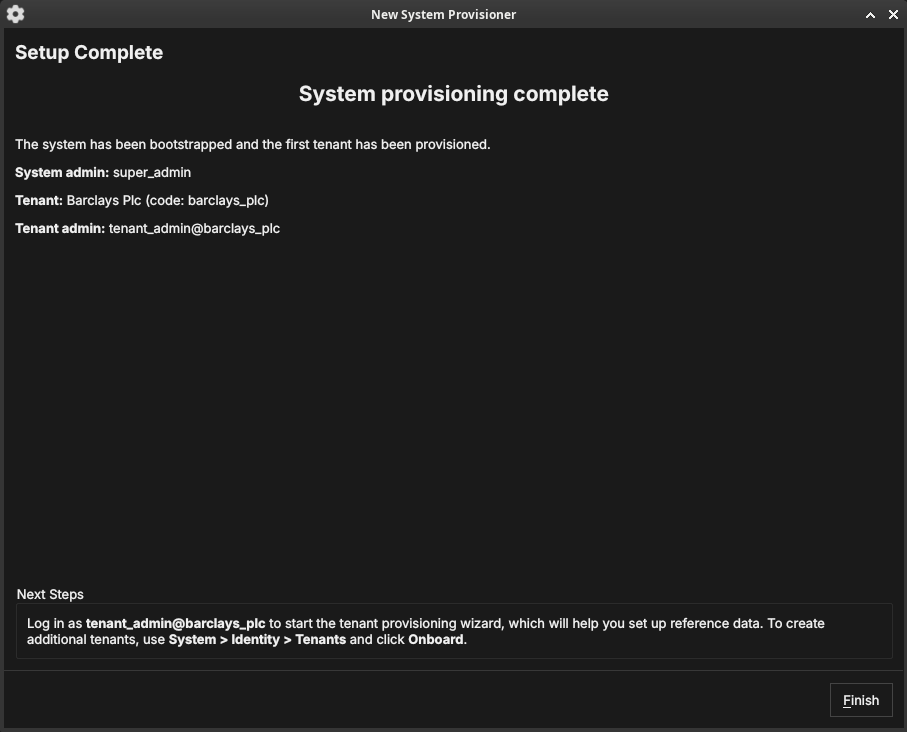
Figure 7: The System Provisioner summary: the platform admin, the first tenant, and the tenant admin that were created, with next-step guidance.
The final page summarises what was created and tells you the next step: log in as the tenant administrator to run the Tenant Provisioner. To create further tenants later, use System → Identity → Tenants and click Onboard. Click Finish — the backend leaves provisioning mode and the login dialog appears.
5. The Tenant Provisioner wizard
The first time you log in as a tenant administrator, ORE Studio launches the New Tenant Provisioner. It seeds the tenant with reference data and, optionally, an initial party hierarchy. You can skip it with Cancel and set everything up by hand later from the Data Librarian and Parties windows.
5.1. Welcome: Acme Corporation or Manual setup
Before anything else, the welcome page offers a choice between two entirely different paths:
- Acme Corporation (full sample bank) — the fastest way to a fully populated, realistic installation. Selecting it skips every other step in this wizard (catalogue selection, data source, party setup) and hands the whole build to the server: a four-legal-entity holding group with business units, portfolios, books, and fifty-eight staff accounts, imported and published in one step. This is the recommended path if your goal is exploring ORE Studio rather than modelling your own organisation — see the Acme Corporation chapter for what you get and why.
- Manual setup — build the tenant up yourself: choose a reference-data catalogue, choose how to seed your own party hierarchy (from the real GLEIF registry or generated synthetic data), and optionally run the Party Setup wizard per party. Choose this path when you want to model your own organisation rather than explore a pre-built one. The rest of this section walks that path step by step.
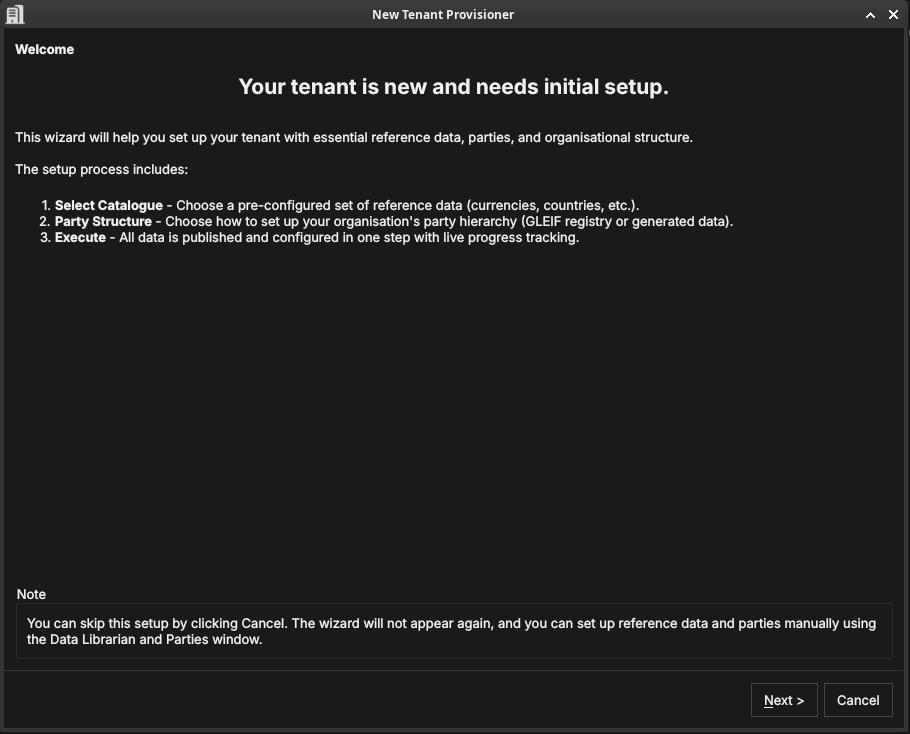
Figure 8: The Tenant Provisioner welcome page, listing its three steps: select a reference-data catalogue, choose a party structure, and execute. This capture predates the Acme Corporation vs Manual setup choice described above and needs retaking.
Selecting Manual setup and clicking Next moves on to catalogue selection, described next.
5.2. Select a catalogue
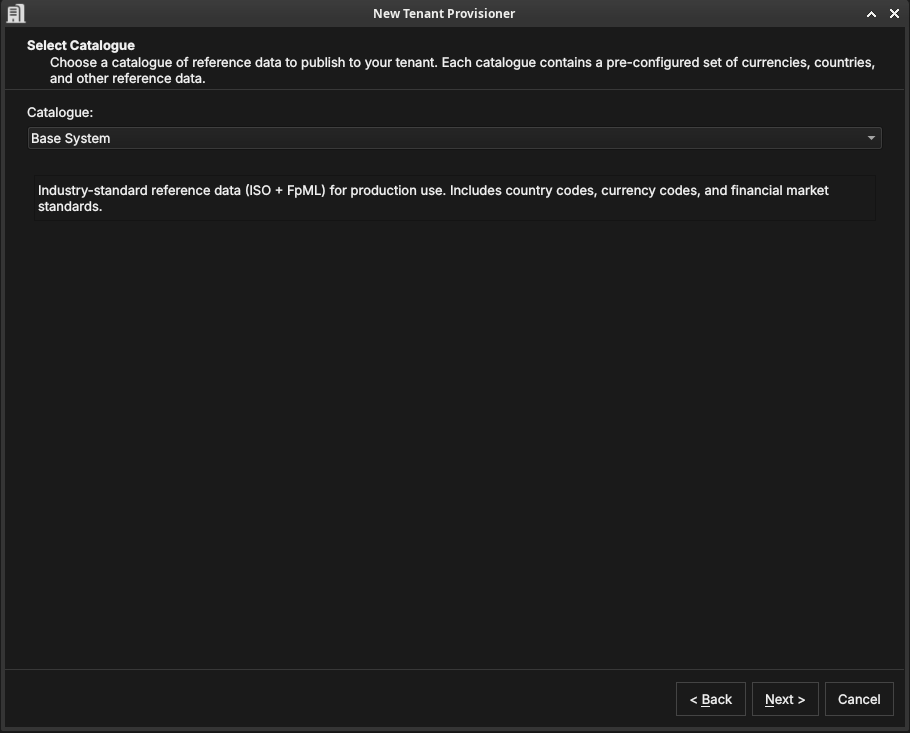
Figure 9: Selecting a reference-data catalogue — a pre-configured set of currencies, countries, and market standards.
A catalogue is a ready-made bundle of reference data. The Base System catalogue provides industry-standard ISO and FpML data — country codes, currency codes, and financial-market standards — suitable for production use. Choose a catalogue and click Next.
5.3. Choose a data source
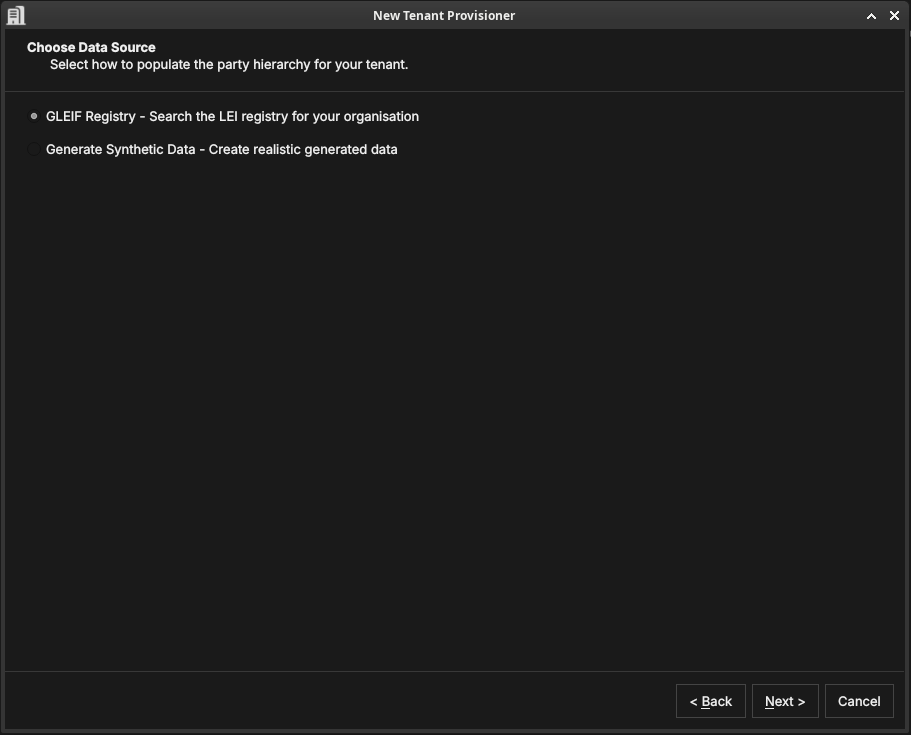
Figure 10: Choosing how the tenant's internal party hierarchy — your organisation's own legal entities and business units — will be seeded.
This step seeds the internal party hierarchy: the legal entities and business units that represent your own organisation — what practitioners call the house. As described in Parties, these are the operational parties that own trades, books, and analytics results.
The data source choice does not affect counterparties (the external entities your organisation trades with — those are imported separately in the Party Setup wizard). It only determines how the house structure is created.
In a group context — for example a bank holding company with separate London and New York subsidiaries — the house hierarchy reflects the corporate structure. The root party is the top-level legal entity; its children are the subsidiary entities; their children are trading desks, books, or booking centres. Each node in this tree represents a real organisational unit, and users log in to the node that corresponds to their own entity.
Two seeding methods are available:1
- GLEIF Registry — searches the global LEI registry for your real organisation. The entity you select becomes the root party, and its corporate descendants in the GLEIF hierarchy — subsidiaries, branches, and related entities — are created automatically as child parties. This is the recommended approach for production deployments: the GLEIF data provides real legal entity names, LEI codes, and verified corporate relationships.
- Generate Synthetic Data — creates a realistic but fictional party hierarchy using generated names. Use this for evaluation tenants, demonstrations, or testing where you want a plausible structure without importing real organisational data.
Click Next.
5.4. Party setup (optional)
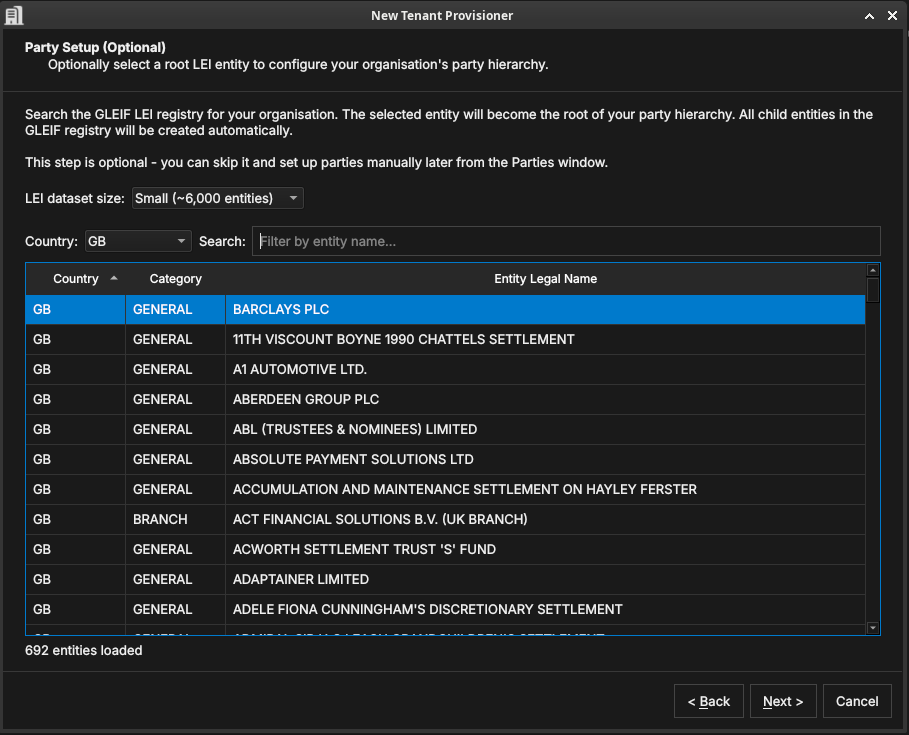
Figure 11: The optional Party Setup step. Search the GLEIF LEI registry for your root entity (here Barclays PLC); its corporate descendants are created as child parties automatically.
It helps to be clear about what this step does and does not do.
What it creates: the party nodes — the named entries in the hierarchy that represent your legal entities and business units. Each node gets a name, a LEI code, and a position in the tree. After this step OreStudio knows that "Barclays PLC" exists as a party, that it is the parent of "Barclays Bank UK PLC", and so on. The hierarchy structure is in place.
What it does not create: the operational content within each party — the books, portfolios, business units, counterparties, and report definitions that each party uses day-to-day. That content is added separately, after provisioning, by the Party Setup wizard (described in The Party Provisioner wizard below). Think of this step as building the org chart; the Party Setup wizard then stocks each office.
To use the GLEIF registry, pick an LEI dataset size (which controls how much of the registry is loaded for searching), filter by Country if needed, and search by entity name. The entity you select becomes the root house party — the top of your internal hierarchy. Its corporate children and grandchildren in the GLEIF registry (subsidiaries, branches, booking centres) are created automatically as child operational parties. You do not need to build the structure by hand; the GLEIF corporate hierarchy data does it for you.
This step is optional — skip it to create parties manually later from the Parties window. Click Next.
5.5. Publishing
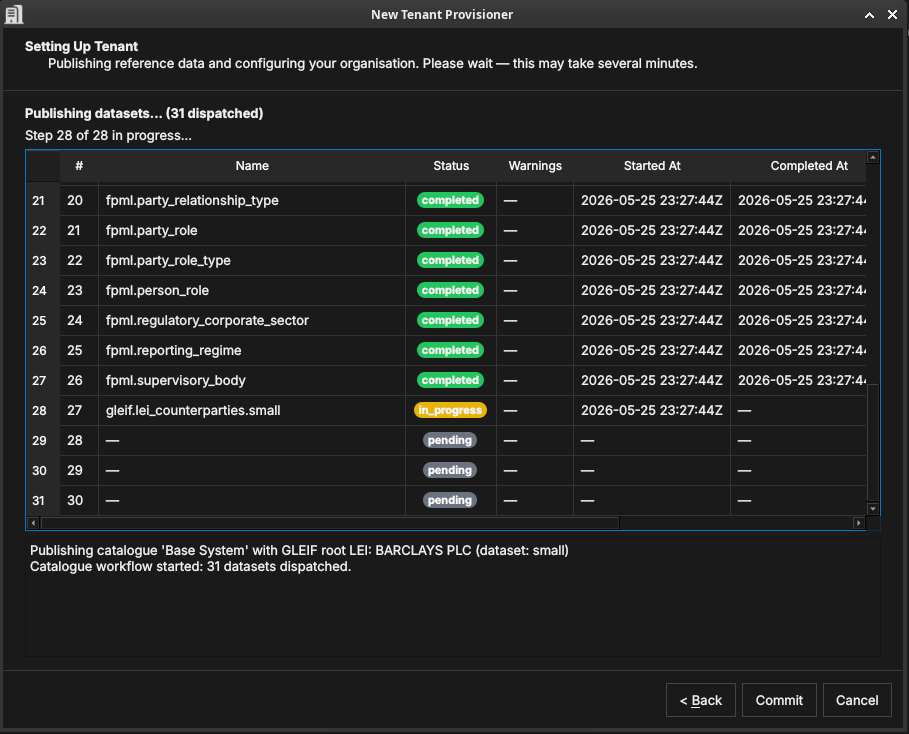
Figure 12: The publishing step, showing 31 datasets being dispatched in dependency order. Dataset 28 (gleif.lei_counterparties.small) is in progress; datasets 29–31 are pending.
OreStudio runs a multi-step publishing pipeline to populate the tenant with all the data selected in the previous steps. The pipeline dispatches datasets in the correct dependency order — classification tables before the entities that reference them, catalogue data before GLEIF data — and shows live progress in the table.
Each row in the table is one dataset. The columns are:
- # — the dataset's position in the dependency graph (zero-based). Datasets with lower numbers are prerequisites for those with higher numbers.
- Name — the dataset identifier, in
source.datasetform. The prefix identifies the data source:iso.*datasets contain ISO standard data (currencies, countries);fpml.*datasets contain FpML reference classifications (party types, roles, regulatory sectors);gleif.*datasets contain GLEIF LEI entity data (counterparties, house parties). - Status —
pending(not yet started),in_progress(actively loading), orcompleted(finished successfully). A red status indicates a failure. - Warnings — any non-fatal issues encountered during that dataset's load, displayed as a count. Click the row to see details.
- Started At / Completed At — UTC timestamps for the dataset's execution window.
The log panel at the bottom provides a running narrative: which catalogue is being published, how many datasets were dispatched, and the final outcome for each phase (reference data, organisation, activation).
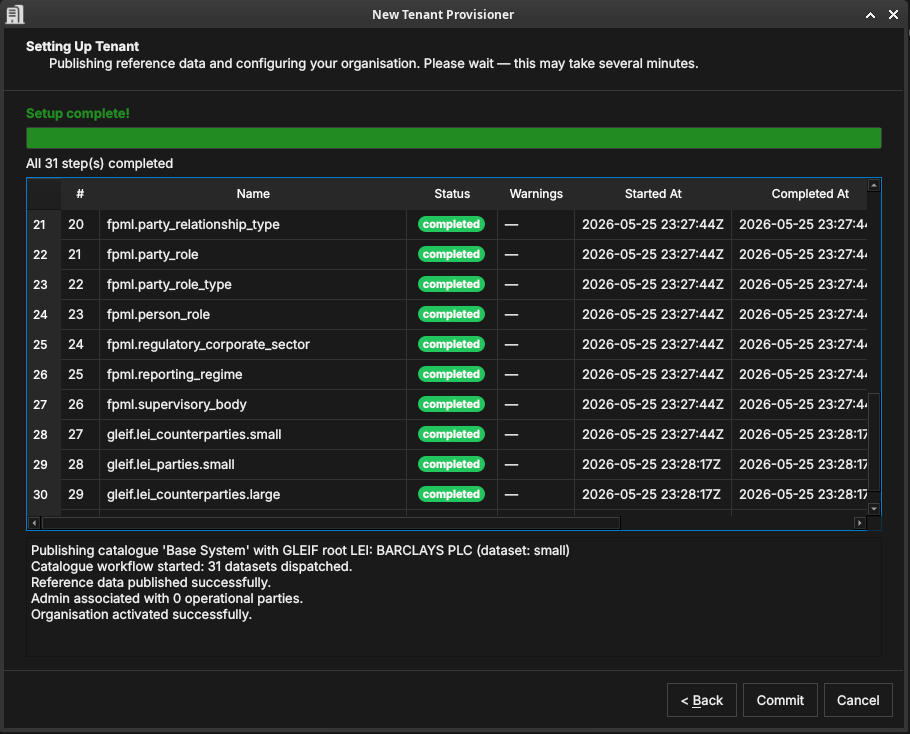
Figure 13: All 31 datasets completed. The log confirms: reference data published, organisation associated with parties, and the tenant activated.
When all rows show completed and the log ends with "Organisation
activated successfully", click Commit to finalise the setup, or
Back to change your selections.
5.6. Setup complete
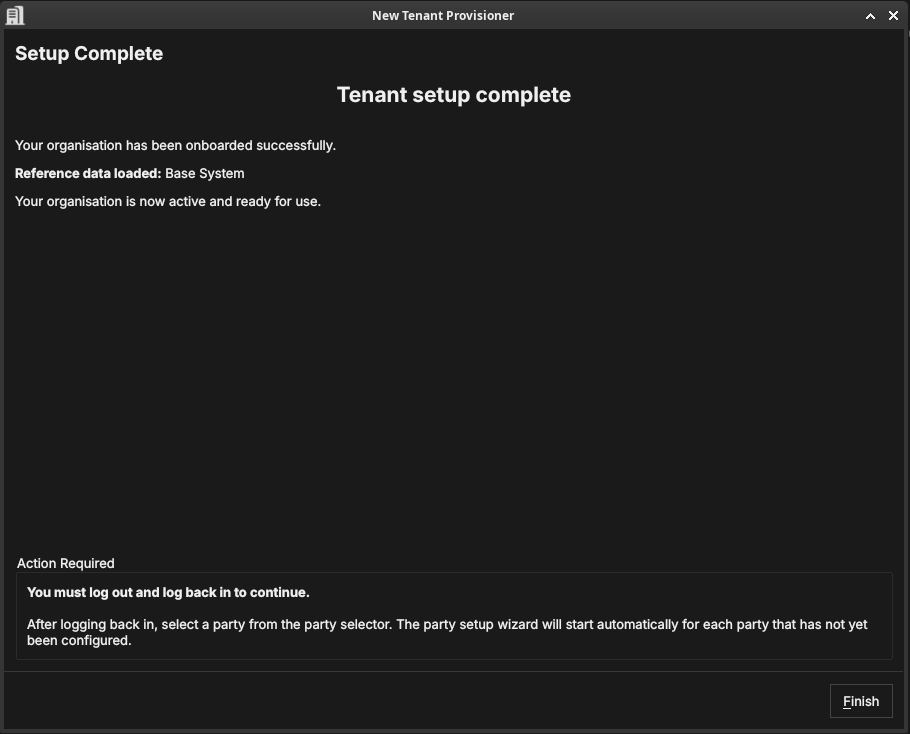
Figure 14: The Tenant Provisioner summary, confirming the reference data and parties that were set up.
The final page confirms what was created. Click Finish. The tenant now has its reference data and party hierarchy in place.
6. The Party Provisioner wizard
Where the Tenant Provisioner establishes the party hierarchy, the Party Setup wizard configures the operational structure within a party: it imports counterparties, then publishes every party-scoped data bundle the party needs — risk management (business units, portfolios, books, and a standard set of risk-report definitions), synthetic market data configuration, and curated FX driver rates. It runs for a party that needs initial setup, and can be skipped with Cancel (counterparties and bundles can be configured later from the application menus).
6.1. Welcome
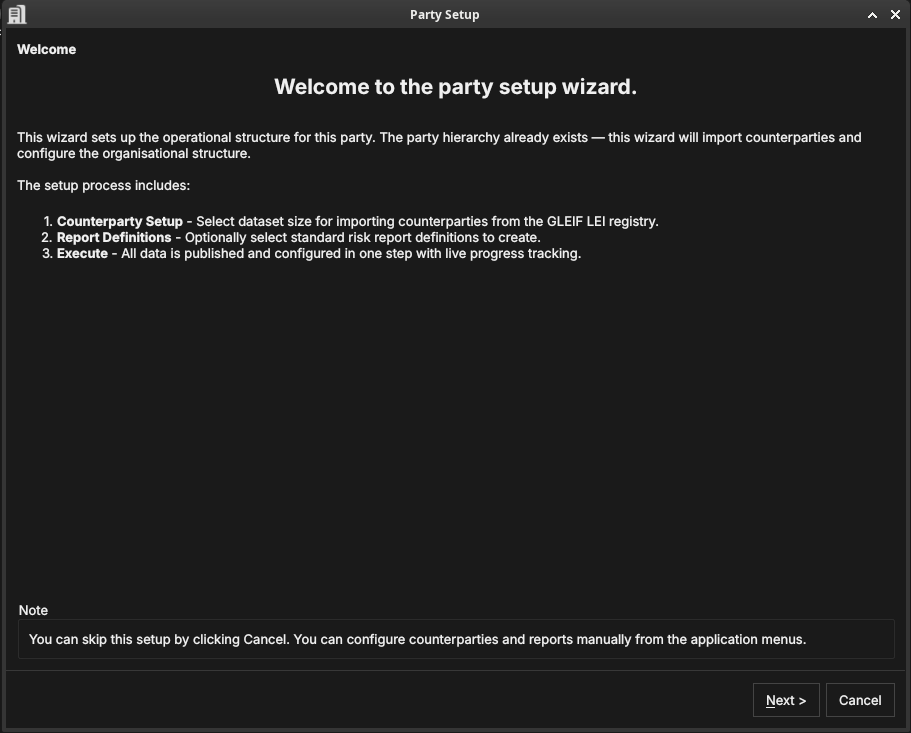
Figure 15: [SCREENSHOT OUTDATED — retake needed] The Party Setup welcome page, listing its steps: counterparty import and execute.
By this point the house hierarchy — the party nodes representing your organisation's legal entities — already exists. This wizard populates one specific party within that hierarchy: it attaches the external counterparties that this party trades with, then publishes its operational structure, risk reports, and market data configuration in one step. Click Next.
6.2. Counterparty import
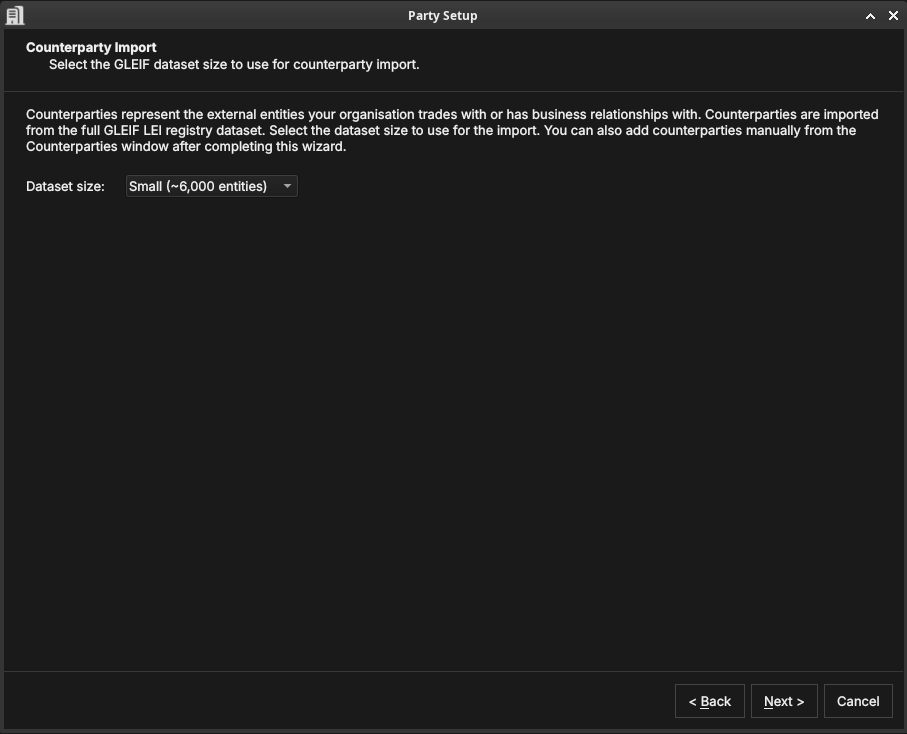
Figure 16: Choosing the GLEIF dataset size for importing counterparties. The dataset size controls how many real-world legal entities are loaded from GLEIF as counterparties.
Counterparties are the external legal entities your organisation trades with — banks, broker-dealers, corporates, funds. Where parties (the house) represent your own organisational structure, counterparties represent the other side of your trades. The distinction is important: house parties own books and positions; counterparties appear on trade tickets as the facing entity.
OreStudio imports counterparties from the GLEIF LEI registry. This is a deliberate design choice: GLEIF contains over two million real legal entities with verified names, LEI codes, countries of incorporation, and corporate relationships. Importing from GLEIF means your OreStudio instance starts with a realistic, authoritative counterparty population rather than a hand-crafted list. In an evaluation or demonstration tenant this is especially valuable — trades booked against real counterparty names (Deutsche Bank, JP Morgan, BlackRock) look and behave exactly as they would in production, making scenario testing meaningful.
The dataset size controls how many GLEIF entities are loaded: smaller sizes load a representative subset quickly; larger sizes import a more complete global population. You can add individual counterparties later from the Counterparties window regardless of which size you choose. Click Next.
6.3. Execute
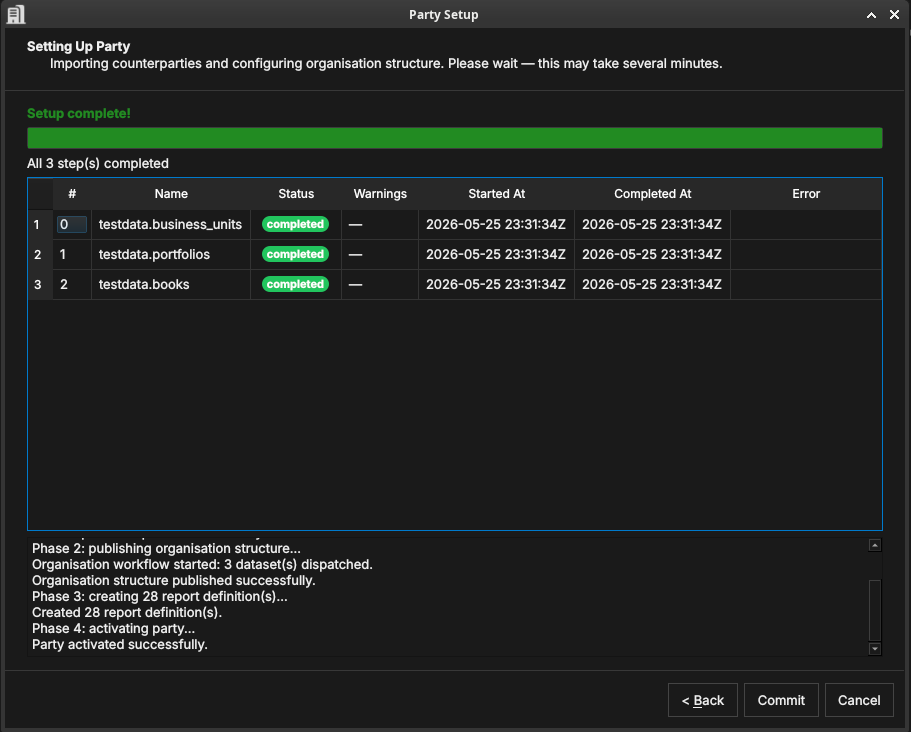
Figure 17: [SCREENSHOT OUTDATED — retake needed] The execute step showing the risk_management bundle's datasets completed: testdata.business_units, testdata.portfolios, testdata.books, and ore.report_definitions. The log below shows the five phases completed in sequence.
OreStudio runs the party setup in five phases, shown in the log panel:
- Phase 1: importing counterparties — loads the selected GLEIF
counterparty dataset into the party's counterparty table. The
progress table shows one row per dataset (e.g.
gleif.lei_counterparties.small), with the same Status / Started At / Completed At columns as the Tenant Provisioner publishing step. - Phase 2: publishing risk management — publishes the
risk_managementbundle in full: business units (testdata.business_units), portfolios (testdata.portfolios), books (testdata.books) — the lowest-level containers that own individual trades and positions — and the standard set of risk-report definitions (ore.report_definitions), since reports reference the book/portfolio tree. - Phase 3: publishing synthetic market data configuration —
publishes the
synthetic_realistic_2026bundle in full: the "2026 Realistic" theme's FX spot and IR curve generation configs, and any further asset class added to the bundle in future. Two other themes exist –synthetic_ore_samples_2016("2016 ORE Samples", matching the conventions ORE's own sample data comes from) andsynthetic_uniform_demo(a simple, non-vintage demo/exercise archetype) – publish those separately (e.g. viaores.shell) if you want them available too. Only one theme's feeds should ever run at once: the Market Simulator's Start action at the collection root prompts you to pick a theme rather than starting them all. - Phase 4: publishing FX driver rates — publishes the curated
marketdata.reference_vintage_2016_02_05bundle so the party has real market series/observations to browse. - Phase 5: activating party — marks the party as operational so users can log in to it and begin booking trades.
When the log ends with "Party activated successfully", click Commit.
6.4. Setup complete
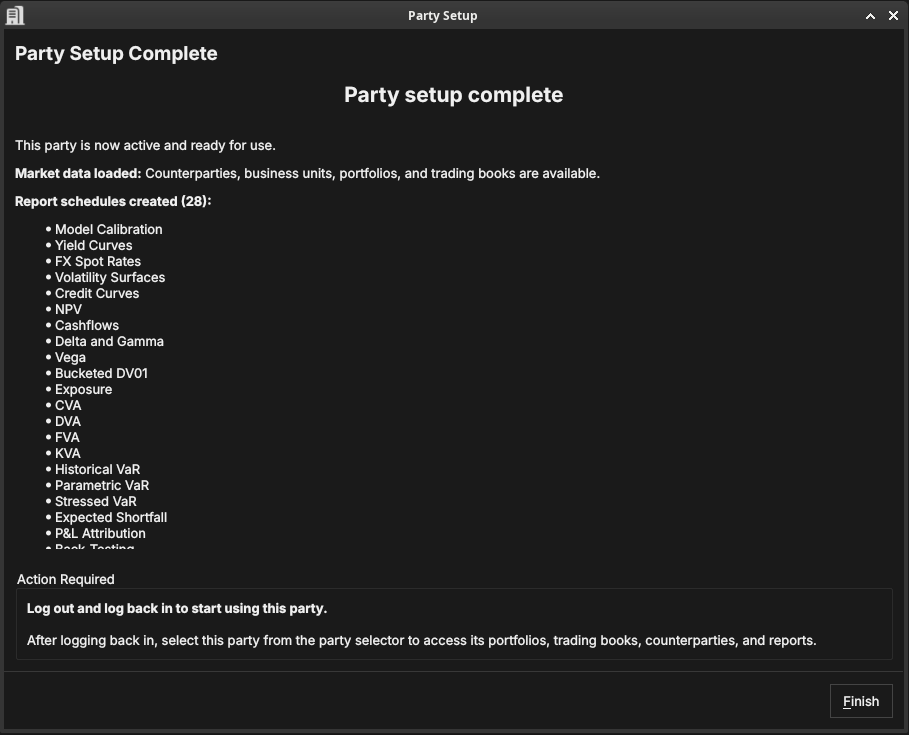
Figure 18: [SCREENSHOT OUTDATED — retake needed] The Party Setup summary, confirming the party is active and ready for use.
The final page confirms the party is now fully operational: it has counterparties, an organisational structure, scheduled risk reports, and market data configuration.
7. Choosing a party at login
Some accounts are associated with more than one party — for example a group administrator who can act for several entities. When you log in with such an account, ORE Studio asks which party context to use for the session.
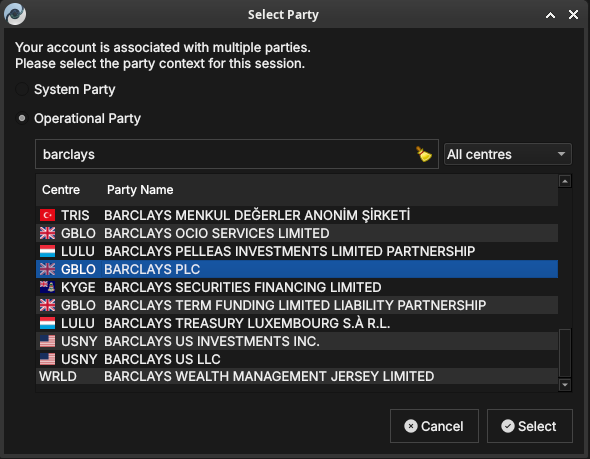
Figure 19: The Select Party dialog. Choose the System Party or an Operational Party; filter by booking centre or search by name.
Choose System Party for administrative work, or Operational Party to work within a specific business entity. Filter the list by booking centre, or type in the search box to narrow it.
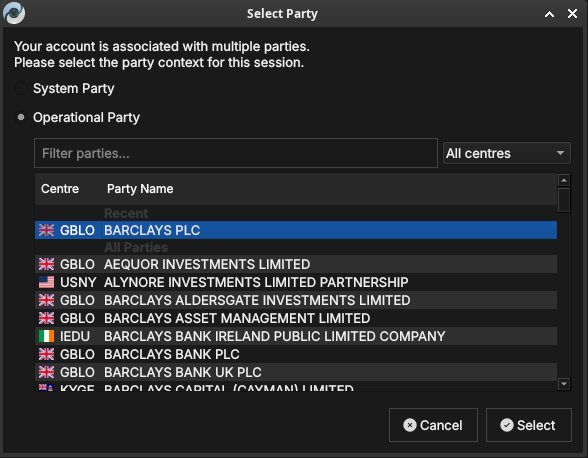
Figure 20: The Select Party dialog with a recently used party listed under Recent at the top for quick access.
Select a party and click Select. Your data visibility for the session is determined by the party you choose and its position in the hierarchy.
8. Conclusion
The chapter set out to show that provisioning a fresh installation is a fixed sequence that follows from the data model it serves, and it has traced exactly that path. The tenant and party model came first — the tenant as the unit of isolation, the party as the hierarchy within it, with the full treatment reserved for the Tenants chapter — because the provisioning steps exist to create precisely those structures. Building on that premise, the three wizards did the work in turn: the System Provisioner created the platform administrator and the first tenant, the Tenant Provisioner forked between the ready-made Acme Corporation reference entity and a Manual path seeding the tenant with reference data and its own house party hierarchy, and the Party Provisioner equipped each manually-created party with counterparties, an organisational structure, and report definitions. Each step required its own login identity, and each ran once. Provisioning ends where daily use begins — choosing a party at login — and the accounts the wizards created, like every account after them, are managed through the windows described in the next chapter.