ORE Studio User Manual Introduction Connecting to ORE Studio Initial Setup Provisioning from the Shell Accounts and Roles Tenants Reference Data Currencies
Table of Contents
- Introduction
- Connecting to ORE Studio
- Initial Setup
- Provisioning from the Shell
- Accounts and Roles
- Tenants
- Reference Data
- Currencies
Introduction
This chapter introduces ORE Studio: what the application is and the problem it solves, the open-source quantitative finance engines it builds upon, the audience it is written for, and the conventions used throughout this manual. By the end of the chapter the reader should understand where ORE Studio sits in the risk-technology landscape and how to navigate the remainder of the book.
What is ORE Studio?
ORE Studio is a desktop application for exploring, configuring, and running quantitative finance calculations. It provides a graphical environment built around the Open Source Risk Engine (ORE), a widely-used open-source library for pricing derivatives and measuring financial risk, which is itself built on QuantLib. ORE Studio handles the data — storing trades, market data, and model configurations, and presenting the results — while ORE and QuantLib provide the mathematics.
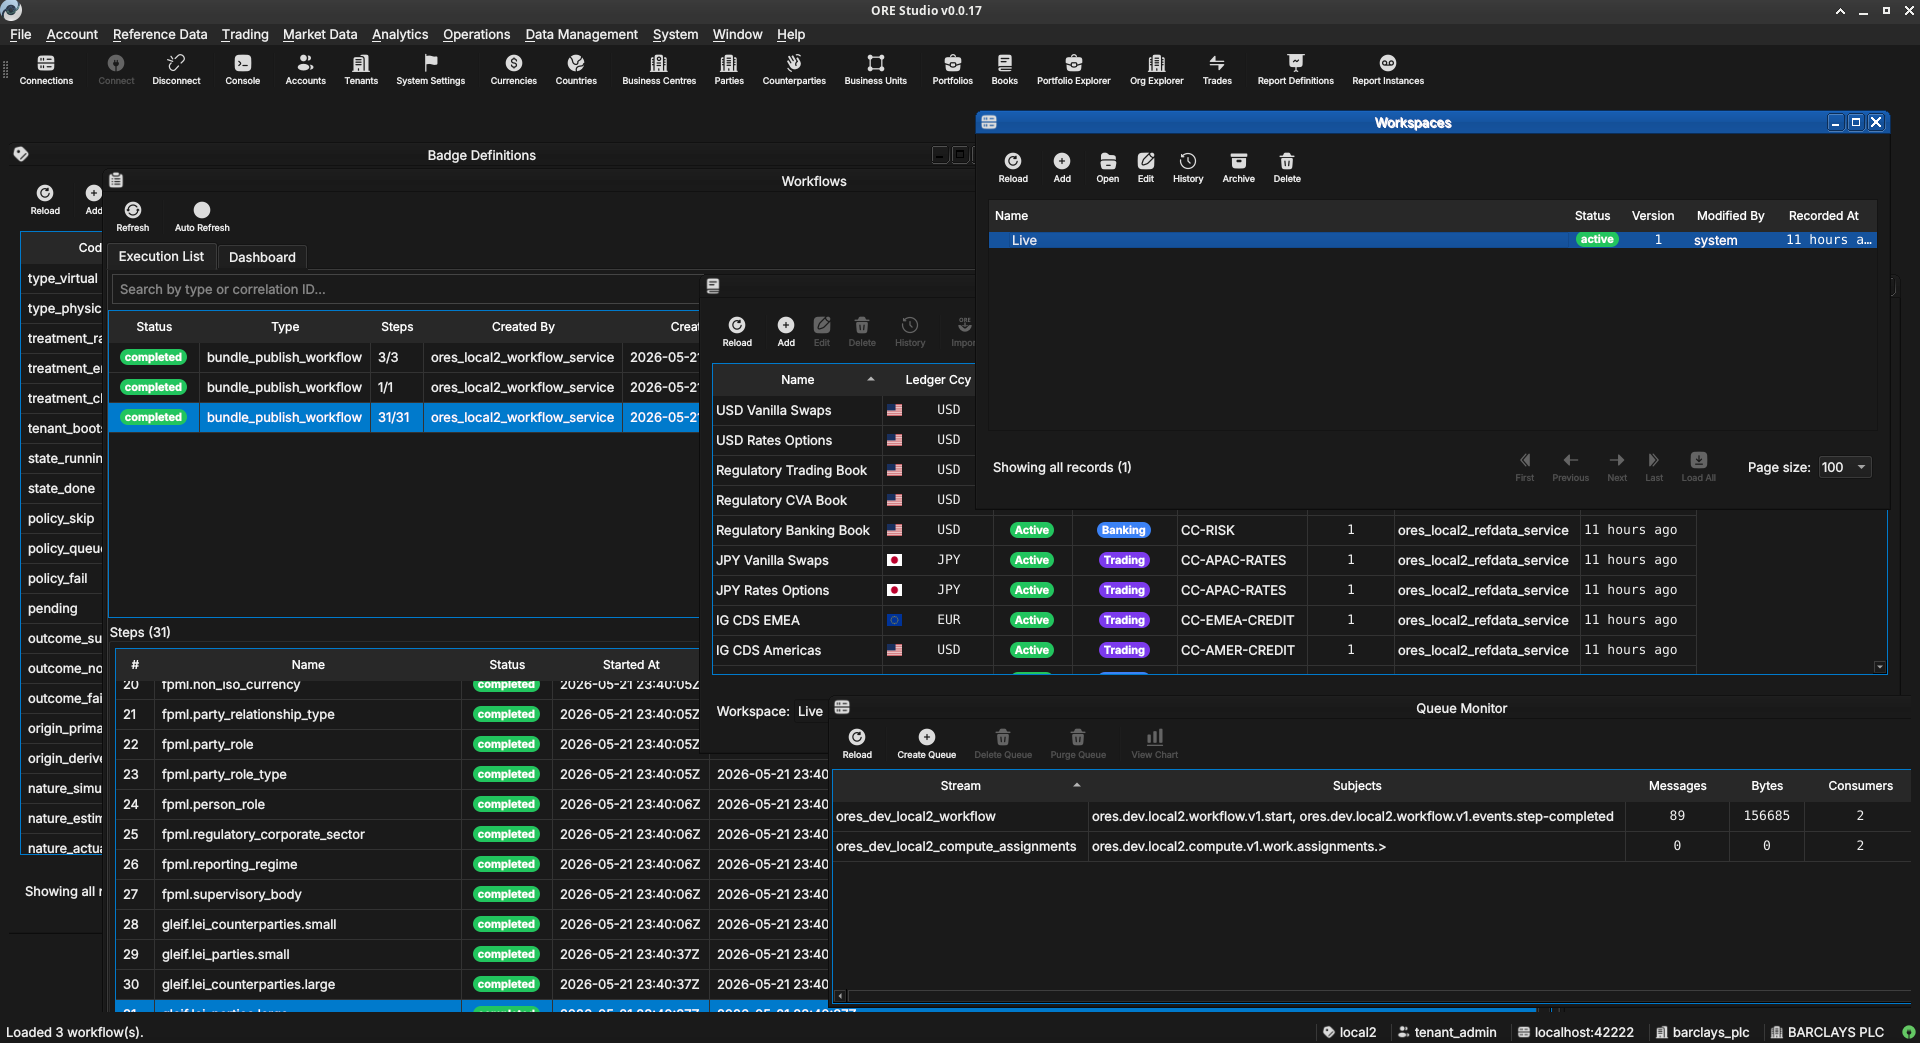
Figure 1: ORE Studio v0.0.17 — the main workspace showing the instrument and trade management views.
Audience
This manual is written for several kinds of reader:
- Analysts, traders, quants, and middle-office staff who want to explore financial instruments and risk calculations through a graphical interface. No programming experience is required.
- Students and researchers learning quantitative finance. ORE Studio makes it possible to experiment with derivative pricing, yield curve construction, and risk measures without writing code.
- LLM-based agents and coding assistants that interact with ORE Studio on a user's behalf, help configure workspaces, interpret results, or draft analytical reports. Multimodal models — those capable of processing both text and images — are preferred, as the manual makes extensive use of screenshots to describe the user interface.
The focus throughout is on what you can do through the application itself: entering trades, configuring market data, running analytics, and understanding the results.
Functional Areas
ORE Studio is organised around a set of functional areas accessible from the main menu:
- Reference data — currencies, business calendars, counterparties, and market conventions that form the foundation for everything else.
- Instruments and trades — define, store, and manage financial instruments and their terms.
- Market data — yield curves, volatility surfaces, fixing histories, and other inputs to pricing and risk models.
- Model configuration — choose and parameterise pricing engines, simulation models, and sensitivity specifications.
- Analytics — run calculations and view results: net present value, sensitivities (Greeks), credit and funding valuation adjustments (XVA), Monte Carlo simulations, and stress tests.
All data is stored persistently, so trades, curves, and configurations can be saved, revisited, and reused across sessions.
What ORE Studio Is Not
ORE Studio is a learning and exploration environment, not a production trading or risk system. It is independent of and unaffiliated with ORE, QuantLib, or any financial institution. All quantitative mathematics are provided by ORE and QuantLib; ORE Studio is the surface through which they are configured and their results explored. Users who need production-grade performance, real-time market data feeds, or regulatory reporting should look to enterprise risk platforms.
How This Manual Is Organised
The chapters follow the natural order of first use. After this introduction, Connecting to ORE Studio covers launching the application, establishing a connection to the backend, and orienting yourself in the main window; Initial Setup then covers provisioning the system, tenants, and parties. Later chapters cover each functional area in turn. You do not need to read the manual cover to cover; each chapter can be read independently once the system is up and running.
Early-Stage Software Notice
Early-stage software. ORE Studio is currently in active development (version 0.x). Features, workflows, and this documentation are all evolving and may change between releases. Numbers produced by the system are for learning and exploration only — they must not be used for real trading, risk management, or any financial decision-making.
A Note on This Document
This manual was generated entirely by large language models (LLMs) working under human supervision. While every effort has been made to ensure accuracy, LLM-generated content can contain errors, omissions, or descriptions that do not match the actual software behaviour. If you find a discrepancy between this manual and the application, trust the application. Please report inaccuracies via the project issue tracker so they can be corrected.
Connecting to ORE Studio
Connecting to a backend is the first task of every session, and the subject of this chapter — from launching the application to an authenticated session. It covers the main window in its disconnected state, the Connection Manager and the lifecycle of connection definitions, the connect-and-login sequence, connection status and automatic reconnection, and the status bar's vocabulary. It closes with the supporting material around a session: command-line options, locating the application version, running in the system tray, and logging out.
Getting started
When you launch ORE Studio a splash screen appears briefly while the application initialises, showing the ORE Studio logo and the build version in its lower-right corner.

Figure 2: The ORE Studio splash screen shown during start-up. The build version appears in the lower-right corner.
Once initialisation completes you are greeted by the main window in its disconnected state. The application is running but has not yet established a connection to the backend service that performs calculations. Before you can work with trades, market data, or analytics, you need to connect to a running ORE Studio backend.
This chapter covers:
- What the main window looks like before a connection is established.
- How to open the Connection Manager and configure one or more backends.
- How to log in once a connection is active.
- How to manage your saved connections — adding, editing, deleting, organising by environment and tag.
- How to read the status bar and understand what each zone shows.
- How to launch ORE Studio from the command line with options for telling windows apart, configuration directory, auto-connect, and diagnostics.
The main window before login
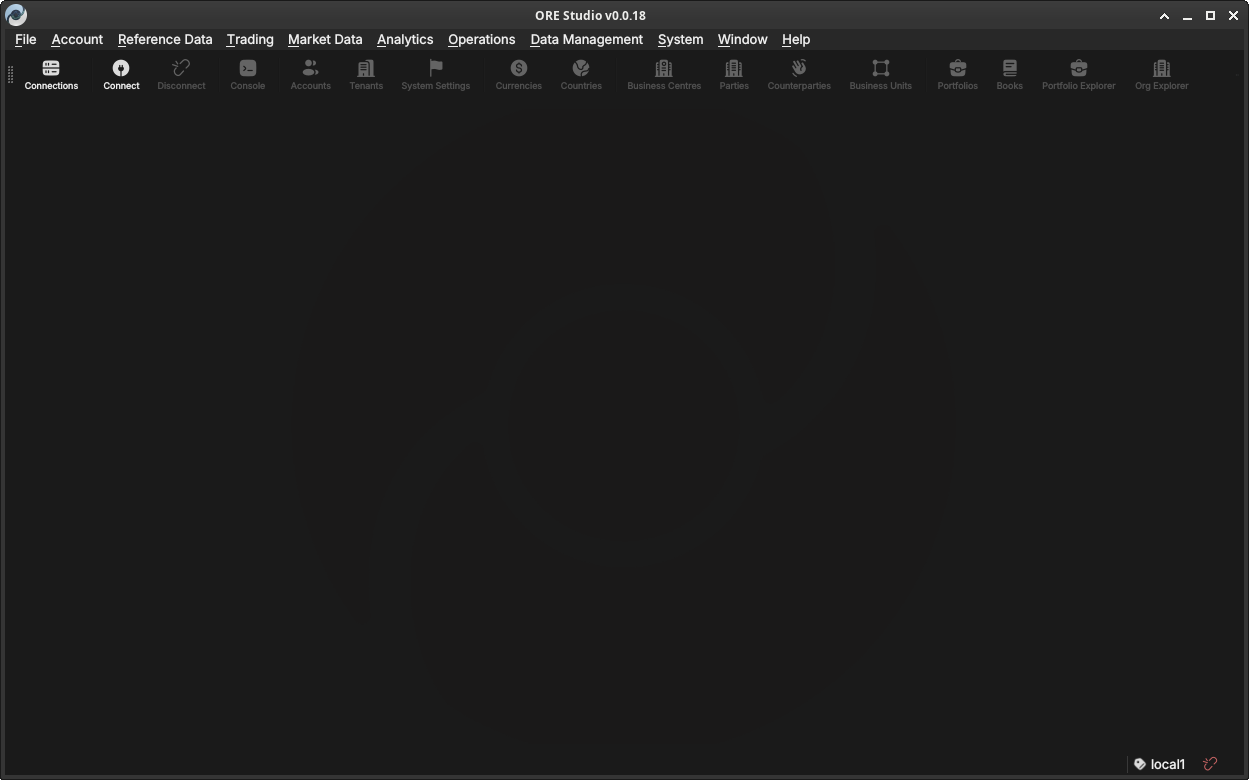
Figure 3: The ORE Studio main window immediately after launch, in the disconnected state. The toolbar shows the Connect and Connections buttons; the workspace area is empty until you log in.
In the disconnected state most of the application is inactive. The menu bar and toolbar are present but workspace panels, trade lists, and analytics views are all unavailable until a successful login. Two toolbar buttons are always accessible:
- Connect — opens the login dialog for the currently selected connection.
- Connections — opens the Connection Manager, where you configure the list of backends ORE Studio knows about.
The Connection Manager
The Connection Manager is the central place where you maintain the list of ORE Studio backends the application can connect to. You might have a local development backend, a shared team backend, and a staging backend — each appears as a separate entry here. The manager lets you add, edit, delete, and organise those entries before you attempt a login.
Open it at any time from the toolbar Connections button or from the File menu.

Figure 4: The Connection Browser open with no connections configured. The toolbar exposes Add, Edit, Copy, Delete, Connect, Refresh, Change and Purge; the unusable actions are greyed out until something is selected.
Adding a new connection
Click Add (or the "+" button) to open the New Connection form. Fill in the fields:
- Name — a free-text label you choose, used throughout the UI to identify this backend (e.g. "Local dev", "Team staging"). Must be unique among your saved connections.
- Host — the hostname or IP address of the machine running the ORE
Studio backend (e.g.
localhost,192.168.1.10,ores-staging.example.com). - Port — the TCP port the backend is listening on. The default is
35900; change it only if the backend was started on a different port. - Environment — an optional grouping label (see Environments below). Helps you distinguish development, staging, and production backends at a glance.
- Tags — zero or more free-text labels (see Tags below). Useful for filtering and searching when you have many connections.
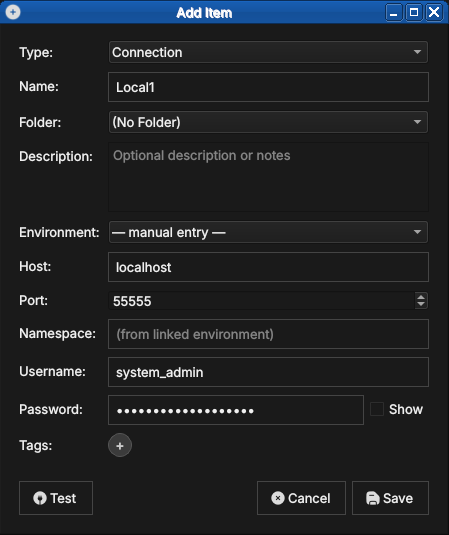
Figure 5: The New Connection form with example values filled in. Type is set to Connection; the Environment may be left as manual entry or linked to a defined environment.
Click Save (or OK) to add the connection to the list. The new entry appears immediately in the Connection Manager list. No network contact is made at this point — ORE Studio simply stores the configuration.
Editing a connection
Select an existing connection in the list and click Edit (or double-click the row) to open the same form pre-populated with the saved values. Change any field and click Save. The connection list updates immediately.
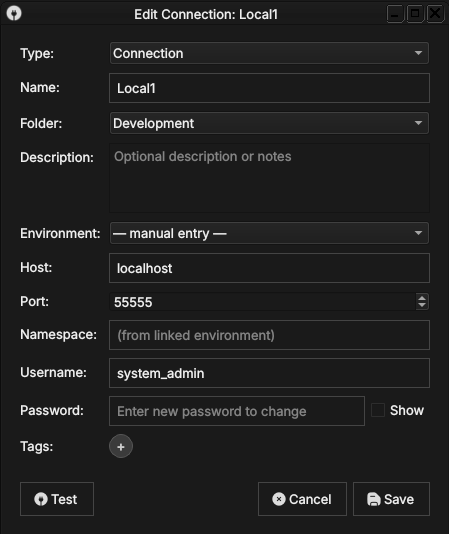
Figure 6: Editing a saved connection. The dialog title shows Edit Connection, the fields are pre-populated, and the password field reads Enter new password to change — the stored password is preserved unless you type a replacement.
Deleting a connection
Select one or more connections in the list and click Delete (or press the Delete key). A confirmation dialog asks you to confirm the removal.
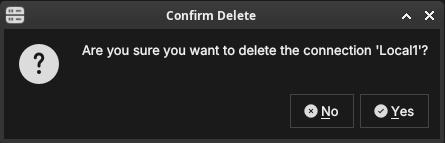
Figure 7: The delete confirmation dialog. ORE Studio names the connection being removed and waits for you to confirm with Yes or cancel with No.
Deleting a connection removes only the saved configuration; it has no effect on the running backend or any data stored there.
Organising connections into folders
When the list grows, folders keep it manageable. A folder is a named
container you can nest, grouping related connections — by team, by
client, or by environment tier. In the populated browser above, the
connections sit under a Development → Dev → Local1…Local4 folder tree.
To create one, click Add and set Type to Folder. Give it a name and
an optional description, and choose a parent folder (or No Folder to
place it at the top level). Connections are then assigned to a folder
through their Folder field, or by dragging them in the tree.
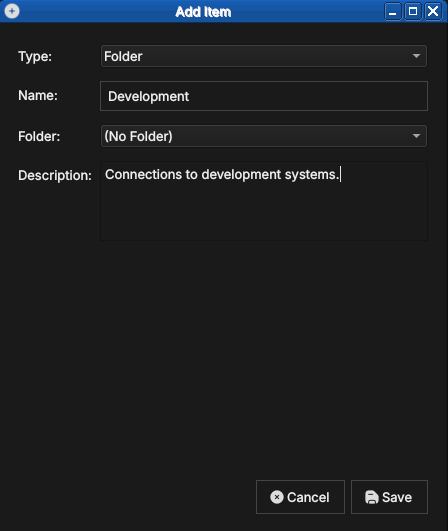
Figure 8: Creating a folder. With Type set to Folder, a folder needs only a name and an optional description; it can be nested inside another folder.
Protecting your credentials with a master password
The passwords you save with a connection are encrypted at rest using a master password that you choose. The first time you save a credential, ORE Studio offers to create one.
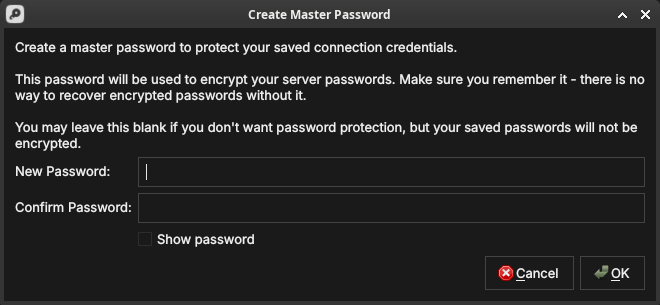
Figure 9: Creating the master password. It encrypts every saved server password; there is no recovery if you forget it, so you may also leave it blank to store passwords unencrypted.
Type the same value into New Password and Confirm Password; the fields turn green when they match. Show password reveals what you typed.
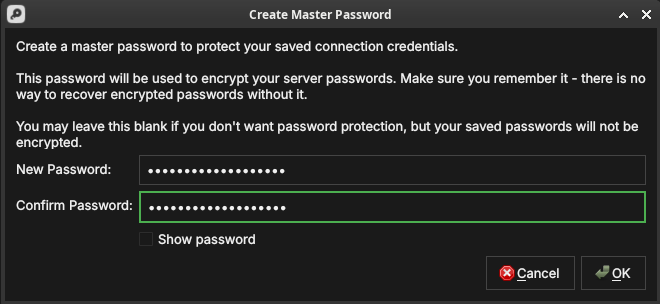
Figure 10: The master password confirmed — both fields match and are outlined in green, ready to accept with OK.
When you next launch ORE Studio and open the Connection Browser, it prompts you to unlock your saved connections by entering the master password. Until you do, the encrypted passwords stay sealed.
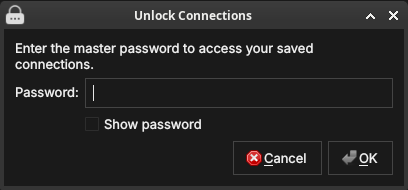
Figure 11: The unlock prompt shown on a later launch. Enter the master password to decrypt your saved connection credentials.
If you leave the master password blank, your connections still work but their passwords are stored unencrypted — acceptable on a personal machine, but not recommended on shared or portable systems.
Environments
An environment is a named grouping that you assign to a connection to
indicate which tier of your infrastructure it belongs to. Typical
values are Development, Staging, and Production, but the list is
fully customisable — you can define any environment names that make
sense for your setup.
Environments appear as a coloured badge or label next to the connection name in the list, making it immediately obvious which tier you are about to connect to. This is a safety feature: it is easy to accidentally connect to production when you meant staging; a clearly labelled environment badge prevents that.
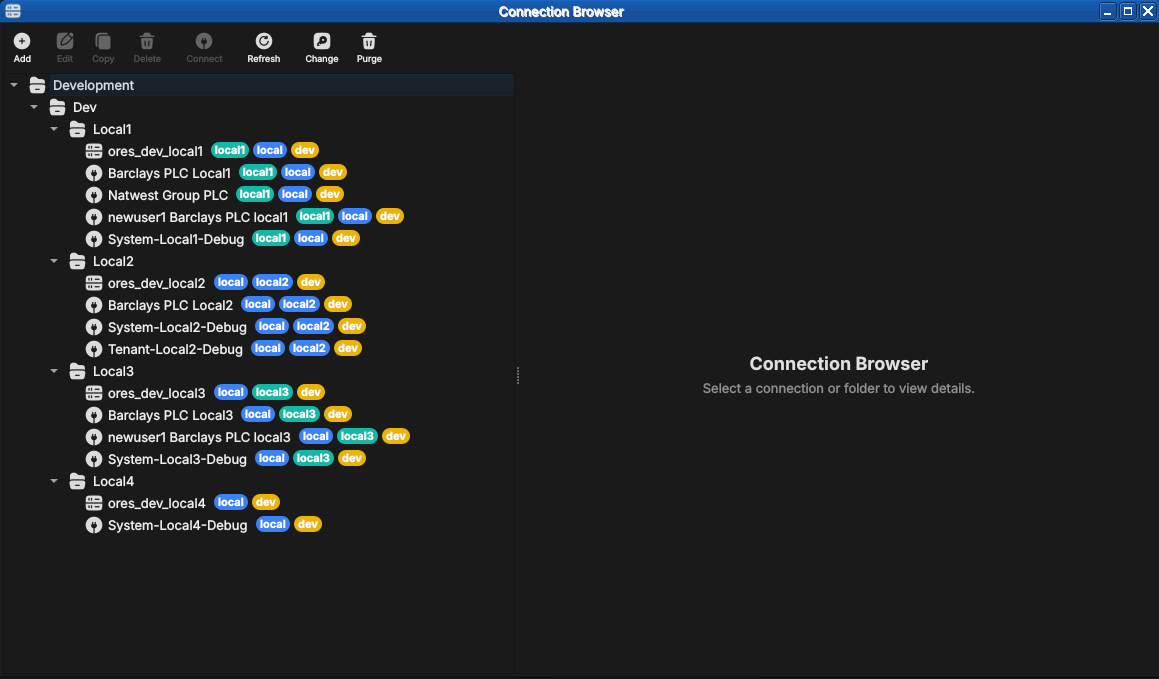
Figure 12: A populated Connection Browser. Connections are grouped under folders (here Development → Dev → Local1…Local4) and each carries coloured chips — the environment and tags — making the tier and purpose of every entry obvious at a glance.
To manage the available environment names, open the Environments section within the Connection Manager settings (or the dedicated menu item). From there you can:
- Add a new environment name and choose its display colour.
- Rename an existing environment (all connections using it update automatically).
- Delete an environment (connections that used it revert to Unassigned).
An environment is itself created from the Connection Browser: click Add
and set Type to Environment. An environment carries its own host,
port, HTTP port, namespace and tags — these become the connection details
that any connection linked to it inherits.
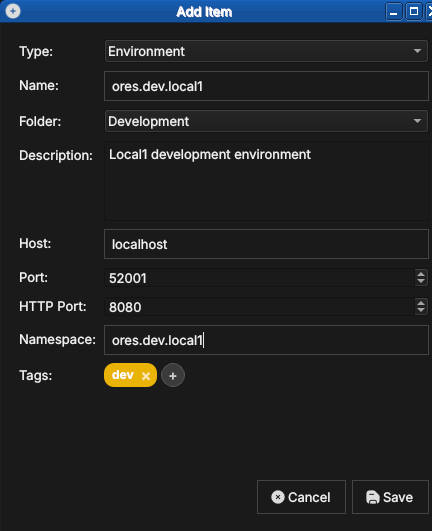
Figure 13: Creating an environment. With Type set to Environment, you give it a name, folder, host, ports, namespace, and tags (here a dev tag).
Once an environment exists, a connection can link to it by selecting it in the connection's Environment field instead of manual entry. The connection then inherits the environment's host, port, and namespace, so you maintain those details in one place.
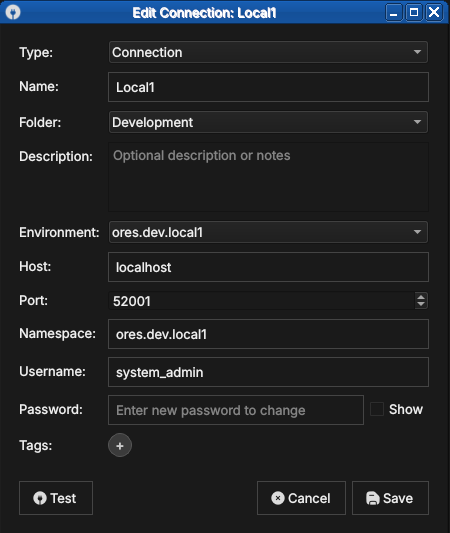
Figure 14: A connection linked to an environment. Selecting ores.dev.local1 in the Environment field populates the host, port and namespace from that environment.
Tags
Tags are free-text labels you attach to a connection to enable
flexible filtering and search. Unlike environments (which represent a
single tier), a connection can carry any number of tags. Examples:
personal, client-acme, read-only, high-memory.
Tags are displayed inline with the connection name in the list. The Connection Manager provides a tag filter bar at the top of the list: type or select a tag to show only the connections that carry it.
To add or remove tags, open the Edit form for the entry and use the Tags field. Type a new tag name and press Enter (or comma) to add it; click the × on an existing tag chip to remove it. Tags are created on first use — there is no separate tag management screen.
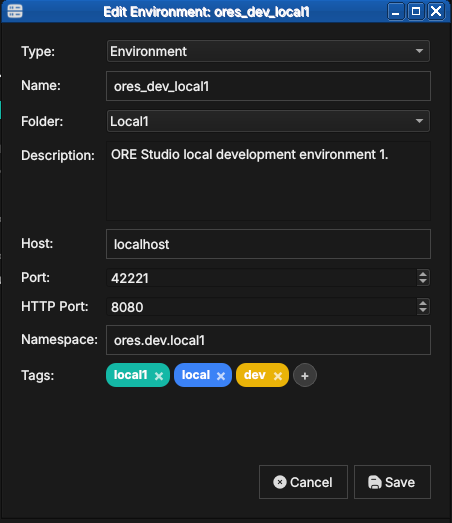
Figure 15: Tags shown as coloured chips in an entry's Edit form (here the ores_dev_local1 environment, tagged local1, local and dev). Add tags in the Tags field, remove one with the × on its chip, or click + to add another.
Where your connections are stored
ORE Studio keeps your connections — together with their environments,
folders, and tags — in a single local SQLite database file named
connections.db. Your UI settings (preferences and window layout) are
stored separately, in the operating system's standard settings store.
Neither leaves your machine.
- Linux:
- settings in
~/.config/OreStudio/; - database at
~/.local/share/ores.qt/connections.db.
- settings in
- macOS:
- settings in
~/Library/Preferences/; - database at
~/Library/Application Support/ores.qt/connections.db.
- settings in
- Windows:
- settings in registry:
HKCU\Software\OreStudio\OreStudio; - database at
%APPDATA%\ores.qt\connections.db.
- settings in registry:
If connections.db is missing when ORE Studio starts, it creates a new
empty one — so the Connection Manager simply opens with no entries.
Backing up and restoring your connections
Because everything you configure here lives in that one connections.db
file, backing it up is a file copy:
- Quit ORE Studio, so the database is fully written and not locked.
Copy
connections.dbfrom the location above to a safe place — on Linux, for example:cp ~/.local/share/ores.qt/connections.db ~/connections-backup.db
To restore, quit ORE Studio and copy the backup back over
connections.db. To move your connections to another machine, copy the
file to the same location there. The file is self-contained, so a single
copy preserves all your connections, environments, folders, and tags.
Connecting and logging in
Once you have at least one connection configured, you can log in.
Selecting the active connection
In the Connection Manager, select the connection you want to use and click Set as active (or double-click it). The selected connection becomes the target for the Connect button in the main toolbar. The status bar at the bottom of the main window shows the name of the active connection.
You do not have to choose in advance, though: clicking Connect opens the login dialog directly, and its Quick Connect selector lets you pick the connection there (see Filtering Quick Connect with labels below).
The login screen
With an active connection selected, click Connect. ORE Studio attempts to reach the backend. If the backend is reachable, the Login dialog appears.
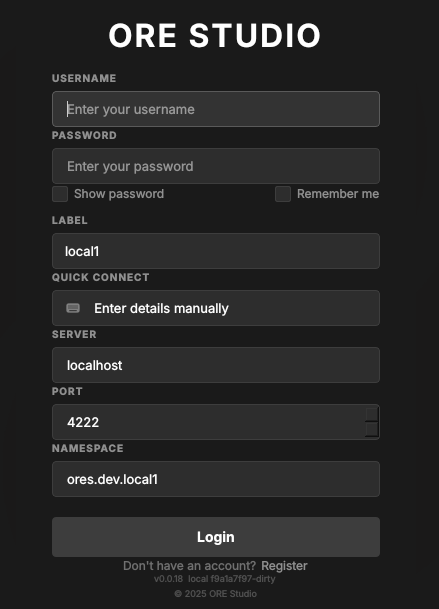
Figure 16: The login dialog. Below the credentials it shows the connection Label, a Quick Connect selector, and the Server, Port and Namespace the login will target; the footer carries the Register link and the build version.
Enter your username and password and click Login. Tick Remember me to have ORE Studio recall the username next time. ORE Studio authenticates against the backend's user database. On success the dialog closes and the main window transitions to the connected state: the workspace panels become active, the menu bar is fully enabled, and the status bar shows your username and the connected backend name.
The fields below the credentials describe which backend you are logging in to:
- Label — the saved connection's name (e.g.
local1). - Quick Connect — pick a saved connection to fill Server, Port and Namespace in one step, or leave it on Enter details manually to type them yourself.
- Server, Port, Namespace — the backend address the login targets.
The Label and Quick Connect fields work together. The Label names
the environment — it defaults from the connection (or from the
--instance-name you launched with); Quick Connect then offers the
connections for that label, and picking one fills in Server, Port and
Namespace so you do not have to type them.
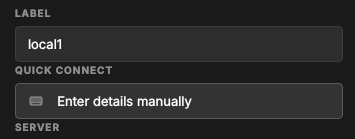
Figure 17: The Label and Quick Connect fields. The Label selects the environment; Quick Connect offers that environment's connections and fills in the server details.
If you do not yet have an account, the Register link in the footer opens account registration. If authentication fails, an error message is shown below the password field. Check that you are using the correct credentials for this backend; each backend maintains its own user database independently.
Filtering Quick Connect with labels
With only a handful of connections, Quick Connect is easy to scan. But a real deployment soon accumulates many — several environments, each with its own system, tenant and per-party logins. Left unfiltered (the Label set to All), the selector lists every one:
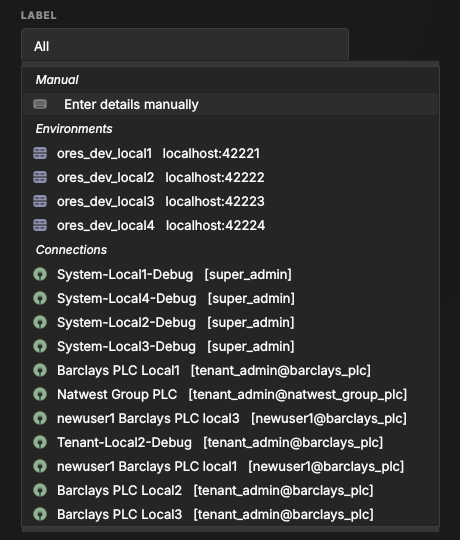
Figure 18: Quick Connect with the Label set to All — every saved connection across all environments and tenants. Hard to pick the right one at a glance.
Each connection carries a label — its environment tag, such as dev,
local1 or local2. The Label selector lists those labels; choosing
one filters Quick Connect to just the connections that carry it:
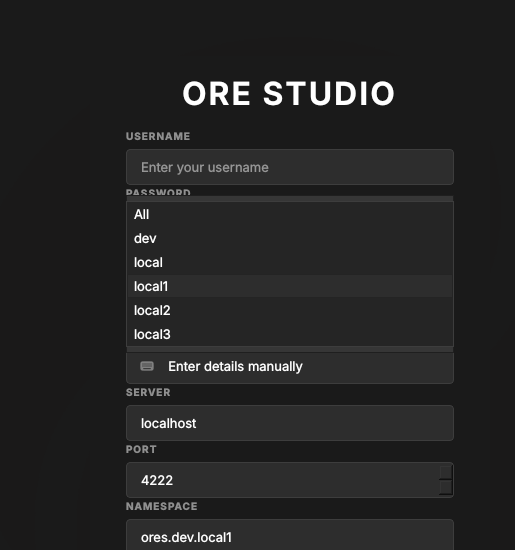
Figure 19: The Label selector lists the labels found on your connections. Pick one to narrow Quick Connect to that environment.
With local1 selected, Quick Connect shows only the local1 entries — the
environment's own database, its system and tenant logins, and its
per-party connections — so you reach the right backend without scrolling
past unrelated ones:

Figure 20: Quick Connect filtered to the local1 label: only that environment's connections remain.
You normally run one client per environment: a client built for local1
should connect to local1, not to staging or production. Rather than pick
the label by hand each time, set it when you launch the client — the
--instance-name command-line option (see Telling windows apart) opens
the client with the Label already set, so Quick Connect is pre-filtered
to that environment. The compass client command does this
for you, taking the label from ORES_CHECKOUT_LABEL in your .env.
When the connection fails
Not every login failure is a wrong password. ORE Studio talks to the backend over a messaging server (NATS), and if it cannot reach that server — or the services behind it — it tells you which is wrong rather than just reporting "login failed".
If the messaging server itself is unreachable, ORE Studio reports that it cannot connect, along with the host and port it tried:
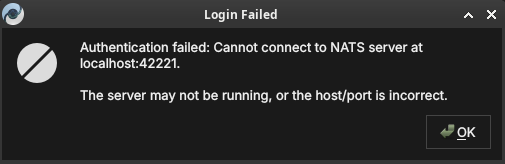
Figure 21: A login failure caused by an unreachable messaging server. The host and port ORE Studio tried are shown; the server is likely not running, or the host/port is wrong.
If the messaging server is running but the application services behind it have not started, ORE Studio says so explicitly — the fix is to start the backend services, not to change your connection:
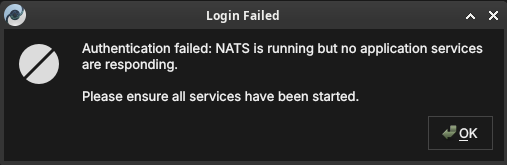
Figure 22: A login failure where the messaging server is up but no application services are responding. Ensure the backend services have been started.
In both cases your saved connection is fine; correct the backend (start the server or its services) and click Connect again.
First login and the default account
On a freshly initialised backend the only account that exists is the default administrator account. Your system administrator will have provided the initial credentials. After first login it is strongly recommended to change the password immediately via Settings → Account.
Once a tenant has been provisioned (covered in the next chapter,
Initial Setup), you log in with that tenant's administrator account —
the username takes the form user@tenant_code. Picking the connection
from Quick Connect fills in the server, port and namespace for you:
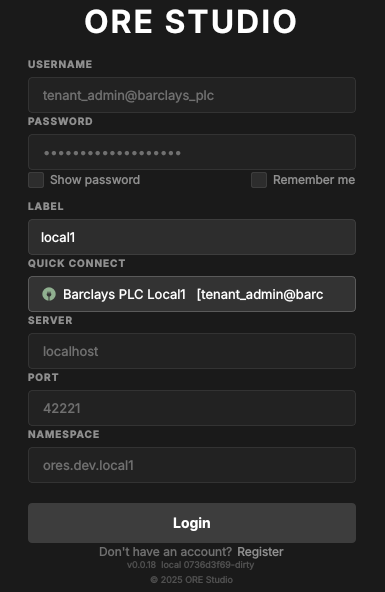
Figure 23: Logging in as a tenant administrator (tenant_admin@barclays_plc), with the connection chosen from Quick Connect.
Registering a new account
If your deployment allows it, the Register link in the login dialog footer opens the Create Account form. Fill in a username, email, and password (with confirmation), check the Server and Port point at your backend, and click Create Account. The Log in link returns to the login dialog.
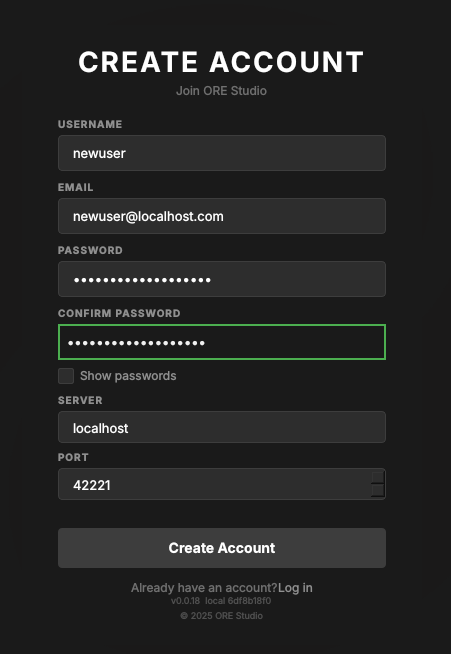
Figure 24: The Create Account form, opened from the Register link in the login dialog footer.
Self-registration is not always available: the backend must be set up to permit new users to register themselves. Where it is disabled, accounts are created for you by an administrator instead (see First login and the default account).
Account registration currently fails with Account creation failed: NATS
connect failed: SSL Error — the registration path's NATS/TLS connection
does not succeed. Until this is fixed, ask an administrator to create your
account. The fix is tracked in the story Fix account registration NATS
SSL error.
Connection status and reconnection
The status bar always shows whether you are connected. After a deliberate log-out — or once a stopped backend is running again — use the Connect button to re-establish the session: your saved connection is retained, so you only re-enter your password.
ORE Studio does not yet reliably detect a backend that drops while you are logged in. If the messaging server (NATS) or the services behind it are stopped mid-session, the client may keep looking connected until your next action fails or hangs. Detecting the drop and showing a clear connection-lost state is planned work, tracked in the story Detect and report NATS disconnection.
The status bar
The status bar runs along the bottom of the main window and provides a continuous read on the application's connection state. It is always visible regardless of what is open in the workspace.

Figure 25: The status bar in the fully connected, logged-in state: from left to right, the environment marker (local1), the username (super_admin), the server (localhost:42221), the active party (Root / System Party), and the green connected indicator.
The status bar is divided into zones from left to right:
- Connection name — the name of the active connection as entered in the Connection Manager (e.g. "Local dev"). Clicking this zone opens the Connection Manager directly.
- Environment badge — the coloured environment label (e.g.
Productionin red) if one is assigned to the active connection. Absent when no environment is set. This is the most prominent safety indicator: always glance at the environment badge before performing any write operation. - Username — the account name of the currently logged-in user. Absent in the disconnected state.
- Server — the backend address (host and port) the session is
connected to, e.g.
localhost:42221. - Active party — the party context for the session (e.g.
Root/System Party), set at login when your account spans multiple parties. - Connection indicator — a coloured icon at the right showing the live link state (green when connected).
The status bar changes appearance to reflect the connection state:
- Disconnected (no active connection) — grey; shows "Not connected".
- Connecting (handshake in progress) — animated indicator; shows "Connecting to /name/…".
- Connected and logged in — normal; shows all zones as described above.
A distinct connection lost state for a backend that drops mid-session is planned but not yet implemented — see Connection status and reconnection above.
In the disconnected state the strip is reduced to the environment marker and the connection label, with the broken-link icon on the right:

Figure 26: The status bar in the disconnected state, showing the environment marker, the connection label (local1), and the broken-link indicator.
The connected state is shown at the start of this section. Compare it with the disconnected strip above to recognise at a glance which state the application is in.
Starting ORE Studio from the command line
ORE Studio can be launched directly from a terminal, which is useful for
scripting, for telling several windows apart, or for pointing the
application at a non-default configuration directory. Run ores --help
to see the full list of accepted options for your installed version; the
most commonly used ones are documented below.
ores --help
Telling windows apart (instance colour and name)
When you run more than one ORE Studio window at once — for example against different backends, or from separate checkouts — you can give each window a distinct identity so you can tell them apart at a glance. This is not a light/dark theme; it is purely a per-window marker.
--instance-color HEXdraws a small coloured circle in the status bar in that colour (a 6-digit RGB hex, e.g.F44336for red). Give each window a different colour.--instance-name NAME(short form-n) labels the window with a name, also shown in the status bar, so you can see which window is which.
ores --instance-name "Local dev" --instance-color 2196F3
The colour and the name are independent: the colour is only a visual
marker, and the name is what identifies the instance. If you launch via
compass client, its --colour red|green|blue|<hex>
sets the marker colour and --name sets the instance name; when you omit
--name, the name comes from ORES_CHECKOUT_LABEL in your .env — never
from the colour.
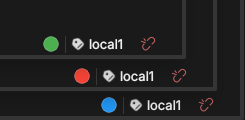
Figure 27: The status bars of three windows running the same local1 instance, each given a different --instance-color (green, red, blue) so you can tell them apart at a glance.
Configuration directory
By default ORE Studio stores its UI settings — preferences and window
layout — in the operating system's standard settings store. The exact
per-OS locations are listed under Where your connections are stored;
your saved connections live separately in connections.db. To use a
different directory:
ores --config-dir /path/to/config
This is useful when running multiple isolated instances, or when keeping configuration under version control for team-shared settings.
Selecting a connection at startup
To bypass the Connection Manager and connect immediately to a named connection:
ores --connection "Local dev"
ORE Studio will start, set the named connection as active, and open the login dialog automatically. The connection name must match exactly (case-sensitive) a saved entry in the Connection Manager.
Logging and diagnostics
For troubleshooting, verbosity can be increased:
ores --log-level debug    # verbose output to stdout
ores --log-file /tmp/ores.log  # write log to a file instead
Log output includes connection lifecycle events, authentication
attempts, and backend protocol messages. The debug level is intended
for issue reporting and development; it produces high-volume output and
should not be left enabled during normal use.
Finding the application version
Knowing exactly which build you are running matters when reporting an issue or checking client/backend compatibility. ORE Studio shows its version in several places.
The title bar of the main window always shows the version next to the application name:

Figure 28: The version in the main window title bar, alongside the full menu bar and toolbar of the connected application.
It also appears in the lower-right corner of the splash screen at start-up:
Figure 29: The build version in the lower-right corner of the splash screen.
…and in the footer of the login dialog, below the Register link:
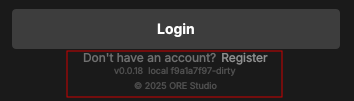
Figure 30: The version string in the login dialog footer, beneath the Register link.
From the command line, ores --version prints the client version string
(e.g. ORE Studio 0.0.19) and exits — handy in scripts or when filing a
bug report.
ores --version
Running in the background and the system tray
While ORE Studio is running it places an icon in your desktop's system tray (notification area). The icon keeps the application reachable when its window is minimised or hidden, and shows the instance name so you can tell multiple windows apart.

Figure 31: The ORE Studio icon in the system tray, labelled with the instance name so you can identify the window it belongs to.
Logging out
To end your session, choose File → Log Out or click the Disconnect toolbar button. ORE Studio closes the connection to the backend and returns to the disconnected main window. Your saved connection configurations are preserved; you can log back in at any time.
Logging out does not stop the backend service — it only terminates your client session. Other users connected to the same backend are unaffected.
To close the application entirely, quit the window (or choose File → Exit). ORE Studio asks you to confirm so you do not lose an active session by accident:
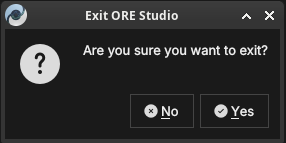
Figure 32: The exit confirmation. Click Yes to close ORE Studio, or No to keep working.
Summary
This chapter walked the full path from a freshly launched application to an authenticated session: the disconnected main window, defining and managing connections in the Connection Manager, connecting and logging in, and reading the status bar's account of the session. It also covered the operational periphery — command-line options, the application version, the system tray, and logging out. The reader can now reach a live backend; the next chapter covers what must happen before a brand-new backend is usable at all: provisioning.
Initial Setup
Before first use, a fresh ORE Studio installation must be provisioned — a one-time sequence this chapter describes in full. After a brief sketch of the model the steps rest on — tenants as units of isolation, parties as the organisational hierarchy within them — it walks through the fixed provisioning sequence: the System Provisioner, which creates the platform administrator and the first tenant; the Tenant Provisioner, which seeds a tenant with reference data and its house party hierarchy; and the Party Provisioner, which equips each party with counterparties and report definitions. The chapter closes with party selection at login, the point where provisioning ends and daily use begins.
The model in brief
ORE Studio organises data around two concepts that the provisioning wizards exist to create. A tenant is a fully isolated organisational space — its users, reference data, and results are invisible to every other tenant; typically one per organisation. Within a tenant, parties form the organisational hierarchy: the house — your own legal entities, desks, and booking centres — alongside the external counterparties it trades with. Users log in to a specific party, and their position in the hierarchy determines what they can see. The full model — tenant types, the system tenant and system party, hierarchy visibility, and the house versus counterparty distinction — is covered in the Tenants chapter.
The provisioning sequence
A freshly installed ORE Studio backend goes through a fixed sequence before it is ready for normal use. Each step requires a specific login identity:
- System provisioning — no login is needed; the backend is in provisioning mode and the System Provisioner wizard launches automatically the first time any client connects. This step creates the platform administrator account and provisions the first tenant and its tenant administrator. Until it completes, no normal user logins are accepted.
- Tenant provisioning — log out of the system administrator session (or simply connect as a new user) and log in as the tenant administrator created in step 1. OreStudio detects that this account has never logged in before and launches the Tenant Provisioner automatically. This step seeds the tenant with reference data and creates the house party hierarchy.
- Party provisioning — log in to a specific house party using the tenant administrator account, or any operational account that holds party setup permissions for that party. OreStudio detects that the party has not yet been provisioned and launches the Party Setup wizard. Repeat this step for each party in the hierarchy that needs its own counterparties, books, and reports.
Each step has a corresponding wizard in the ORE Studio UI. The following sections walk through each one.
The System Provisioner wizard
The first time you connect to a backend that has never been initialised, ORE Studio detects provisioning mode and launches the New System Provisioner automatically. This one-time wizard creates the platform administrator account, chooses a single- or multi-tenant layout, and provisions the first tenant together with its own administrator.
Welcome
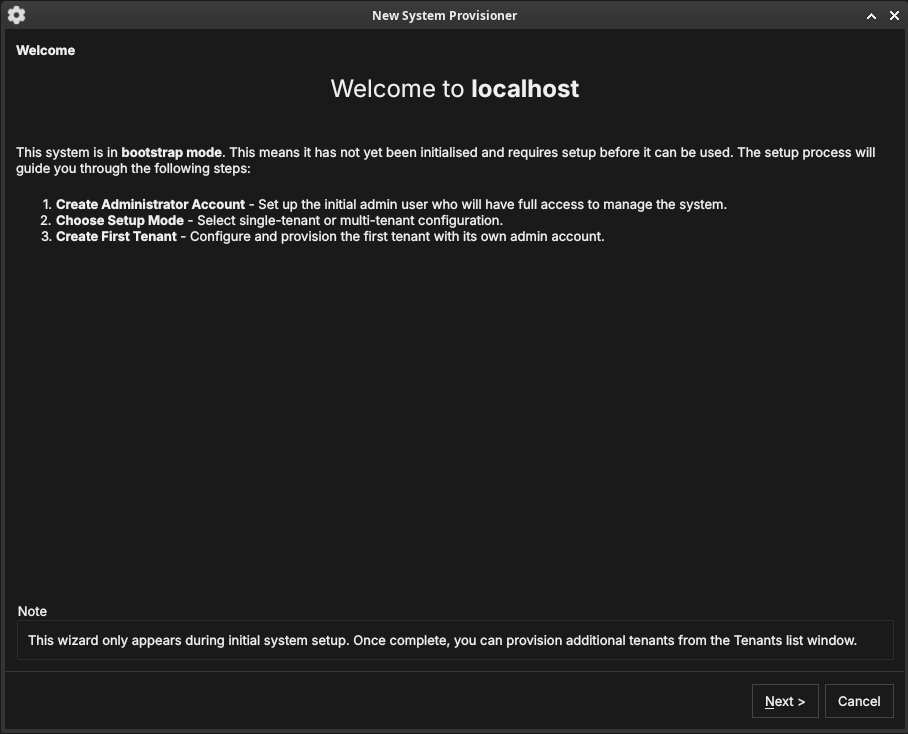
Figure 33: The System Provisioner welcome page, shown when the backend is in provisioning mode. It lists the three setup steps.
The welcome page confirms the system is in provisioning mode and outlines the steps: create the administrator account, choose the setup mode, and create the first tenant. Click Next.
Create the administrator account
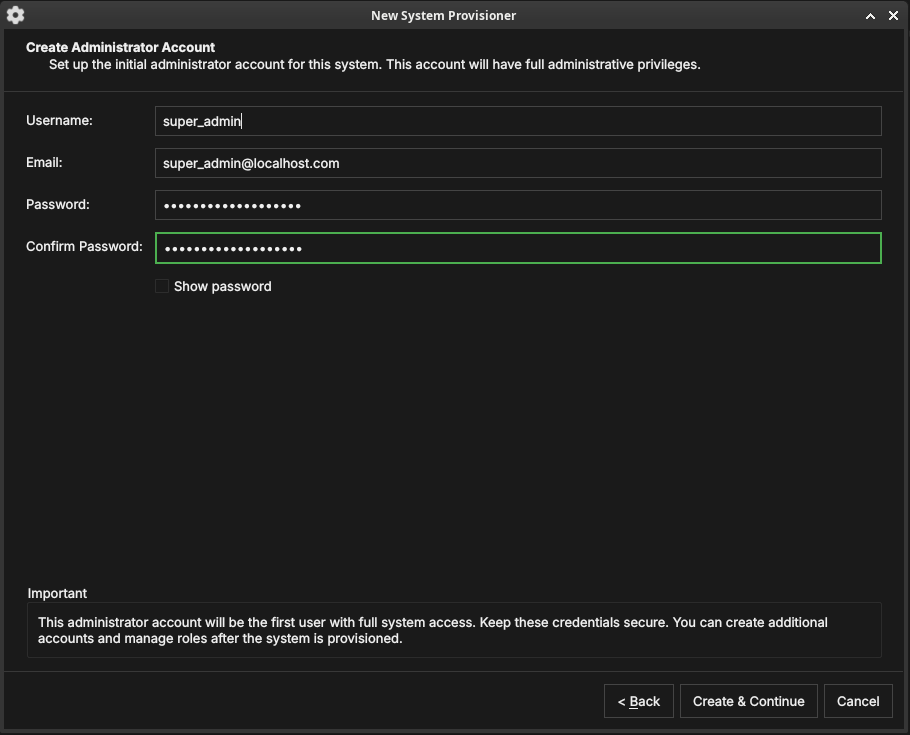
Figure 34: Creating the platform administrator account — the first account, with full administrative privileges over the whole deployment.
Enter a username, email, and password (with confirmation) for the platform administrator. Keep these credentials safe — this account has unrestricted access to the entire deployment. Click Create & Continue.
Choose the setup mode
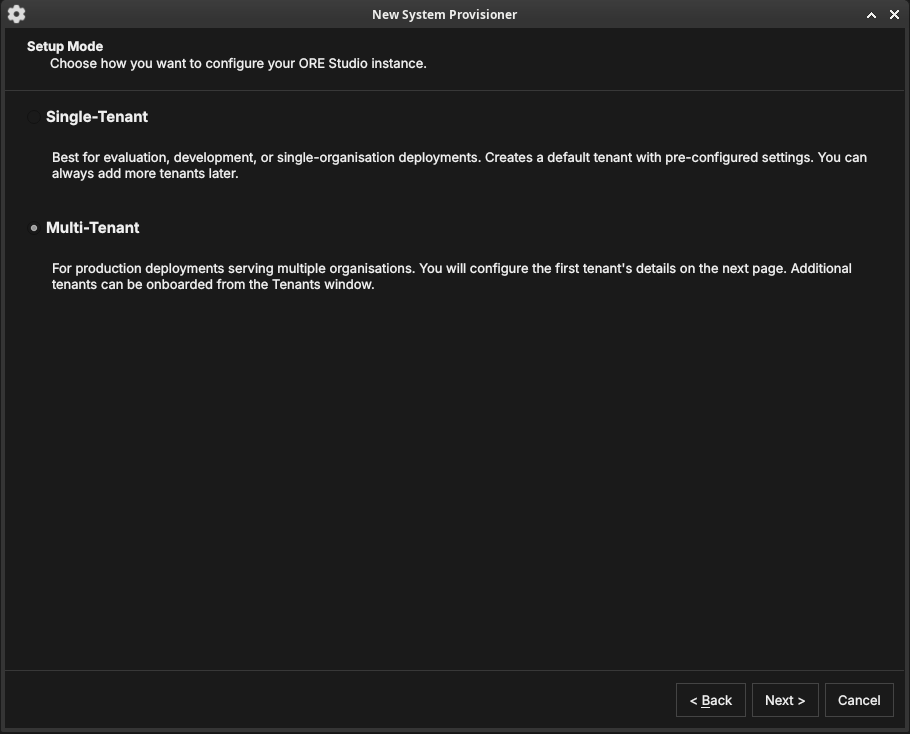
Figure 35: The Setup Mode page. Single-Tenant creates a default tenant with pre-configured settings; Multi-Tenant lets you configure the first tenant in detail and onboard more later.
Choose how the deployment is organised:
- Single-Tenant — best for evaluation, development, or a single organisation. Creates a default tenant with sensible defaults; you can add more tenants later.
- Multi-Tenant — for production deployments serving several organisations. You configure the first tenant's details on the next page and onboard additional tenants from the Tenants window.
Click Next.
Tenant details
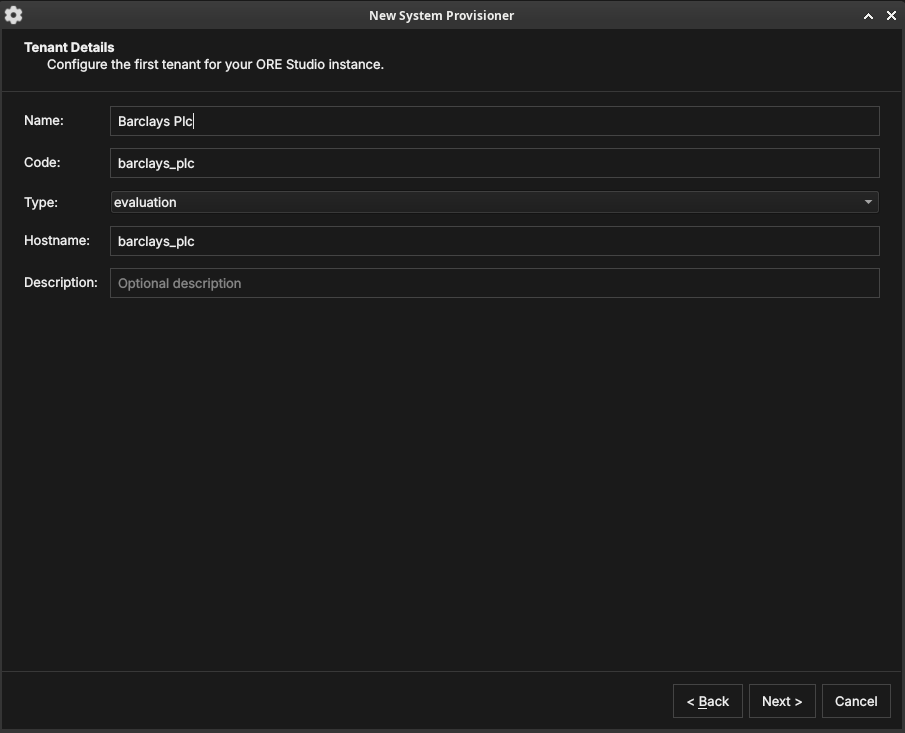
Figure 36: The first tenant's details: a display name, a short code, a tenant type, and a hostname.
Configure the first tenant:
- Name — the organisation's display name (e.g. "Barclays Plc").
- Code — a short machine code used internally (e.g.
barclays_plc). - Type — the tenant type (see Tenant types): System, Production, Evaluation, or Automation.
- Hostname — the host identifier for the tenant.
Click Next.
Tenant administrator account
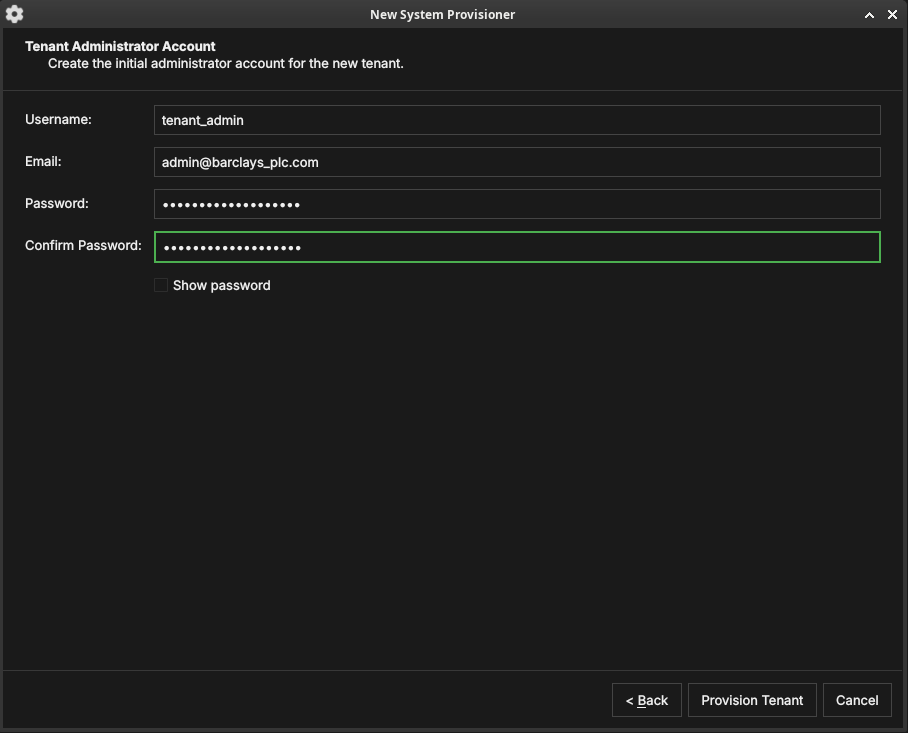
Figure 37: The tenant administrator account. This account administers the new tenant and is independent of the platform administrator.
Create the initial administrator for the new tenant — a username,
email, and password. This account is given the TenantAdmin role:
full control within the tenant, but no cross-tenant access. Click
Provision Tenant.
Provisioning
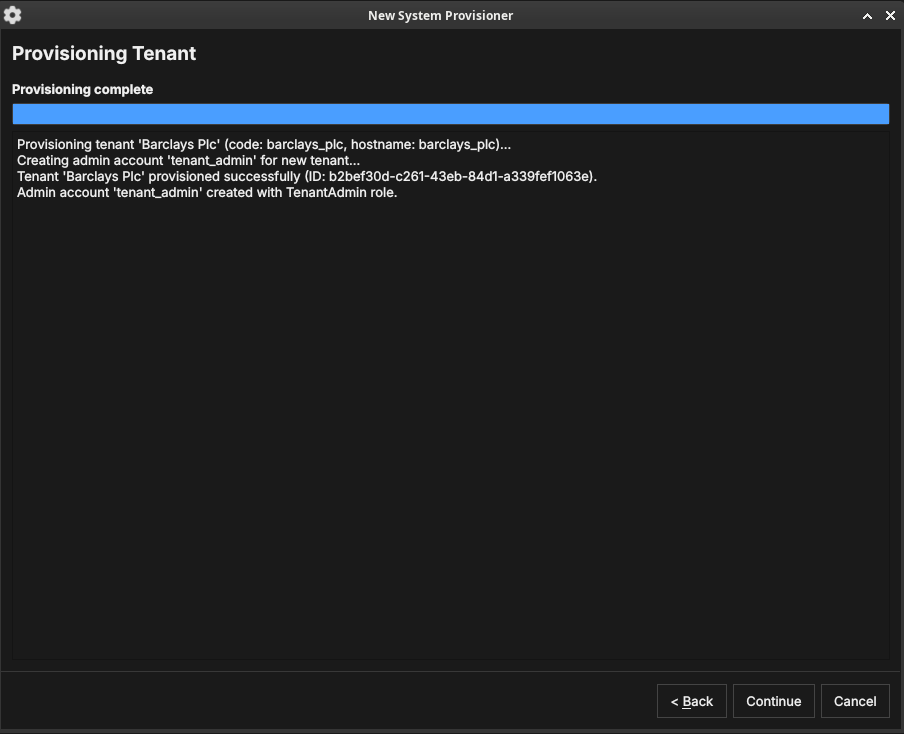
Figure 38: The provisioning step. ORE Studio creates the tenant and its administrator, logging progress as it goes.
ORE Studio provisions the tenant and creates its administrator account, logging each step. When it finishes, click Continue.
Setup complete
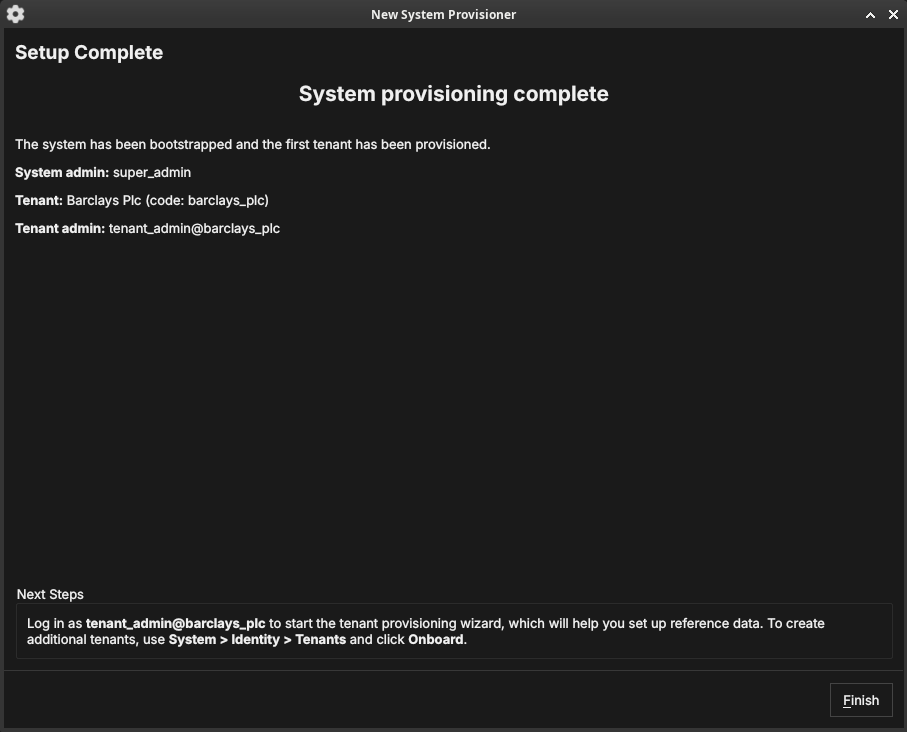
Figure 39: The System Provisioner summary: the platform admin, the first tenant, and the tenant admin that were created, with next-step guidance.
The final page summarises what was created and tells you the next step: log in as the tenant administrator to run the Tenant Provisioner. To create further tenants later, use System → Identity → Tenants and click Onboard. Click Finish — the backend leaves provisioning mode and the login dialog appears.
The Tenant Provisioner wizard
The first time you log in as a tenant administrator, ORE Studio launches the New Tenant Provisioner. It seeds the tenant with reference data and, optionally, an initial party hierarchy. You can skip it with Cancel and set everything up by hand later from the Data Librarian and Parties windows.
Welcome
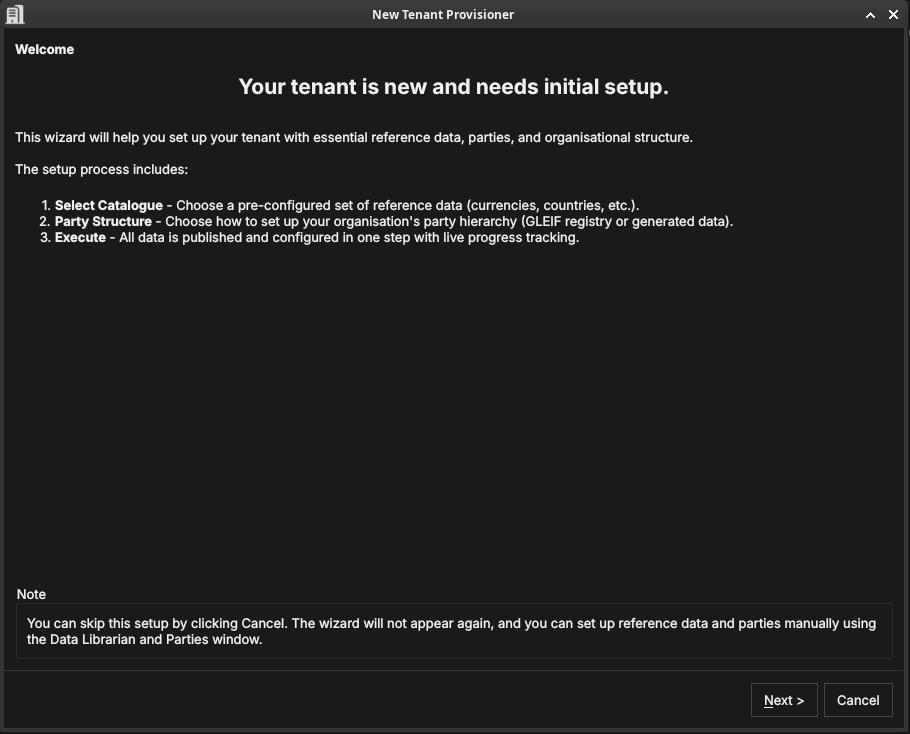
Figure 40: The Tenant Provisioner welcome page, listing its three steps: select a reference-data catalogue, choose a party structure, and execute.
The welcome page outlines the steps: select a catalogue, choose how to populate the party hierarchy, and execute. Click Next.
Select a catalogue
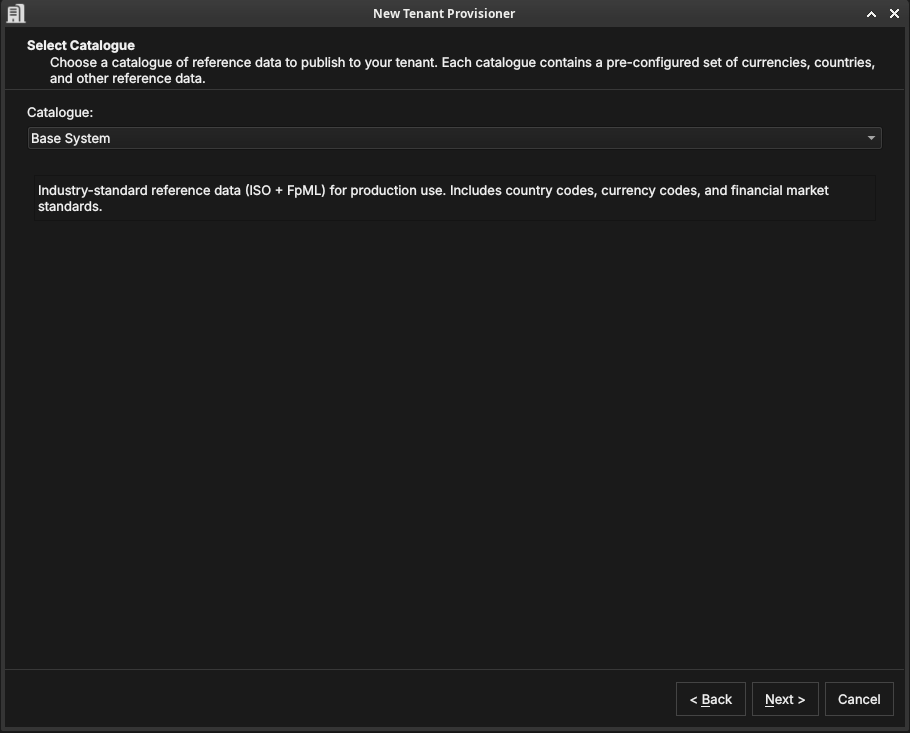
Figure 41: Selecting a reference-data catalogue — a pre-configured set of currencies, countries, and market standards.
A catalogue is a ready-made bundle of reference data. The Base System catalogue provides industry-standard ISO and FpML data — country codes, currency codes, and financial-market standards — suitable for production use. Choose a catalogue and click Next.
Choose a data source
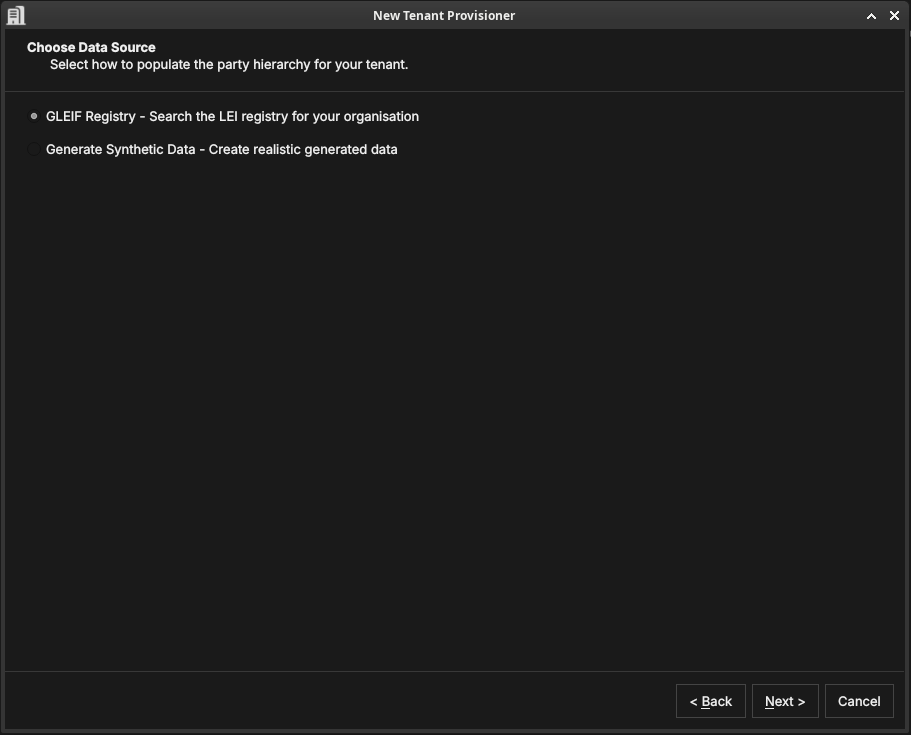
Figure 42: Choosing how the tenant's internal party hierarchy — your organisation's own legal entities and business units — will be seeded.
This step seeds the internal party hierarchy: the legal entities and business units that represent your own organisation — what practitioners call the house. As described in Parties, these are the operational parties that own trades, books, and analytics results.
The data source choice does not affect counterparties (the external entities your organisation trades with — those are imported separately in the Party Setup wizard). It only determines how the house structure is created.
In a group context — for example a bank holding company with separate London and New York subsidiaries — the house hierarchy reflects the corporate structure. The root party is the top-level legal entity; its children are the subsidiary entities; their children are trading desks, books, or booking centres. Each node in this tree represents a real organisational unit, and users log in to the node that corresponds to their own entity.
Two seeding methods are available:1
- GLEIF Registry — searches the global LEI registry for your real organisation. The entity you select becomes the root party, and its corporate descendants in the GLEIF hierarchy — subsidiaries, branches, and related entities — are created automatically as child parties. This is the recommended approach for production deployments: the GLEIF data provides real legal entity names, LEI codes, and verified corporate relationships.
- Generate Synthetic Data — creates a realistic but fictional party hierarchy using generated names. Use this for evaluation tenants, demonstrations, or testing where you want a plausible structure without importing real organisational data.
Click Next.
Party setup (optional)
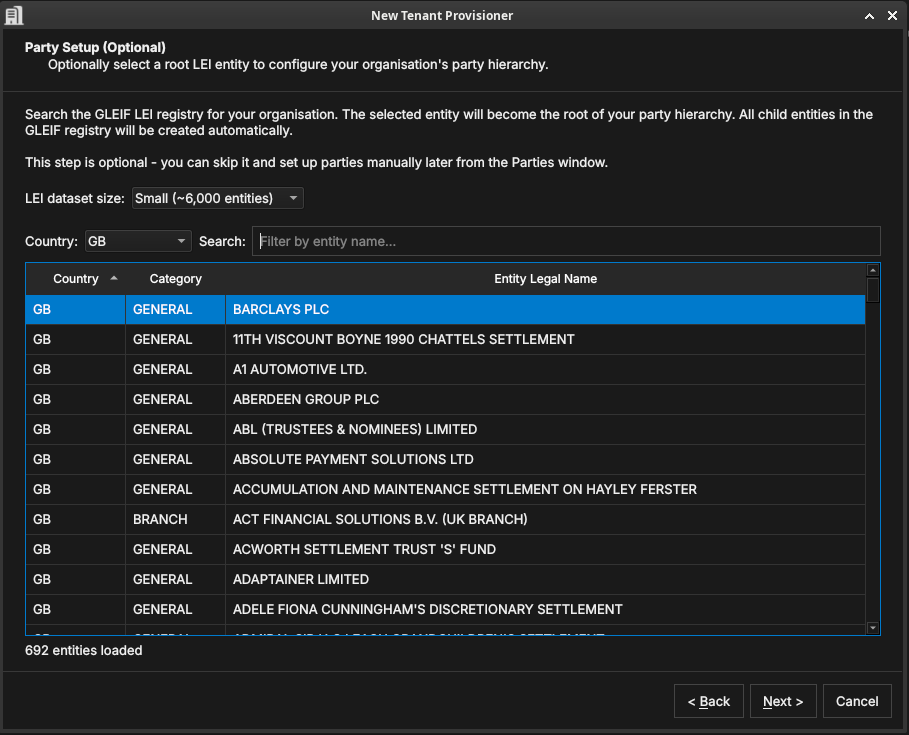
Figure 43: The optional Party Setup step. Search the GLEIF LEI registry for your root entity (here Barclays PLC); its corporate descendants are created as child parties automatically.
It helps to be clear about what this step does and does not do.
What it creates: the party nodes — the named entries in the hierarchy that represent your legal entities and business units. Each node gets a name, a LEI code, and a position in the tree. After this step OreStudio knows that "Barclays PLC" exists as a party, that it is the parent of "Barclays Bank UK PLC", and so on. The hierarchy structure is in place.
What it does not create: the operational content within each party — the books, portfolios, business units, counterparties, and report definitions that each party uses day-to-day. That content is added separately, after provisioning, by the Party Setup wizard (described in The Party Provisioner wizard below). Think of this step as building the org chart; the Party Setup wizard then stocks each office.
To use the GLEIF registry, pick an LEI dataset size (which controls how much of the registry is loaded for searching), filter by Country if needed, and search by entity name. The entity you select becomes the root house party — the top of your internal hierarchy. Its corporate children and grandchildren in the GLEIF registry (subsidiaries, branches, booking centres) are created automatically as child operational parties. You do not need to build the structure by hand; the GLEIF corporate hierarchy data does it for you.
This step is optional — skip it to create parties manually later from the Parties window. Click Next.
Publishing
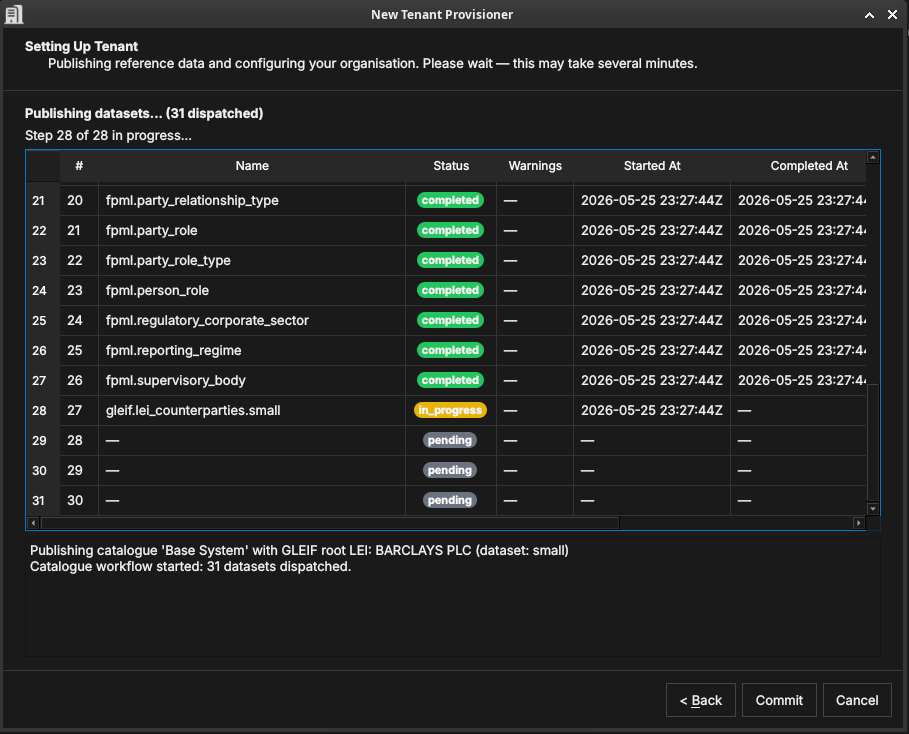
Figure 44: The publishing step, showing 31 datasets being dispatched in dependency order. Dataset 28 (gleif.lei_counterparties.small) is in progress; datasets 29–31 are pending.
OreStudio runs a multi-step publishing pipeline to populate the tenant with all the data selected in the previous steps. The pipeline dispatches datasets in the correct dependency order — classification tables before the entities that reference them, catalogue data before GLEIF data — and shows live progress in the table.
Each row in the table is one dataset. The columns are:
- # — the dataset's position in the dependency graph (zero-based). Datasets with lower numbers are prerequisites for those with higher numbers.
- Name — the dataset identifier, in
source.datasetform. The prefix identifies the data source:iso.*datasets contain ISO standard data (currencies, countries);fpml.*datasets contain FpML reference classifications (party types, roles, regulatory sectors);gleif.*datasets contain GLEIF LEI entity data (counterparties, house parties). - Status —
pending(not yet started),in_progress(actively loading), orcompleted(finished successfully). A red status indicates a failure. - Warnings — any non-fatal issues encountered during that dataset's load, displayed as a count. Click the row to see details.
- Started At / Completed At — UTC timestamps for the dataset's execution window.
The log panel at the bottom provides a running narrative: which catalogue is being published, how many datasets were dispatched, and the final outcome for each phase (reference data, organisation, activation).

Figure 45: All 31 datasets completed. The log confirms: reference data published, organisation associated with parties, and the tenant activated.
When all rows show completed and the log ends with "Organisation
activated successfully", click Commit to finalise the setup, or
Back to change your selections.
Setup complete
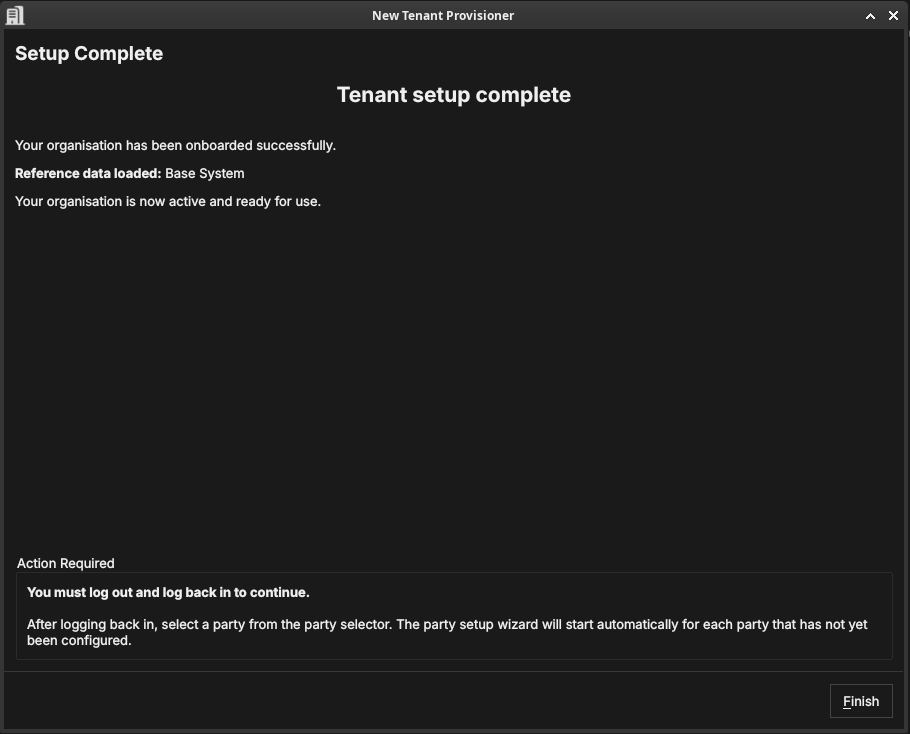
Figure 46: The Tenant Provisioner summary, confirming the reference data and parties that were set up.
The final page confirms what was created. Click Finish. The tenant now has its reference data and party hierarchy in place.
The Party Provisioner wizard
Where the Tenant Provisioner establishes the party hierarchy, the Party Setup wizard configures the operational structure within a party: it imports counterparties and creates a standard set of risk-report definitions. It runs for a party that needs initial setup, and can be skipped with Cancel (counterparties and reports can be configured later from the application menus).
Welcome
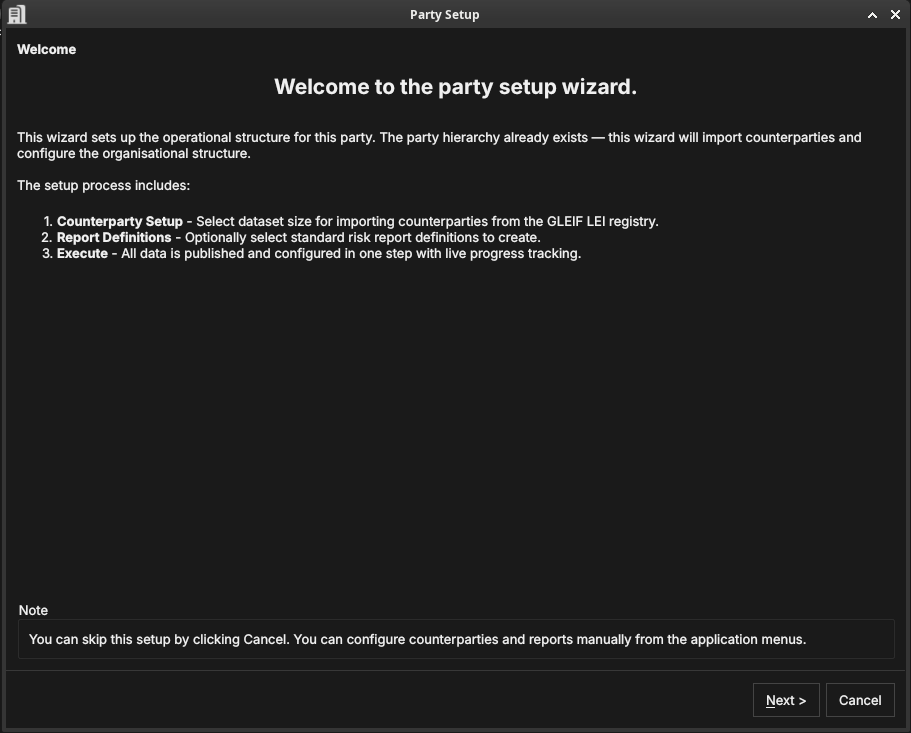
Figure 47: The Party Setup welcome page, listing its steps: counterparty import, report definitions, and execute.
By this point the house hierarchy — the party nodes representing your organisation's legal entities — already exists. This wizard populates one specific party within that hierarchy: it attaches the external counterparties that this party trades with, creates the internal organisational structure (business units, portfolios, and books), and defines the risk reports that will run on its data. Click Next.
Counterparty import
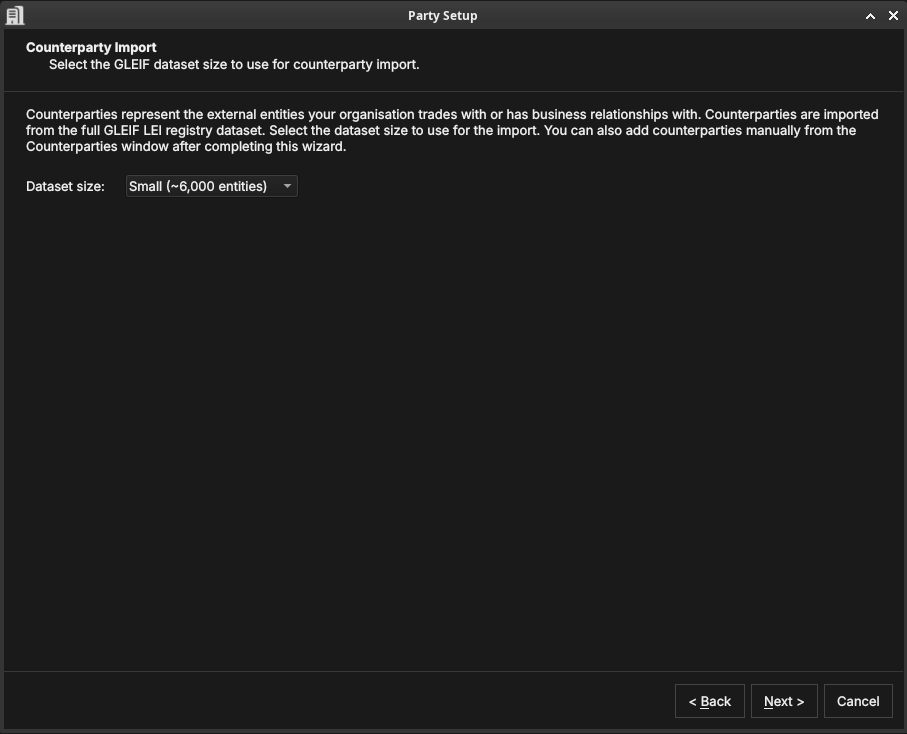
Figure 48: Choosing the GLEIF dataset size for importing counterparties. The dataset size controls how many real-world legal entities are loaded from GLEIF as counterparties.
Counterparties are the external legal entities your organisation trades with — banks, broker-dealers, corporates, funds. Where parties (the house) represent your own organisational structure, counterparties represent the other side of your trades. The distinction is important: house parties own books and positions; counterparties appear on trade tickets as the facing entity.
OreStudio imports counterparties from the GLEIF LEI registry. This is a deliberate design choice: GLEIF contains over two million real legal entities with verified names, LEI codes, countries of incorporation, and corporate relationships. Importing from GLEIF means your OreStudio instance starts with a realistic, authoritative counterparty population rather than a hand-crafted list. In an evaluation or demonstration tenant this is especially valuable — trades booked against real counterparty names (Deutsche Bank, JP Morgan, BlackRock) look and behave exactly as they would in production, making scenario testing meaningful.
The dataset size controls how many GLEIF entities are loaded: smaller sizes load a representative subset quickly; larger sizes import a more complete global population. You can add individual counterparties later from the Counterparties window regardless of which size you choose. Click Next.
Report definitions
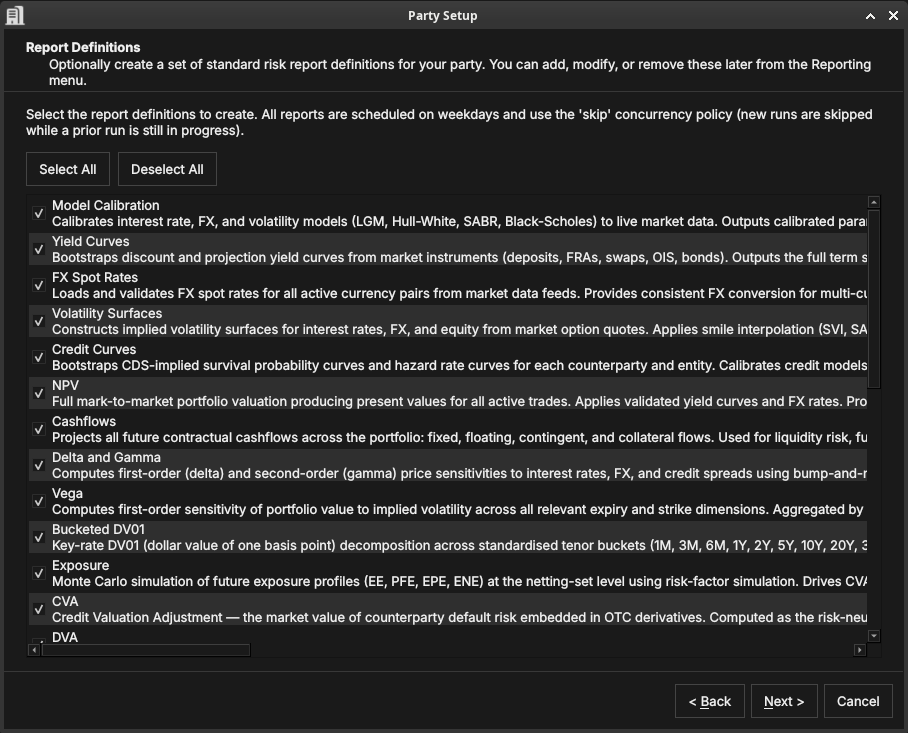
Figure 49: Selecting standard risk-report definitions to create — NPV, sensitivities, exposure, CVA, and more. All are scheduled on weekdays.
Optionally create a set of standard risk-report definitions — model calibration, yield curves, FX spot rates, volatility surfaces, credit curves, NPV, cashflows, Delta and Gamma, Vega, bucketed DV01, exposure, CVA, DVA, and others. Use Select All / Deselect All, or tick individual reports; they can be edited later from the Reporting menu. Click Next.
Execute

Figure 50: The execute step showing three datasets completed: testdata.business_units, testdata.portfolios, and testdata.books. The log below shows the four phases completed in sequence.
OreStudio runs the party setup in four phases, shown in the log panel:
- Phase 1: importing counterparties — loads the selected GLEIF
counterparty dataset into the party's counterparty table. The
progress table shows one row per dataset (e.g.
gleif.lei_counterparties.small), with the same Status / Started At / Completed At columns as the Tenant Provisioner publishing step. - Phase 2: publishing organisation structure — creates the internal
organisational entities within the party: business units
(
testdata.business_units), portfolios (testdata.portfolios), and books (testdata.books). Books are the lowest-level containers that own individual trades and positions. - Phase 3: creating report definitions — creates the scheduled risk-report configurations selected in the previous step.
- Phase 4: activating party — marks the party as operational so users can log in to it and begin booking trades.
When the log ends with "Party activated successfully", click Commit.
Setup complete
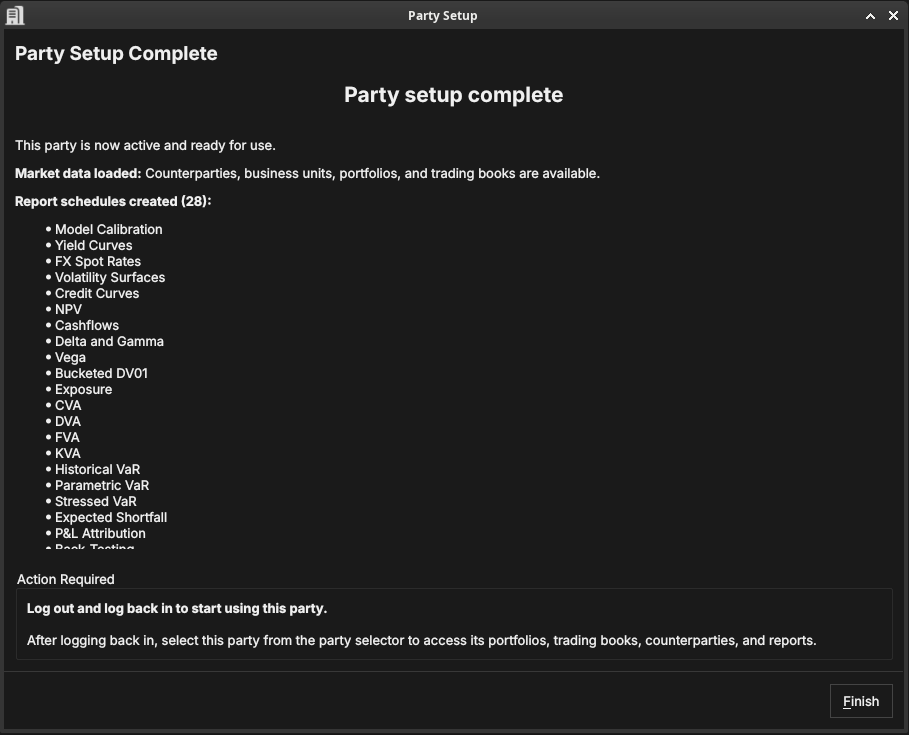
Figure 51: The Party Setup summary, confirming the counterparties, structure, and reports that were created.
The final page confirms what was set up. The party is now fully operational: it has counterparties, an organisational structure, and scheduled risk reports.
Choosing a party at login
Some accounts are associated with more than one party — for example a group administrator who can act for several entities. When you log in with such an account, ORE Studio asks which party context to use for the session.
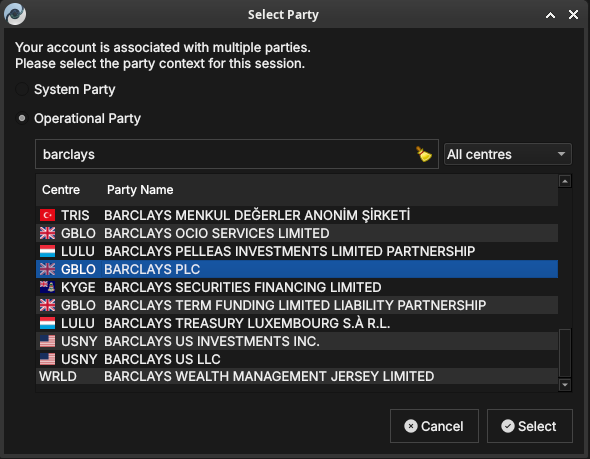
Figure 52: The Select Party dialog. Choose the System Party or an Operational Party; filter by booking centre or search by name.
Choose System Party for administrative work, or Operational Party to work within a specific business entity. Filter the list by booking centre, or type in the search box to narrow it.
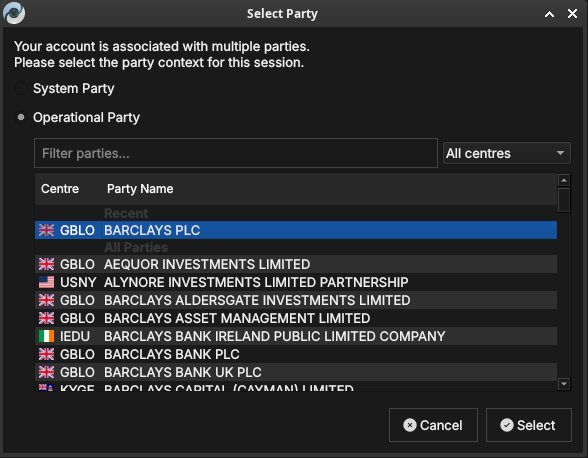
Figure 53: The Select Party dialog with a recently used party listed under Recent at the top for quick access.
Select a party and click Select. Your data visibility for the session is determined by the party you choose and its position in the hierarchy.
Summary
This chapter covered the one-time journey from an empty backend to an operational deployment. With the tenant and party model sketched in brief — the full treatment lives in the Tenants chapter — the three wizards did the work: the System Provisioner created the platform administrator and first tenant, the Tenant Provisioner seeded reference data and the house, and the Party Provisioner equipped each party with counterparties and report definitions. Provisioning ends where daily use begins: choosing a party at login. The accounts the wizards created, and every account after them, are managed through the windows described in the next chapter.
Provisioning from the Shell
Everything the wizards do, the shell can do too. The
previous chapter walked through the three provisioning wizards
page by page; this one covers the same ground from the command line,
where a complete system can be provisioned with three commands — or
with one script, run end to end without touching the desktop
application at all. Scripted provisioning is repeatable: the same
script against a fresh installation produces the same system, which
makes it the natural tool for development environments, testing, and
automation. The chapter introduces the provision commands and how
each maps onto its wizard, the supporting commands they are built
from, and the script library that ties them together, closing with a
complete worked example.
The shell and provisioning
ores.shell is ORE Studio's interactive command-line client. Like
the desktop application it speaks to the backend services over the
message bus, so anything it does respects the same validation, audit
trail, and permissions. Start it, connect, and type help to see the
available commands; every command described here also explains its
own arguments through the shell's built-in help.
Provisioning from the shell follows exactly the sequence described in the previous chapter — system, then tenant, then party — including the logouts and logins between the stages, because each login is what refreshes your session's view of the system's state. The difference is that each wizard collapses into a single command whose options carry the same defaults the wizard pre-fills, so the common case needs very few of them.
Provisioning the system
provision system performs the System Provisioner's work: it checks
the installation is in bootstrap mode, creates the platform
administrator, logs in as that account, and provisions the first
tenant together with its tenant administrator.
provision system super_admin Secure-Password-123 admin@localhost.com --tenant-admin-password Secure-Password-123 --tenant-hostname default
logout
exit
The tenant administrator's password is the only option without a
default — everything else mirrors the wizard's single-tenant mode:
tenant code default, name Default Tenant, type evaluation, and
the tenant administrator named tenant_admin with the e-mail address
admin@<code>.com. To provision a custom tenant instead — what the
wizard calls multi-tenant mode — override what you need with
--tenant-code, --tenant-name, --tenant-type,
--tenant-hostname, --tenant-description, --tenant-admin and
--tenant-admin-email.
The command validates everything before touching the backend, refuses to run when you are already logged in or the system is not in bootstrap mode, and on success prints the login for the next stage:
./projects/ores.compass/compass.sh shell << 'EOF'
<<shellprov-system>>
EOF
✓ Connected to nats://localhost:42222
⚠ WARNING: System is in BOOTSTRAP MODE
ores-shell> [1/3] Creating initial admin account 'super_admin'...
  Account created (ID: b88d04ec-ac25-4137-981a-ddefb1d92592).
[2/3] Logging in as 'super_admin'...
✓ Login successful!
[3/3] Provisioning tenant 'default'...
✓ System provisioned. Tenant 'Default Tenant' (ID: 93b5d425-...), admin 'tenant_admin'.
Next: logout, then: login tenant_admin@default <password>  — the tenant is in bootstrap mode; run provision tenant.
ores-shell> ✓ Logged out successfully.
ores-shell> Bye!
Note the login principal is the username at the tenant's hostname
(tenant_admin@default above), not its display name.
Provisioning a tenant
provision tenant performs the Tenant Provisioner's work for the
tenant you are logged in to. Log in as the tenant administrator the
previous stage created — the tenant is in bootstrap mode, which is
exactly what the command requires — and run:
login tenant_admin@default Secure-Password-123
provision tenant --source synthetic --seed 42
logout
exit
./projects/ores.compass/compass.sh shell << 'EOF'
<<shellprov-tenant>>
EOF
ores-shell> ✓ Login successful!
ores-shell> Using bundle 'base' (first available).
[1/4] Publishing bundle 'base'...
  Dispatched 31 dataset(s); workflow instance: 7c059b7f-...
✓ All 31 step(s) completed.
[2/4] Generating synthetic organisation...
✓ Synthetic organisation generated (seed 42):
  parties:             5
  counterparties:      10
  ...
[3/4] Associating 'tenant_admin' with the operational parties...
  5 parties associated.
[4/4] Finalizing tenant provisioning...
✓ Tenant provisioned: bundle 'base', 5 parties associated.
ores-shell> ✓ Logged out successfully.
ores-shell> Bye!
With no options this publishes the first available reference data catalogue and uses the GLEIF registry as the data source, just as the wizard's defaults do. The options mirror the wizard's pages:
--bundle <code>selects a specific catalogue (bundles listshows what is available).--source gleif(the default) optionally takes--root-lei <lei>to build the house hierarchy from a real organisation; find the LEI withlei countriesandlei entities <country> --filter <text>.--source syntheticgenerates a realistic artificial organisation instead. All the generation controls from the wizard's synthetic page are available as options with the same defaults (--party-count,--counterparty-count,--portfolio-leaf-countand so on);--seed <n>makes the result reproducible — the same seed always generates the same organisation, names included.
The command publishes the catalogue and waits while the backend works through its datasets, printing each step as it completes; generates the synthetic organisation when selected; associates your administrator account with every operational party; and finally marks the tenant active. As with the wizard, log out and back in afterwards so your session picks up the now-active tenant.
Provisioning a party
provision party performs the Party Provisioner's work for one
party. Unlike the wizard — which runs for the party you selected at
login — the command always names its target explicitly, either by its
full name or by its identifier; parties list --category Operational
shows the candidates:
login tenant_admin@default Secure-Password-123
provision party "Lloyds Wealth Management Ltd" --reports all
logout
exit
./projects/ores.compass/compass.sh shell << 'EOF'
<<shellprov-party>>
EOF
ores-shell> ✓ Login successful!
ores-shell> [1/4] Importing counterparties (dataset small)...
✓ All 1 step(s) completed.
[2/4] Publishing organisation bundle for the party...
✓ All 3 step(s) completed.
[3/4] Creating report definitions...
  Created report definition 'Cashflows'.
  ...
[4/4] Activating party 'Lloyds Wealth Management Ltd'...
✓ Party 'Lloyds Wealth Management Ltd' provisioned and active.
ores-shell> ✓ Logged out successfully.
ores-shell> Bye!
The options mirror the wizard's pages: --dataset-size small|large
selects the counterparty import size (small is the default), and
--reports takes all (the default — the wizard pre-selects every
template), none, or a comma-separated list of template names from
reports templates. The command imports the counterparties,
publishes the party's organisation data, creates the selected report
definitions, and activates the party.
The supporting commands
The provision commands are built from smaller commands you can use
on their own — to inspect the system, to recover when a step fails,
or to assemble a custom flow. Each provision phase prints which of
these it is performing, so a failed run tells you where to pick up by
hand.
| Command | Purpose |
|---|---|
bundles list |
The reference data catalogues available for publication. |
bundles publish <code> [--wait] |
Publish a catalogue; --wait blocks until the backend finishes. |
workflow steps <id> / workflow wait <id> |
Inspect or wait on a long-running backend operation. |
lei countries / lei entities <country> |
Browse the GLEIF registry for a --root-lei value. |
synthetic generate |
Generate a synthetic organisation (all controls as options). |
parties list |
List parties, with --category and --status filters. |
account-parties add <account> <party> |
Grant an account access to a party. |
tenants complete-provisioning |
Mark the logged-in tenant's provisioning complete. |
reports templates |
The report definitions available to the party provisioner. |
The provision commands call these in sequence; you can call them
individually to inspect the system or to recover a failed run from
where it stopped.
Scripts
The shell runs scripts with the load command: one command per line,
# starts a comment, and blank lines are ignored. A script stops at
the first command that fails — so a run that reaches the end has
genuinely succeeded — and reports the failing line and command.
When you want a script to press on regardless, for example while
exploring, pass --continue-on-error:
load my_script.ores
load my_script.ores --continue-on-error
ORE Studio ships a small library of provisioning scripts in
projects/ores.shell/scripts/. Each .ores script in the library is
generated from a documentation file alongside it that explains, step
by step, what the script does and what it expects of the system —
read that file before running a script for the first time. Treat the
shipped scripts as templates: copy one and adjust the copy rather
than editing the original, which the build regenerates.
A complete example
The library's acme_system_provision.ores provisions a complete system
from a fresh installation: platform administrator, an Acme tenant with
a reproducible synthetic organisation, and the house's root party with
every standard report. (Its sibling barclays_system_provision.ores
does the same from the GLEIF golden copy instead of synthetic data.) It
expects a fresh installation in bootstrap mode, all services running,
and a connected, logged-out session.
load projects/ores.shell/scripts/library/acme_system_provision.ores
exit
An error-free run ends with a fully provisioned system (the excerpt below elides most of the run — the full output reports every dataset, generation count and report definition as it lands):
./projects/ores.compass/compass.sh shell << 'EOF'
<<shellprov-all>>
EOF
ores-shell> Loading script: projects/ores.shell/scripts/library/acme_system_provision.ores
> provision system super_admin Secure-Password-123 admin@localhost.com ...
✓ System provisioned. Tenant 'Default Tenant' ...
...
> provision party "Lloyds Wealth Management Ltd" --reports all
[4/4] Activating party 'Lloyds Wealth Management Ltd'...
✓ Party 'Lloyds Wealth Management Ltd' provisioned and active.
> logout
✓ Logged out successfully.
Script complete: 9 commands executed.
Two details are worth pausing on. The seed pins the generated
organisation, which is why stage 3 can name Lloyds Wealth Management
Ltd — change the seed and you must discover the new root party with
parties list --category Operational and update the script. And the
logouts between stages are not ceremony: they are how the session
learns that the tenant has become active and the parties exist,
exactly as the wizards instruct.
Log in — from the shell or the desktop application — as
tenant_admin@default, select a party, and daily use begins, just as
at the end of the previous chapter.
Accounts and Roles
Day-to-day account management is the subject of this chapter: the Accounts window and how it differs between administrator identities, the account detail dialog and each of its tabs, the flow for creating a new account, and the roles and permissions that govern what an account may do.
Overview
Every person and process that talks to OreStudio does so through an account. The provisioning wizards described in the Initial Setup chapter create the first accounts for you — the platform administrator during system provisioning and the tenant administrator during tenant creation. Those wizards are a one-time bootstrap: every account after that is created and managed in the Accounts window described here.
Accounts come in four types, shown as coloured badges throughout the UI: User for people, Service for OreStudio's own backend services, Algorithm for automated processes, and LLM for large language model agents. What an account is allowed to do is determined by the roles assigned to it; which data it can see is determined by the tenant it belongs to and the parties it is assigned (see Initial Setup for the tenant and party model).
The Accounts window
Open the Accounts window from the Administration submenu of the System menu. The Administration menu is only present for accounts that hold administrative permissions.
The window lists every account visible to your login identity, one row per account. Alongside the username and email, badge columns show the account type, the login status (Online, Recent, Old, or Never for accounts that have never logged in), and whether the account is locked. The remaining columns carry the record version and provenance — who last modified the record and when.
The toolbar follows the standard entity-window layout (Reload, Add, Edit, Delete, History) and adds four account-specific actions: Lock and Unlock to suspend and restore login access, Reset Pwd to set a new password, and Sessions to inspect the account's login sessions.
What you see depends on who you are
Account visibility follows tenant isolation. Logged in as the platform
administrator on the system tenant, the window shows the full
machinery of the platform — the super_admin account plus the service
accounts that OreStudio's backend components use to talk to each
other:
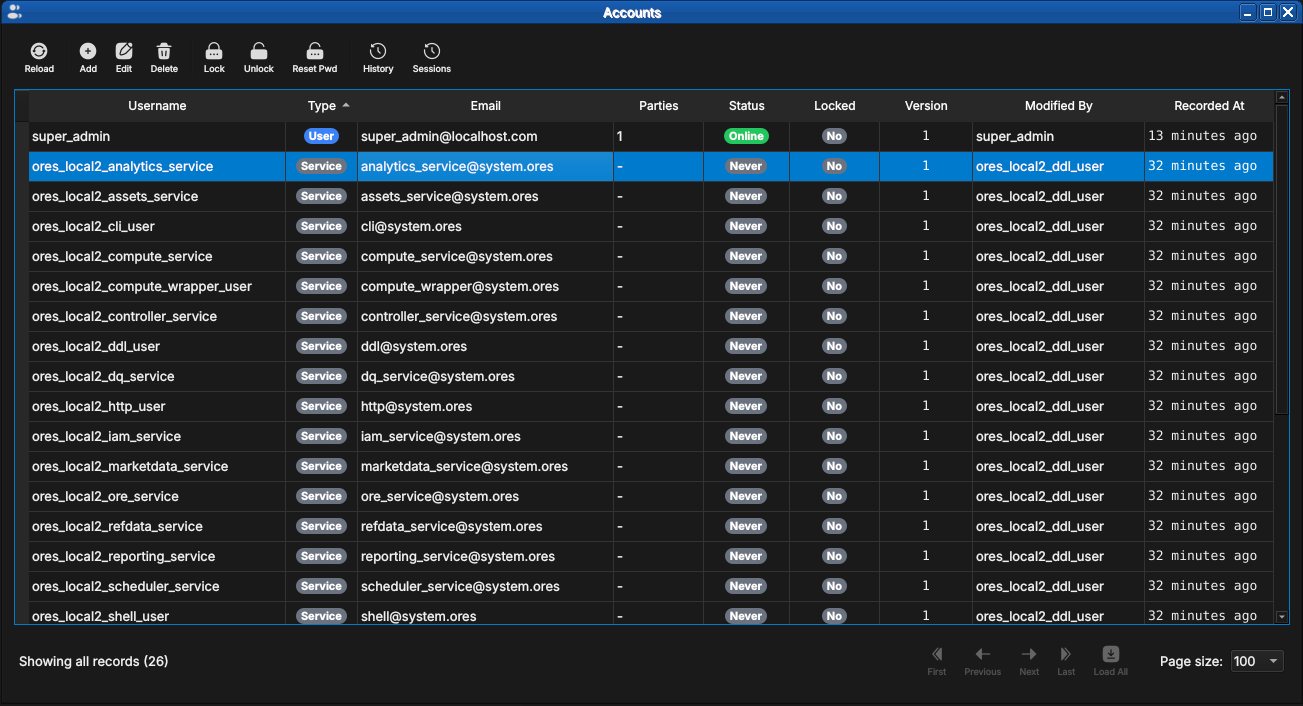
Figure 54: The Accounts window as seen by the platform administrator. Most rows are service accounts — one per backend component — shown with the teal Service type badge. Note the gray Never login-status badges: service accounts authenticate with certificates rather than interactive logins.
Logged in as a tenant administrator, the same window shows only the accounts belonging to that tenant — a freshly provisioned tenant contains exactly one, the tenant administrator itself:
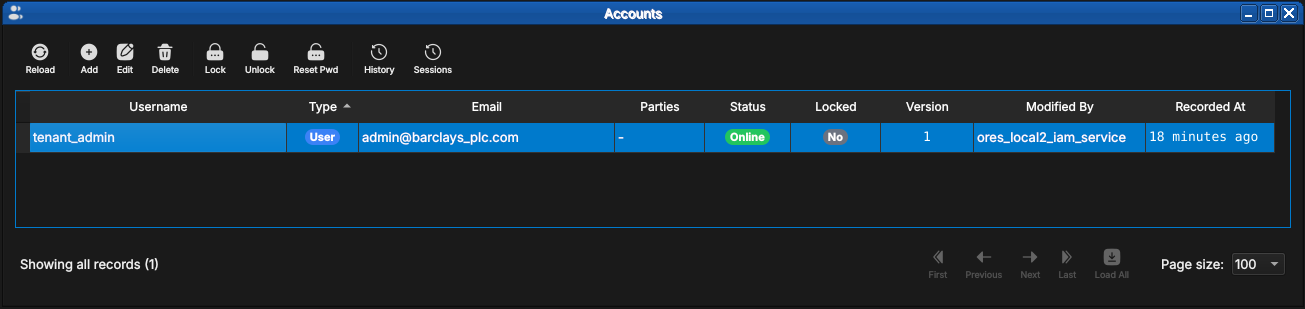
Figure 55: The same window as seen by a tenant administrator immediately after tenant provisioning. Only the tenant's own accounts are visible — here just tenant_admin, currently Online.
Live updates
Like all OreStudio entity windows, the Accounts list updates in response to changes made elsewhere — another administrator creating an account in a different session, for example. When unseen changes are pending, the Reload button carries a yellow stale indicator; recently changed rows are highlighted until you have seen them.
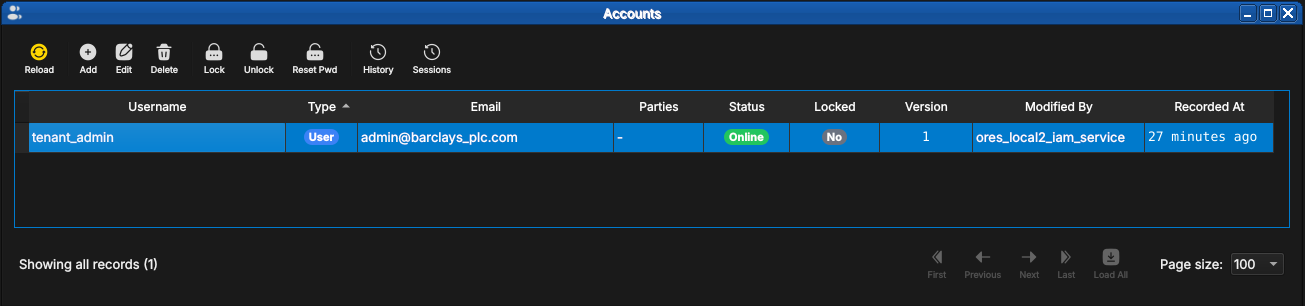
Figure 56: The Reload button showing the yellow stale indicator: the account list has changed since it was last loaded.
After a reload, rows that changed since you last looked stay highlighted until acknowledged, so a batch of new arrivals stands out from the records you have already reviewed:
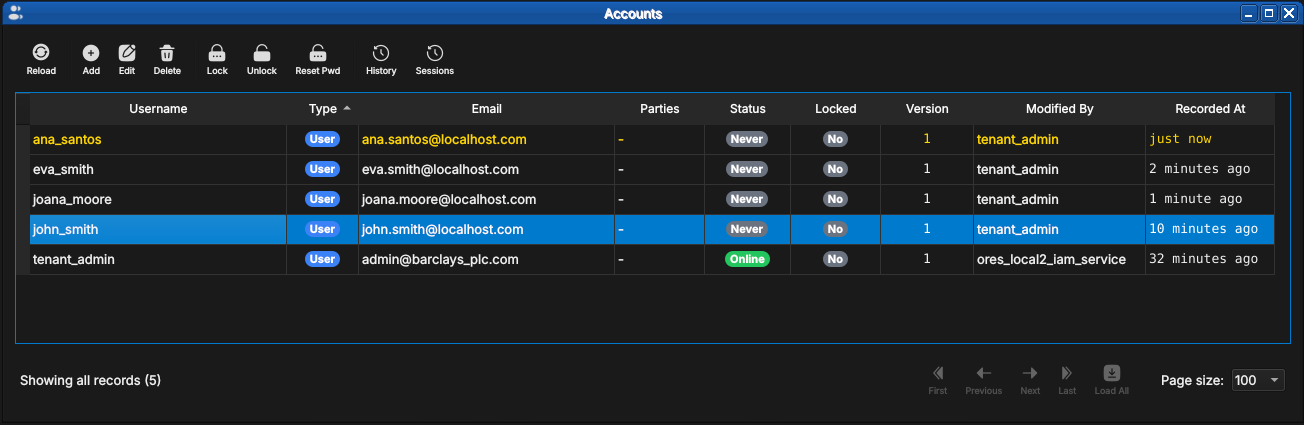
Figure 57: Newly created accounts highlighted in the list. The ana_santos row was recorded "just now" and remains highlighted until acknowledged.
The account detail dialog
Double-click an account (or select it and press Edit) to open the detail dialog. The dialog has six tabs; the same dialog serves creation, editing, and read-only inspection of historical versions.
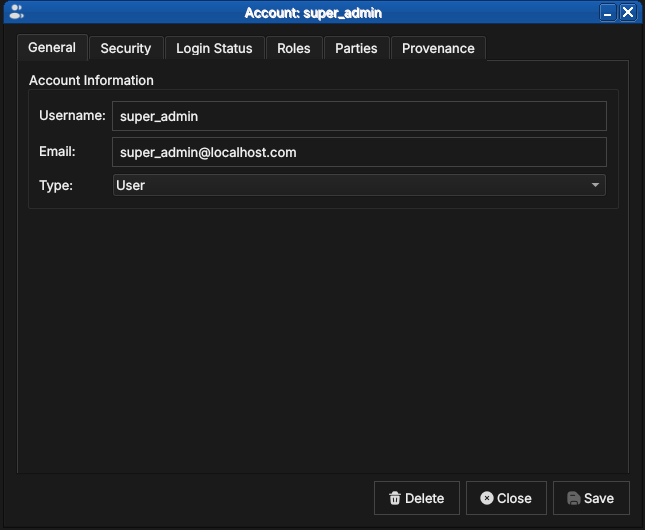
Figure 58: The General tab for super_admin, showing the username, email address, and account type.
- General — username, email, and the account type. The type is chosen at creation time and is read-only afterwards.
- Security — set or change the account password (see the new-account flow below).
- Login Status — read-only login telemetry: whether the account is online, locked, its failed login count, last login time, and last known IP addresses.
- Roles — the roles assigned to this account (next section).
- Parties — the parties this account may log in to.
- Provenance — who changed this record version, when, and why.
Roles and parties tabs
The Roles tab lists the roles currently assigned to the account, and is where capabilities are granted and revoked: pick a role in the combo box below the list and add it, or select an assigned role and remove it. Changes take effect on the account's next login.
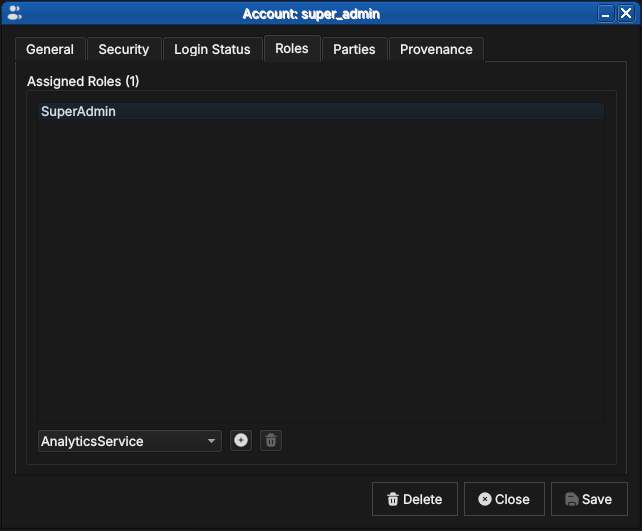
Figure 59: The Roles tab for super_admin, holding the single SuperAdmin role. The combo box below the list adds further roles; the buttons alongside add and remove the selection.
The Parties tab works the same way but governs visibility rather than capability: the parties listed here are the party contexts the account may select at login, as described in Initial Setup.
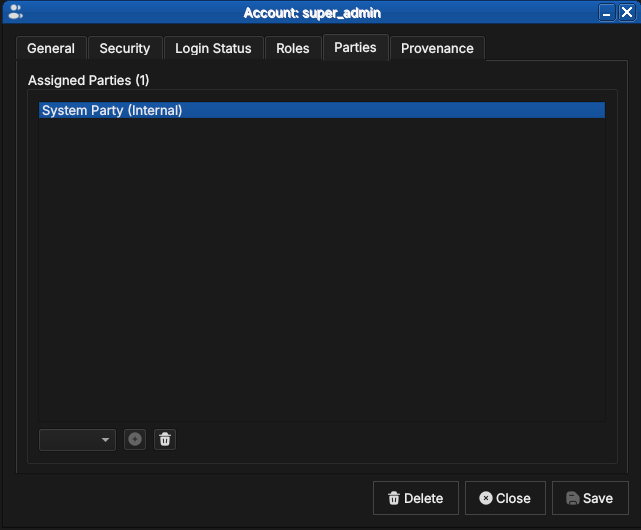
Figure 60: The Parties tab for super_admin, assigned to the internal System Party. Party assignment determines which party contexts the account may select at login.
An account with no party assignment cannot log in to any party context — the dialog warns you if you try to save one (see the new-account flow below).
Provenance
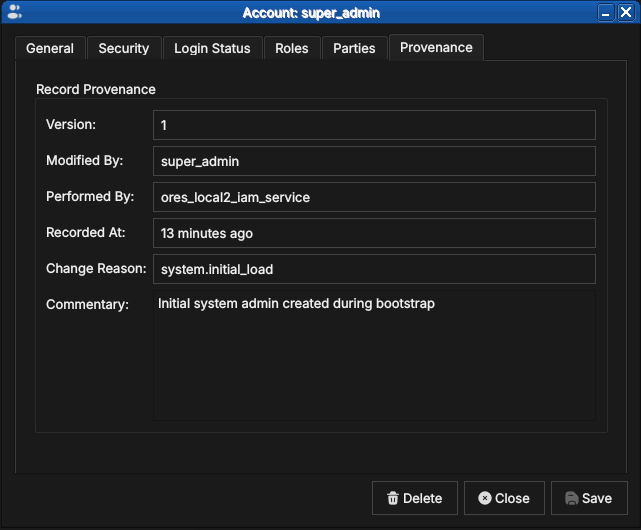
Figure 61: The Provenance tab for super_admin at version 1: modified by super_admin, performed by the IAM service, with the system.initial_load change reason and the bootstrap commentary.
Every account record is versioned and carries full provenance, following the same conventions as all OreStudio entities — see the Provenance section of the Reference Data chapter. Note the distinction visible in the screenshot: Modified By is the account on whose behalf the change was made, while Performed By records the backend service that executed it.
Creating an account
Press Add in the Accounts window toolbar to open the same detail dialog in creation mode, titled New Account.

Figure 62: Creating john_smith: username, email, and account type on the General tab.
Passwords are set on the Security tab. The confirmation field outlines green once both entries match; tick Show passwords to verify what you typed before saving.
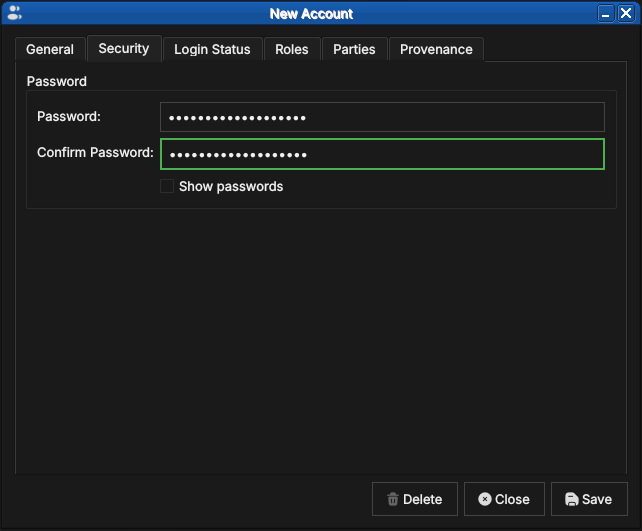
Figure 63: Setting the initial password. The green outline on the confirmation field indicates the two entries match.
Passwords are entered masked; ticking Show passwords reveals both fields, useful when setting an initial password you are about to hand to the new user:

Figure 64: The same tab with Show passwords ticked, revealing the password text for visual verification.
Next, assign at least one role on the Roles tab — without one the account will hold no permissions (see the note below):
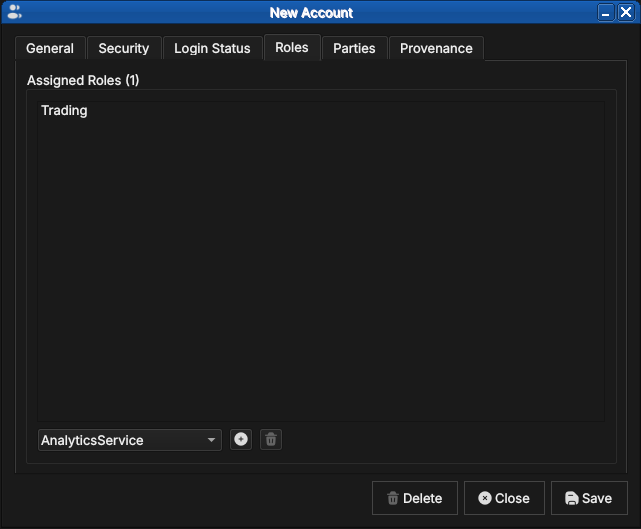
Figure 65: Assigning the Trading role to the new account. The combo box offers every role defined in the tenant.
For accounts that should log in to a party context, assign at least one party on the Parties tab; the combo box offers the tenant's party hierarchy:
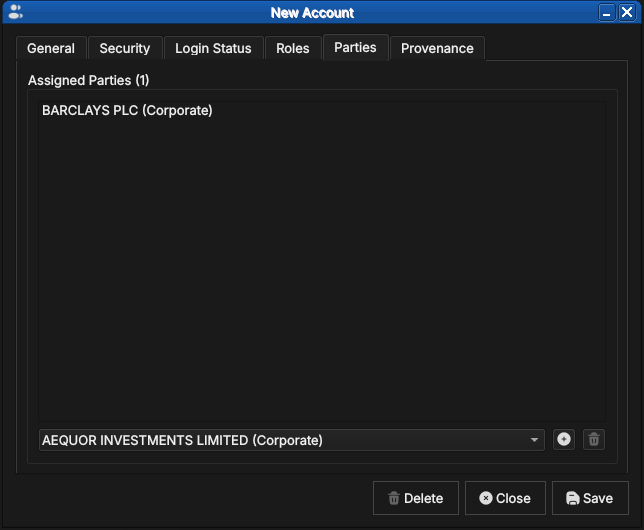
Figure 66: Assigning the new account to BARCLAYS PLC. The combo box lists the tenant's party hierarchy.
If you save without assigning a party, OreStudio asks for confirmation — such accounts exist but cannot enter any party context at login:

Figure 67: The confirmation shown when saving an account with no party assignment.
At present there is no equivalent warning for roles: OreStudio lets you save a new account with no role assignment and stays silent. Such an account can log in but holds no permissions, so almost every operation will be denied. Until a warning is added, double-check the Roles tab before saving a new account.
Roles and permissions
OreStudio implements industry-standard Role-Based Access Control (RBAC). RBAC separates three concepts that are easy to conflate:
- An account is an identity — it answers "who is this?". It carries credentials (a password for users, certificates for services) and is the thing that logs in, appears in provenance records, and gets locked or unlocked. An account grants nothing by itself.
- A permission is the atomic unit of capability — it answers "what
single thing may be done?". Permissions are fine-grained strings
following a
domain::resource:actionpattern:refdata::currencies:readallows reading currency records,iam::tenants:createallows creating tenants. A trailing wildcard covers a whole domain —analytics::*grants every analytics permission — and the bare wildcard*grants everything. - A role is a named bundle of permissions — it answers "what job does this identity do?". Roles are the only bridge between the two: accounts never hold permissions directly, they hold roles, and every permission an account exercises arrives through one of its roles.
This indirection is what keeps administration tractable: when a new
permission is needed by everyone in trading, it is added to the
Trading role once rather than to every trader's account, and an
account's capabilities can be read at a glance from its role list.
Open the Roles window from the Administration submenu of the System menu to see the bundles:

Figure 68: The Roles window listing the built-in roles — one per backend domain service plus the administrative and operational roles — with their permission counts and provenance.
Service roles
Every backend component runs under a dedicated service account (the
teal-badged accounts seen earlier in the system tenant), and each
service account holds exactly one matching service role —
IamService, RefdataService, AnalyticsService, ComputeService,
WorkflowService and so on, one per component. The bundle gives the
component full access to its own domain and read access to whatever
else it legitimately needs: the AnalyticsService role seen below
holds analytics::* plus iam::tenants:read, because the pricing
engine owns the analytics domain but only ever reads tenant records.
This is the principle of least privilege applied to OreStudio's own
machinery — a compromised or misbehaving component cannot reach beyond
its role.
Domain roles
For human users, OreStudio seeds operational roles modelled on the desks and functions of a financial institution:
| Role | Intended for |
|---|---|
SuperAdmin |
Platform administrators |
TenantAdmin |
Tenant administrators |
Trading |
Traders |
Sales |
Sales desks |
Operations |
Middle/back office |
Support |
Support staff |
Viewer |
Auditors, casual consumers |
DataPublisher |
Data stewards |
Each role's capability profile:
SuperAdmin— everything, plus the tenant lifecycle: create, suspend, terminate, reset.TenantAdmin— everything within their own tenant.Trading— read reference data; create, modify, archive and delete workspaces.Sales— read-only reference data.Operations— manage reference data (read, write, delete); view accounts.Support— read-only across resources and admin screens: accounts, roles, login info.Viewer— basic read-only access to domain data and workspaces.DataPublisher— publish curated datasets and bundles to production tables.
The profiles embody a simple gradient: Viewer and Sales observe,
Trading works within its own workspaces, Operations maintains the
shared data everyone depends on, and Support sees administrative
state without being able to change it. The two administrator roles
differ in scope rather than degree — TenantAdmin is omnipotent
inside one tenant, while SuperAdmin additionally manages the tenants
themselves from the system tenant.
The seeded roles are a starting point, and their capability profiles will grow as more of the system is brought under permission control. Roles are inspected through a read-only detail dialog:
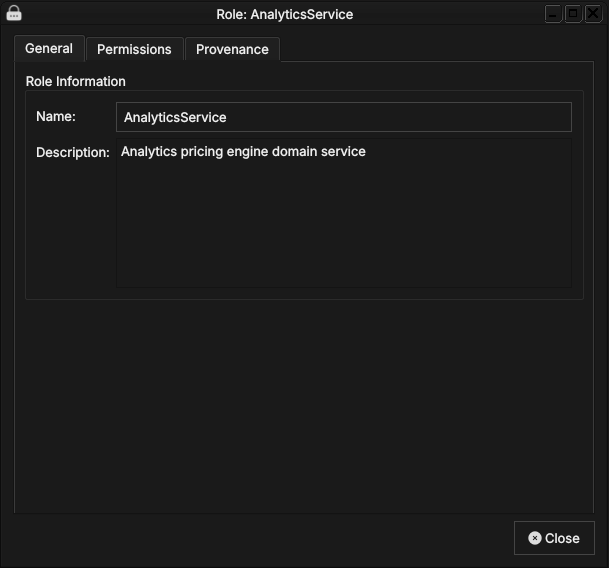
Figure 69: The AnalyticsService role: name and description.
The General tab carries only the role's name and a description of its
purpose — a role has no other state of its own. The substance lives on
the Permissions tab, which lists the permission strings the role
bundles. Reading them is the quickest way to understand exactly what a
role grants — here, analytics::* (every analytics permission) plus
iam::tenants:read (read-only access to tenant records), the
least-privilege profile of the pricing engine discussed above.
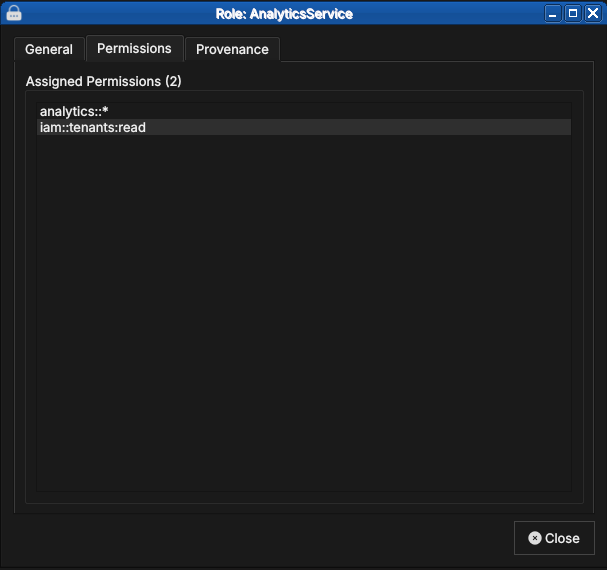
Figure 70: The role's two permissions, following the domain::resource:action pattern.
Finally, the Provenance tab shows that role records are versioned with full provenance like every other entity — changes to what a role grants are part of the audit trail.
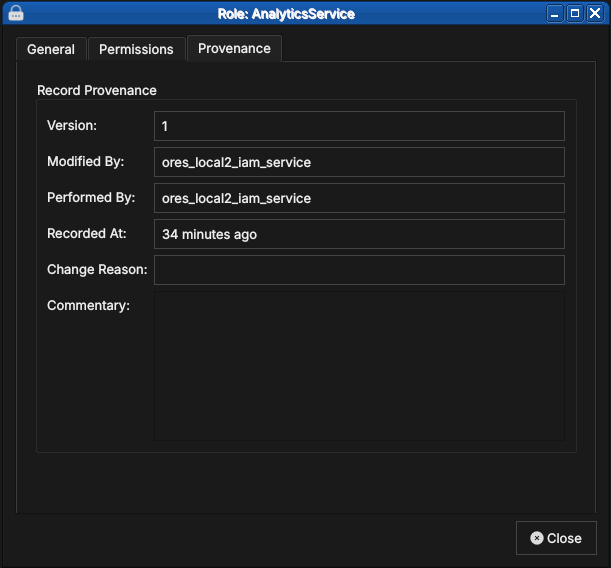
Figure 71: Role records carry the same versioned provenance as every other entity.
Summary
This chapter covered identity and capability in day-to-day operation. The Accounts window presents every account your login identity may see — the platform administrator sees the system tenant's service machinery, a tenant administrator only their own tenant — and the detail dialog manages an account's credentials, roles, parties, and provenance across its six tabs. Creating an account is the same dialog in create mode, with the party warning (and the silent role gap noted above) to watch for. The RBAC model ties it together: accounts are identities, permissions are atomic capabilities, and roles are the named bundles that bridge them — service roles for OreStudio's own components, domain roles for the desks and functions of a financial institution. The next chapter completes the administration picture with the tenants those accounts live in.
See also
- Initial Setup — the tenant and party model, the provisioning wizards that create the first accounts, and party selection at login.
- Tenants — managing the tenants that accounts belong to.
- Reference Data — the provenance and change-reason conventions shared by all entity windows.
- Role-Based Access Control — the general RBAC model behind OreStudio's roles and permissions.
Tenants
Tenants and the parties within them are the organisational backbone of an OreStudio deployment, and this chapter is the canonical reference for that model: tenant isolation, the party hierarchy, the house and its counterparties, the type taxonomy and lifecycle — followed by the Tenants window and detail dialog through which tenants are managed. Tenant administration is a platform concern — the window is available to the platform administrator on the system tenant.
Overview
A tenant is OreStudio's unit of isolation, and the party hierarchy within each tenant is its organisational structure. This section is the canonical home of that model; the Initial Setup chapter walks through the wizards that create tenants and parties, and this chapter picks up once they exist.
The multi-tenant, multi-party model
A tenant's isolation extends to everything it contains: its own users, its own reference data (currencies, counterparties, books), and its own analytics results. Data belonging to one tenant is completely invisible to another tenant; there is no cross-tenant data leakage by design.
A typical deployment has one tenant per organisation. If you are running ORE Studio for your own firm, you will create one tenant representing your organisation. A managed-service provider running ORE Studio on behalf of multiple clients might create one tenant per client.
The system tenant is special — it is created automatically during system provisioning and cannot be deleted. It is the home of the platform administrator accounts. There is exactly one system tenant per deployment. All other tenants are created by platform administrators working from the system tenant.
Tenants come in several types with different operational controls; the next section covers the taxonomy.
Parties
Within a tenant, a party is a business unit — a legal entity, a branch, a trading desk, or any other organisational subdivision. Parties form a hierarchy: a parent party can see all data belonging to its children and grandchildren; a child party sees only its own data and that of its own descendants.
Every tenant has exactly one system party, created automatically when the tenant is provisioned. The system party is the administrative home for tenant administrator accounts. It is not a business entity and should not be used for trading activity.
Business parties — the entities that actually own trades, books, and analytics results — are operational parties. You create these after the tenant is provisioned, using the Party Provisioner.
In financial industry usage, the set of operational parties representing your own organisation is called the house. The house hierarchy models your corporate structure: the root party is your top-level legal entity; its children are subsidiaries, branches, or regional offices; their children are individual trading desks or booking centres. Trades, positions, and risk reports all belong to a specific party within the house.
Distinct from the house are counterparties — the external legal entities your house trades with (banks, broker-dealers, corporates, funds). Counterparties are reference data: they are attached to trade tickets to identify the facing entity, but they do not own books or belong to the party hierarchy. The house versus counterparty distinction appears throughout OreStudio's UI and data model; keeping it clear is important when working with trades and risk reports.
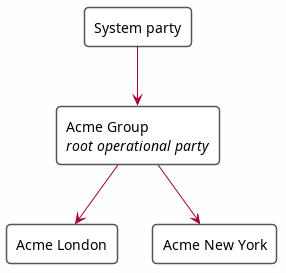
Figure 72: A simple party hierarchy showing the house: the system party at the top, the root operational party (Acme Group) below it, and two child operational parties (Acme London, Acme New York).
A user logs in to a specific party within the house. Their data visibility is determined by their position in the hierarchy: a user logged in at "Acme Group" sees data from both "Acme London" and "Acme New York"; a user logged in at "Acme London" sees only their own data.
Tenant types
ORE Studio supports four tenant types, each with different operational controls:
- System — platform administration; one per deployment; platform-managed.
- Production — real customer organisations with live data; strict controls.
- Evaluation — demos, UAT, training, and exploratory testing; relaxed controls.
- Automation — programmatic test infrastructure; not for human use; no controls.
The system tenant is created automatically during system provisioning and cannot be deleted. It is the home of the platform administrator accounts; all other tenants are created by platform administrators working from it.
Production tenants are for live operations. They enforce strict controls including four-eyes authorisation for sensitive operations and KYC-gated counterparty onboarding.
Evaluation tenants provide a realistic but relaxed environment for demonstrations, user acceptance testing, and training. Bulk data import from external sources (such as the GLEIF/LEI registry) is available in evaluation tenants but not in production tenants.
Automation tenants exist for programmatic test infrastructure. They carry no operational controls and are not intended for human use.
The Tenants window
Open the Tenants window from the Administration submenu of the System menu.
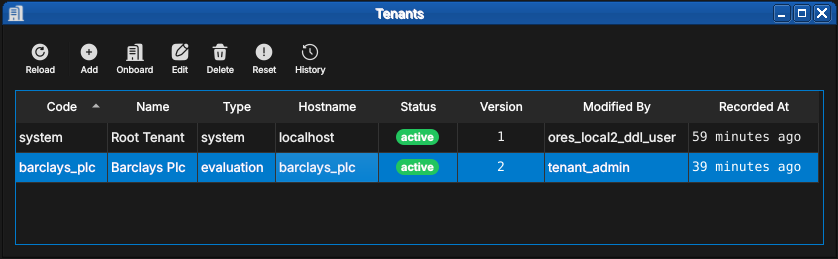
Figure 73: The Tenants window on a freshly provisioned installation: the system root tenant and one business tenant, barclays_plc, both active. Each row shows the tenant code, display name, type, hostname, lifecycle status, and provenance.
Each tenant carries:
- Code — the stable identifier (
system,barclays_plc). - Name — the human-readable display name.
- Type — one of the four tenant types described above;
systemfor the root tenant, hereevaluationfor the business tenant. - Hostname — the hostname the tenant's users connect through, which is how OreStudio routes a login to its tenant.
- Status — the lifecycle state, shown as a badge: bootstrapping while a newly created tenant awaits its provisioning wizard run, active once it is in service, with suspended and terminated closing out the lifecycle.
The toolbar extends the standard entity-window actions with Onboard — which creates a tenant and walks it through provisioning — and Reset, which returns a tenant to its post-provisioning state.
Tenant operations are platform-level and far-reaching: deleting or resetting a tenant affects every account and every record within it. The change-reason dialog applies here as everywhere, so destructive operations leave an audit trail — but there is no undo.
The tenant detail dialog
Double-click a tenant (or select it and press Edit) to open the detail dialog.
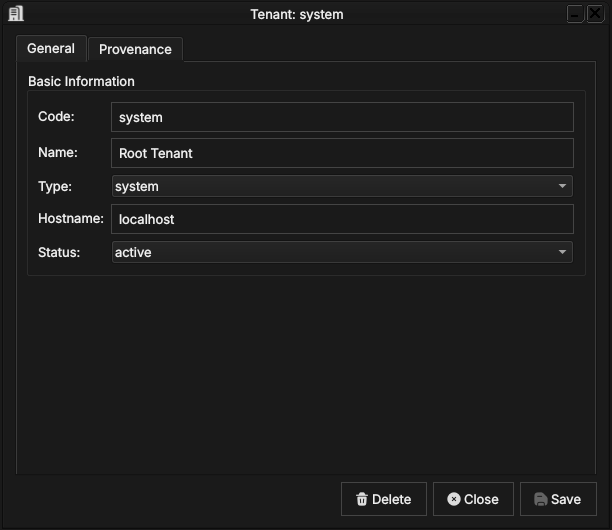
Figure 74: The system root tenant: code, name, type, hostname, and lifecycle status. The status combo is how an administrator suspends or reactivates a tenant.
The General tab carries the fields described above; the status combo is how an administrator moves a tenant through its lifecycle. The second tab holds the record's provenance:

Figure 75: The familiar provenance tab: version, modifier, performing service, change reason and commentary — here the system.initial_load of the root tenant.
Tenant records are versioned with full provenance like every other entity — see the Provenance section of the Reference Data chapter. The History toolbar action shows a tenant's full version history.
Summary
This chapter completed the administration picture begun with accounts and roles. Tenants are the unit of isolation and parties the organisational hierarchy within them — the house and its counterparties — with visibility following the hierarchy. The four tenant types carry operational postures from the strictly controlled production tenant to the uncontrolled automation tenant, and their lifecycle runs from bootstrapping through active to suspended or terminated — all visible at a glance in the Tenants window's status badges. The detail dialog edits a tenant's identity and status under the same provenance regime as every other entity. With connection, provisioning, and administration covered, the manual turns from the system itself to the data it manages: reference data.
See also
- Initial Setup — the tenant model and the provisioning wizards.
- Accounts and Roles — the accounts that live inside each tenant.
Reference Data
Reference data, and the quality framework that governs it, are the subject of this chapter. It explains what reference data is and how it differs from market data and trades, then covers the data quality framework that governs it: the six industry-standard DQ dimensions, the bitemporal storage model, versioning and immutable history, provenance tracking, and the structured change reason system. Readers who want to jump straight to managing specific entity types can skim this chapter and return to it when questions arise about audit trails or data quality controls.
What is Reference Data?
Reference data is the static or slowly-changing master data that all financial activity depends on. It defines the vocabulary of the system — the currencies a trade is denominated in, the counterparty on the other side of a deal, the book it settles into, the country a legal entity is incorporated in. Without it, nothing else can be described precisely.
OreStudio's reference data covers a wide range of entity types:
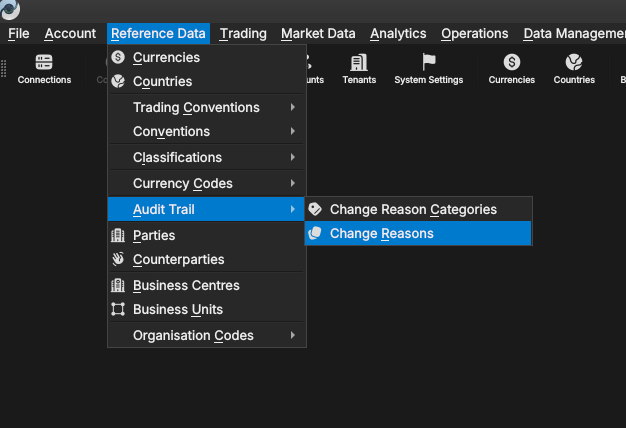
Figure 76: The Reference Data menu showing the full set of entity types managed by OreStudio. The Audit Trail sub-menu provides access to Change Reasons and Change Reason Categories.
- Currencies — ISO 4217 codes, display formatting, and rounding rules.
- Countries — ISO 3166 alpha-2 codes and names.
- Trading conventions and calendars — holiday calendars, settlement day rules, date rolling conventions, and tenor definitions that drive date arithmetic in trade processing and valuation.
- Counterparties — the external legal entities your organisation trades with.
- Books — the internal trading books that own positions.
- Business units and portfolios — the organisational structure within a party.
- Party types and statuses — the classification vocabulary for parties.
- Classifications — supplementary taxonomies such as currency market tiers and monetary natures.
Reference data is distinct from the other two main categories of data in the system:
- Market data — prices, FX rates, yield curves, and volatility surfaces that update continuously throughout the trading day. Market data is time-stamped and immutable once recorded; a new observation does not overwrite an old one.
- Trades — specific financial transactions between parties with defined cashflows, valuation models, and lifecycle states. Trades reference the reference data (they need a currency, a counterparty, a book) but they are not reference data themselves.
The key property of reference data is that it changes slowly and deliberately. A currency's rounding convention is not something that shifts intraday — it is corrected through a controlled, audited process. OreStudio enforces this with a comprehensive data quality framework described in this chapter.
GLEIF and the Legal Entity Identifier (LEI)
The Global Legal Entity Identifier Foundation (GLEIF) is a not-for-profit organisation that oversees the global LEI system on behalf of financial regulators. A Legal Entity Identifier (LEI) is a 20-character alphanumeric code that uniquely identifies a legal entity participating in financial markets — a bank, a corporation, a fund, a branch. LEIs are mandated by major regulatory frameworks including MiFID II, EMIR, Dodd-Frank, and Basel III for trade reporting and counterparty identification.
GLEIF publishes the full registry of LEI entities and their corporate hierarchies (parent-child relationships) as open data. OreStudio uses the GLEIF dataset to seed counterparties and, when a party's root LEI is selected during tenant provisioning, to populate the initial party hierarchy from real organisational data.
A BIC (Bank Identifier Code, ISO 9362) is an 8 or 11 character code identifying a specific financial institution, used in SWIFT messaging for settlement routing. GLEIF publishes a LEI-to-BIC mapping dataset that OreStudio also imports, allowing settlement systems to resolve a counterparty's BIC from its LEI.
Data Quality
Financial calculations are only as reliable as the data they consume. A misspelled currency name is a cosmetic nuisance; an incorrect rounding rule, a wrong counterparty identifier, or a stale market tier classification can silently propagate into risk figures, margin calls, collateral calculations, and regulatory reports. The consequences range from minor reconciliation breaks to significant financial loss or regulatory censure.
OreStudio's reference data layer is designed around the definition of data quality from ISO 8000 and the DAMA Data Management Body of Knowledge (DAMA-DMBOK): data quality is the measure of how well a dataset satisfies the requirements of its intended business use. In financial markets this means data must be not only accurate but also complete, consistent, timely, valid, and unique — the six industry-standard DQ dimensions described below.
The Six Dimensions
Accuracy is the degree to which data values agree with their authoritative golden source. OreStudio seeds currencies from ISO 4217, countries from ISO 3166, and counterparty identifiers from the GLEIF LEI registry. Where a discrepancy arises between a record in OreStudio and its source, the source takes precedence; the system provides tooling to re-import from authoritative datasets.
Completeness means all mandatory attributes are present. The service layer rejects saves that omit required fields and returns a validation error; the Qt UI marks missing mandatory fields visually before a save is attempted.
Consistency is the absence of contradictions between related entities. A currency's rounding type must be drawn from the governed rounding-types table; its market tier from the currency-market-tiers table. Foreign-key constraints in the database enforce this at the persistence layer.
Timeliness means data is available when calculations need it. The tenant provisioner imports standard catalogues at setup time so foundational reference data is ready before any trading activity begins. NATS events propagate updates to all connected clients in real time.
Validity is adherence to business rules and formats. ISO code lengths, numeric code ranges, currency format strings, and rounding precision bounds are all validated at save time.
Uniqueness ensures no duplicate records exist for the same entity. Primary key constraints at the database level prevent duplicates; the service layer surfaces a clear error if a duplicate is attempted.
Bitemporality
The most important architectural property of OreStudio's reference data layer is its use of bitemporality — the recording of two independent time dimensions for every stored fact.
The first dimension is valid time, recorded in valid_from and
valid_to columns on every row. Together they form an open interval
[valid_from, valid_to) bounding the period during which this version
of the record is authoritative. The live (current) row carries
valid_to = 9999-12-31 23:59:59 — a sentinel meaning "no known
expiry". When an update is saved, the database trigger closes the
existing row by setting valid_to to the current time, and inserts a
new row with valid_from = now and valid_to = sentinel. The
application never writes valid_from or valid_to directly — the
trigger owns both columns.
The second dimension is transaction time, surfaced to the application
as the recorded_at field. It records when this version was written to
the database — independently of what period the version is valid for.
Transaction time answers the question "what did the system believe at
a given moment?"
All timestamps in OreStudio are stored and processed as UTC throughout. The Qt UI converts timestamps to your local timezone for display only; every timestamp you see in the application is a local-time rendering of a UTC value stored in the database.
The combination of the two time dimensions allows OreStudio to answer questions that neither alone could answer:
- What is the current record for USD? — the live row has
valid_to = sentinel. - What did the USD record look like on a specific past date t? —
find the row where
valid_from <t < valid_to=. - When did we first record the current name for a currency? —
inspect the
recorded_atof the version where the name field changed. - Revert to an earlier version — inserts a new row copied from the historical version, leaving all intermediate versions intact.
Bitemporality is particularly important for calculation reproducibility. Being able to reconstruct the exact state of all reference data as it existed on a past valuation date is a prerequisite for explaining historical calculation results, for regulatory back-testing, and for resolving disputes about previously reported figures.
Versioning and Immutable History
Every save to a reference data entity creates a new, numbered version. The version counter starts at 1 on the first save and increments monotonically. History is immutable: no version is ever deleted or modified. Even a "revert" operation creates a new version — it does not roll the counter back or remove intermediate history.
This immutability guarantee is deliberate. Compliance frameworks such as MiFID II and EMIR require that firms demonstrate the state of their data at any past point in time. OreStudio's history tables provide this proof unconditionally.

Figure 77: The Currency History dialog for the Angolan Kwanza, showing three versions. The Changes tab shows a field-by-field diff for the selected version against its predecessor.
The history dialog, accessible from every detail dialog's title bar or the list window's right-click menu, shows the full version list. Selecting a version populates a detail panel. The Changes tab shows a field-by-field diff; the Full Details tab shows the complete record at that version. The Revert button reinstates a historical version as a new current version.
Provenance
Every version of every reference data record carries six standard provenance fields. The Provenance tab in every detail dialog shows them read-only; it is disabled in create mode since no provenance exists before the first save.
The table below is the at-a-glance map from what you see on the tab to where each value comes from. Note the split: the two facts that must be tamper-proof — the version number and the moment of writing — are set by a database trigger and can never be supplied by the application; the four that carry business meaning are set by the application from your session and your answers to the change reason prompt.
| UI label | Field | Set by |
|---|---|---|
| Version | version |
DB trigger |
| Modified By | modified_by |
Application |
| Performed By | performed_by |
Application |
| Recorded At | recorded_at |
DB trigger |
| Change Reason | change_reason_code |
Application |
| Commentary | change_commentary |
Application |
version- Monotonically increasing integer starting at 1, incremented by the database trigger on every save. Never written by the application.
modified_by- The username of the account that submitted the save request.
performed_by- The username on whose behalf the change was
performed. Usually the same as
modified_by; they differ in automated workflows, where a service account submits a change on behalf of a human operator —modified_bythen identifies the service andperformed_bythe human, preserving accountability at both layers. recorded_at- The UTC wall-clock timestamp at the moment the row was written. Like all timestamps in OreStudio it is stored as UTC and displayed in your local timezone.
change_reason_code- A structured code drawn from the change reasons table identifying the business justification for the change. See Change Reasons below.
change_commentary- A free-text note accompanying the change. Mandatory for some reason codes, optional for others. Displayed in the history dialog and stored permanently with the version.
Change Reasons
Before every save OreStudio prompts for a change reason — a structured code identifying the business justification. Change reasons are organised into categories accessible from Reference Data → Audit Trail.
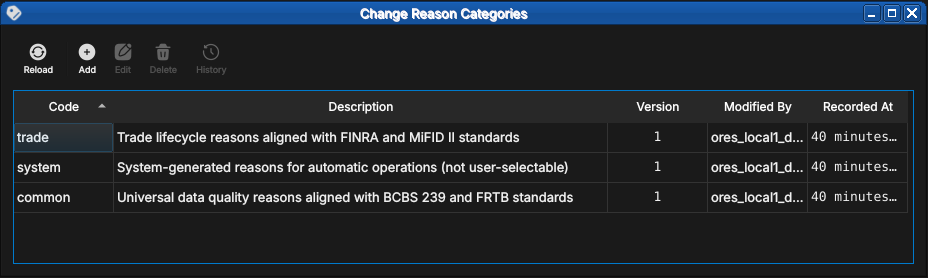
Figure 78: The Change Reason Categories window showing the three built-in category groups and their regulatory alignment.
Screenshot pending: the Change Reasons list window (Reference Data → Audit Trail → Change Reasons).
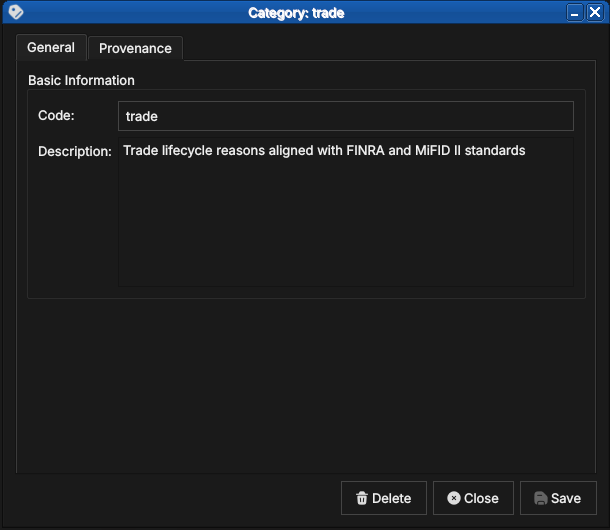
Figure 79: The detail dialog for the trade category, showing its regulatory description.
Change reasons serve two purposes: they act as a forcing function against silent undocumented changes, and they make the audit trail machine-readable and regulatorily aligned. The category structure maps directly to BCBS 239, FRTB, MiFID II, and FINRA reporting obligations.
Each category below opens with a matrix of its codes: which operations
each code applies to (create, amend, delete) and whether the code
demands commentary — codes marked required will not save without a
note, the rest take "—" as optional. The full code as stored in the
audit trail is the category-qualified form, category.code — for
example trade.fat_finger; the matrices and descriptions omit the
prefix within each category section.
The System Category
System reasons are assigned automatically by the application and services. They are not shown in the change reason prompt and cannot be selected manually.
| Code | Create | Amend | Delete | Commentary |
|---|---|---|---|---|
initial_load |
x | — | ||
new_record |
x | — | ||
external_data_import |
x | required | ||
import |
x | x | — | |
test |
x | x | x | — |
tenant_terminated |
x | — | ||
admin_reset |
x | — |
initial_load- Initial system provisioning or database migration. Used once during deployment.
new_record- Normal operational record creation by the application or a service.
external_data_import- Import from an external data source (ISO feed, GLEIF, vendor file). Commentary must record the data lineage source.
import- Data loaded via the CLI import command.
test- Test data created by automated test suites.
tenant_terminated- Applied when a tenant is marked as terminated.
admin_reset- Data reset by a system administrator during re-provisioning.
The Common Category
Common reasons are the universal data quality reasons, aligned with BCBS 239 and FRTB standards. These are the reasons most frequently used by operators during day-to-day data maintenance.
| Code | Create | Amend | Delete | Commentary |
|---|---|---|---|---|
non_material_update |
x | — | ||
rectification |
x | x | — | |
duplicate |
x | — | ||
stale_data |
x | x | — | |
outlier_correction |
x | x | required | |
feed_failure |
x | x | required | |
mapping_error |
x | x | required | |
judgmental_override |
x | x | required | |
regulatory |
x | x | required | |
other |
x | x | required |
non_material_update- A cosmetic or administrative change with no economic impact — a "touch" to refresh a timestamp or correct capitalisation.
rectification- Correction of a user or booking error. The most commonly used reason for fixing a data-entry mistake.
duplicate- Removal of a duplicate record where an equivalent entry already exists.
stale_data- Data not updated within the required liquidity horizon, requiring a refresh or removal.
outlier_correction- Manual override following a plausibility check failure — a value outside acceptable bounds overridden by an operator. Commentary must identify the plausibility rule that triggered the review.
feed_failure- Correction caused by an upstream vendor or API data issue. Commentary must identify the failed feed.
mapping_error- Incorrect identifier translation — for example a wrong ISIN-to-FIGI mapping. Commentary must describe the mapping error.
judgmental_override- Expert judgment applied when market prices or reference values are unavailable and an operator must supply a value manually.
regulatory- Mandatory compliance adjustment required by a regulatory obligation or instruction.
other- Exceptional changes that do not fit any other category. The commentary must fully explain the reason — this code exists as a last resort and should be used sparingly.
The Trade Category
Trade reasons are aligned with FINRA and MiFID II trade lifecycle reporting requirements.
| Code | Create | Amend | Delete | Commentary |
|---|---|---|---|---|
fat_finger |
x | x | — | |
system_malfunction |
x | x | required | |
corporate_action |
x | x | — | |
allocation_swap |
x | x | — | |
re_booking |
x | x | required | |
other |
x | x | required |
fat_finger- Erroneous execution — a trade entered with the wrong quantity, price, or instrument due to a keying error.
system_malfunction- Change caused by a technical glitch or algorithmic error in an execution system. Commentary must identify the system and the nature of the malfunction.
corporate_action- Adjustment following a corporate action such as a stock split, dividend reinvestment, or merger.
allocation_swap- Reallocation between a house account and a client sub-account, or between sub-accounts.
re_booking- Correction of a wrong legal entity booking — a trade entered under the wrong counterparty or book. Commentary must identify the correct entity.
other- Exceptional trade lifecycle changes that do not fit any other code.
Extending Change Reasons
Change reason categories and individual codes are stored as versioned reference data and can be added through the same Qt UI and CLI tools used for other entities. In principle, a tenant administrator can create additional categories and codes for firm-specific workflows.
In practice this should be done cautiously:
- The standard codes are aligned with regulatory frameworks (BCBS 239, FRTB, MiFID II, FINRA). Non-standard codes risk creating audit trail entries that do not map cleanly to regulatory reports.
common.otherandtrade.otherwith mandatory commentary cover most exceptional cases without adding custom codes.- Custom codes cannot be distinguished from standard codes by the system, so the tenant must maintain its own record of which codes are standard and which are custom.
- Removing or renaming a code after it has been used in the audit trail leaves historical records referencing a code whose meaning is no longer documented.
Summary
This chapter established the foundations that every entity chapter builds on. Reference data is the slowly-changing vocabulary of the system, distinct from streaming market data and transactional trades, and OreStudio governs it with the six industry-standard data quality dimensions. The bitemporal storage model gives every record an immutable version history; provenance records who changed what, when, through which service, and why; and the structured change reason system turns every modification into an auditable event. These mechanisms appear identically in every entity window — the following chapters, starting with currencies, document each entity on top of this shared foundation.
See also
- ISO 8000 — international standard for data quality.
- DAMA-DMBOK — data management body of knowledge, including the DQ-6 framework.
- Temporal database — background on transaction time, valid time, and the bitemporal model.
- Time and Timestamps: Architecture and Conventions — internal architecture document (
doc/knowledge/architecture/time-architecture.org). - BCBS 239 — Basel Committee principles for effective risk data aggregation and reporting.
- GLEIF — the Global Legal Entity Identifier Foundation; publishes the LEI registry and the LEI-to-BIC mapping dataset.
Currencies
Currency management is covered here end to end: the ISO 4217 standard and OreStudio's extensions, every screen in the Qt UI, and the three classification tables currencies depend on — rounding types, market tiers, and monetary natures.
Overview
Currencies are the foundational reference data entity. Every trade, cashflow, position, and P&L figure in the system is denominated in a currency; getting the currency record right is a prerequisite for everything else.
ISO 4217 and its limitations
The international standard for currency codes is ISO 4217. It defines
a three-letter alphabetic code (USD, EUR, GBP), a three-digit
numeric code (840, 978, 826), a currency name, and the number of
decimal places — for example, USD has 2 minor units, meaning amounts
are expressed to the nearest cent.
ISO 4217 is widely adopted and OreStudio uses it as its primary identifier. However, the standard has gaps that matter in practice:
- It does not classify currencies by market tier — the distinction between major G10 currencies and emerging-market currencies is economically important but absent from the standard.
- It does not cover digital assets. Cryptocurrencies such as Bitcoin or Ethereum are increasingly relevant in financial systems but have no ISO 4217 code.
- It says nothing about display formatting — whether a symbol precedes or follows the amount, what the thousands and decimal separators are, or how the fractional unit is labelled.
- It does not specify rounding conventions — whether a calculation result should be rounded up, down, or to the nearest unit.
OreStudio extends the ISO 4217 model with additional fields to cover these gaps: monetary nature, market tier, currency symbol, fraction symbol, a printf-style format string, and configurable rounding rules. The standard fields remain primary; the extensions are supplementary.
The Currencies window
Open the Currencies window from the Reference Data menu. It lists all currencies defined in the tenant, with one row per currency.
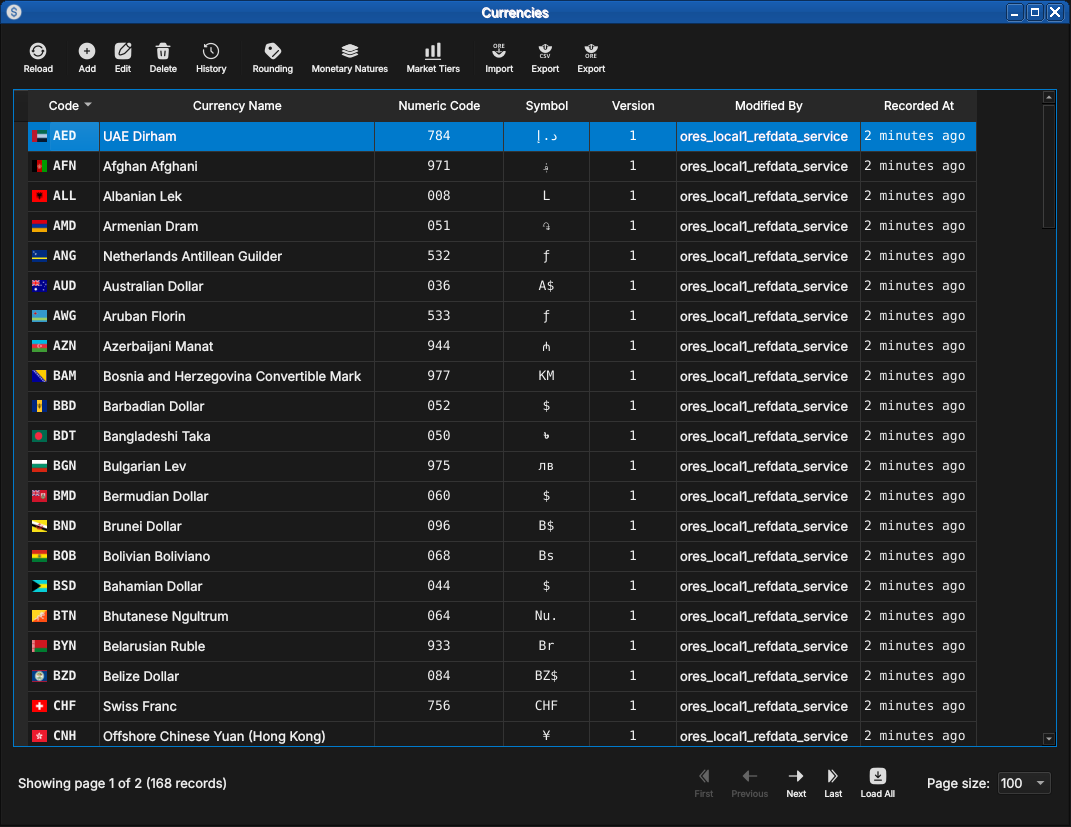
Figure 80: The Currencies window, showing the full list of currencies in the tenant. Each row shows the ISO code, name, numeric code, symbol, version number, the identity of the last modifier, and when the record was last recorded. The status bar shows the current page and total record count.
The toolbar buttons reload the list and adjust the display. The list is paginated; use the page controls at the bottom right to navigate. Double-clicking a row opens the Currency Details dialog.
Currency Details
The Currency Details dialog has four tabs: General, Formatting, Rounding, and Provenance. The three action buttons at the bottom — Delete, Close, and Save — apply to the currency as a whole.
General
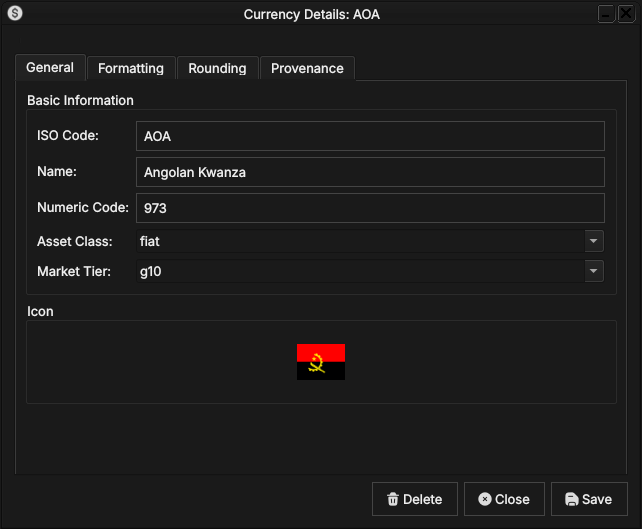
Figure 81: The General tab for the Angolan Kwanza (AOA). It shows the ISO code, full name, numeric code, monetary nature, market tier, and the country flag icon associated with the currency.
The General tab carries the core identity of the currency:
- ISO Code — the three-letter ISO 4217 alphabetic code. This is the primary key and cannot be changed after creation.
- Name — the full English name of the currency (e.g. Angolan Kwanza).
- Numeric Code — the ISO 4217 numeric code (e.g.
973for AOA). - Asset Class — the monetary nature of the currency:
fiatfor a government-issued currency,crypto.majorfor a major digital asset. See Monetary Natures below for the full list. - Market Tier — the currency's liquidity classification:
g10for the major currencies,emergingfor others. See Market Tiers below. - Icon — the country flag for the currency's issuing nation, populated automatically from the system's image dataset on import.
Formatting
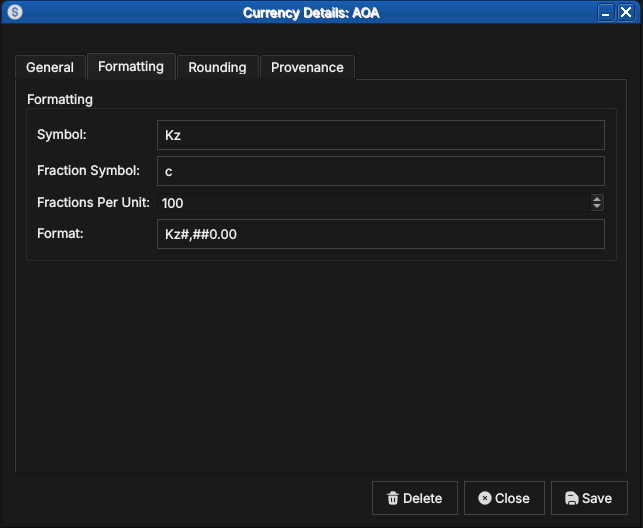
Figure 82: The Formatting tab for AOA, showing the currency symbol (Kz), the fractional unit symbol (c for centavo), fractions per unit (100), and the display format string.
The Formatting tab controls how currency amounts are displayed:
- Symbol — the currency symbol, e.g.
Kzfor the Kwanza or$for the US Dollar. - Fraction Symbol — the symbol for the fractional unit, e.g.
cfor centavo. - Fractions Per Unit — the number of fractional units in one whole
unit. Most fiat currencies use
100; the Kuwaiti Dinar uses1000; currencies with no fractional unit (e.g. Japanese Yen) use0; cryptocurrencies typically use100000000. - Format — a printf-style format string controlling amount rendering,
e.g.
Kz#,##0.00producesKz1,234.56.
Rounding
The Rounding tab controls how calculated amounts are rounded before storage and display:
- Rounding Type — the rounding algorithm applied to amounts in this currency. See Rounding Types below for the full list of options.
- Rounding Precision — the number of decimal places to round to.
Typically
2for most fiat currencies and8for cryptocurrencies.
Provenance
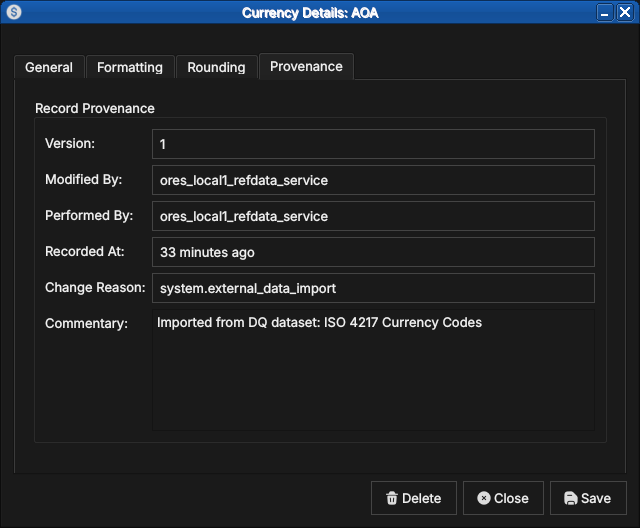
Figure 83: The Provenance tab showing record metadata: version number, the service that last modified the record, who performed the operation, when it was recorded, the change reason code, and a free-text commentary.
The Provenance tab is read-only and shows the audit metadata for the current version. See the Reference Data — Provenance section for a full description of the provenance fields common to all reference data entities.
Editing a currency
To edit a currency, open it in the Currency Details dialog, make your changes, and click Save. Before the record is written, OreStudio prompts for a change reason.
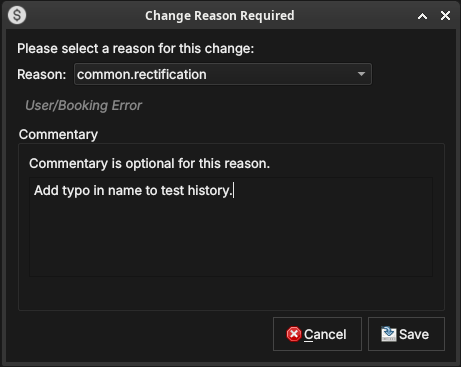
Figure 84: The Change Reason Required dialog, which appears before every save. A reason code must be selected; commentary is optional for some reason codes and required for others.
Select a Reason from the drop-down and add optional Commentary. Click Save to confirm. Every save creates a new version; the previous version is never overwritten.
Currency history
To view the full change history, open the details dialog and click the history icon in the title bar, or right-click the row and choose History.
Figure 85: The History dialog for the Angolan Kwanza, showing three versions: the original ISO 4217 import (version 1), a test correction (version 2), and a final rectification (version 3, currently selected). The Changes tab shows that only the Name and Commentary fields changed between version 2 and version 3.
Select a version to populate the detail panel. The Changes tab shows which fields changed between the selected version and its predecessor. The Revert button reinstates any historical version as a new version, preserving the full audit chain.
Auxiliary Data
The three tables described in this section act as classification vocabularies for currencies. In a standard deployment their values are fixed at provisioning time and rarely change; OreStudio still versions and audits them the same way as any other reference data. They are managed by the system tenant and are accessible from the Reference Data → Currencies sub-menu.
Rounding Types
Rounding types specify the algorithm used to round currency amounts
in financial calculations. The values match the roundingType
enumeration in ORE's XML schema, ensuring consistency with any ORE
configuration files loaded into the system.
Open the Rounding Types window from Reference Data → Currency Codes or from the toolbar within the Currency Detail dialog.
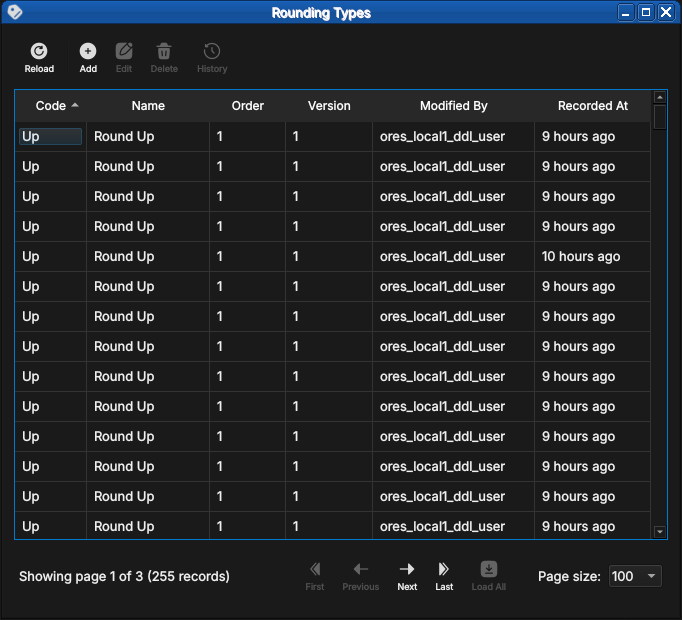
Figure 86: The Rounding Types list window showing the five standard rounding methods with their display order, version, and provenance.
Double-clicking a row opens the detail dialog, which shows the code, name, and a description that includes numeric examples at two decimal places.
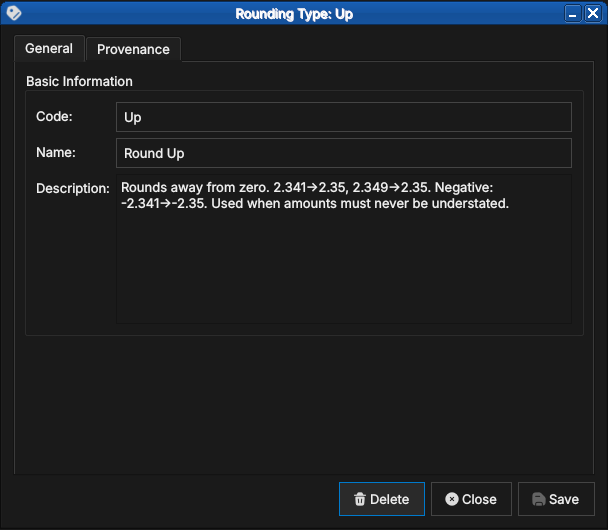
Figure 87: The detail dialog for the Up rounding type, showing the code, human-readable name, and a description with concrete examples.
There are five standard values:
Up
Rounds away from zero regardless of the fractional part. The amount is always moved to the next representable value in the direction away from zero.
Examples at 2 decimal places: 2.341 → 2.35, 2.349 → 2.35.
For negative amounts: -2.341 → -2.35.
Use Up when amounts must never be understated — for example, when
calculating a fee that must cover the full cost.
Down
Truncates toward zero. The fractional part is discarded.
Examples: 2.349 → 2.34, -2.341 → -2.34.
Use Down in conservative contexts where overstating an amount would
be the more serious error — for example, when reporting a liability
that should not be exaggerated.
Closest
Rounds to the nearest representable value, with halves rounded away from zero. This is the most common rounding mode for financial amounts and is the default for most fiat currencies.
Examples: 2.344 → 2.34, 2.345 → 2.35, -2.345 → -2.35.
Floor
Always rounds toward negative infinity — i.e., to the next lower
value regardless of sign. Unlike Down, which rounds toward zero,
Floor produces different results for negative amounts.
Examples: 2.349 → 2.34, -2.341 → -2.35.
Use Floor when rounding must never produce a value higher than the
unrounded input, even for negative amounts.
Ceiling
Always rounds toward positive infinity — i.e., to the next higher value regardless of sign.
Examples: 2.341 → 2.35, -2.349 → -2.34.
Use Ceiling when rounding must never produce a value lower than the
unrounded input.
Market Tiers
Market tiers classify currencies by liquidity profile and market accessibility. The classification feeds into margin calculations, settlement conventions, and risk limits in downstream analytics.
Open the Currency Market Tiers window from Reference Data → Classifications.
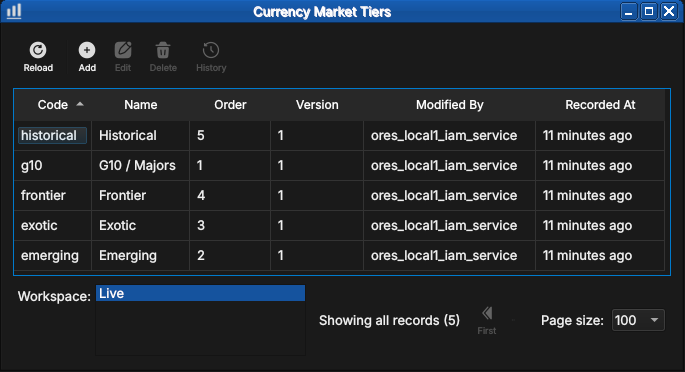
Figure 88: The Currency Market Tiers list showing all five standard tiers — historical, g10, frontier, exotic, and emerging — with their display order and provenance.
Figure 89: The detail dialog for the historical tier, showing the code, name, and description.
There are five standard tiers:
G10 / Majors
The ten most liquid and widely traded global currencies: USD, EUR, GBP, JPY, CHF, AUD, NZD, CAD, SEK, and NOK. G10 currencies have deep interbank markets, tight bid/offer spreads, and continuous 24-hour liquidity. They are the primary currencies for derivatives trading and the dominant funding and collateral currencies in global finance.
Emerging
Currencies from developing economies with growing but still maturing financial markets. They typically have moderate liquidity, wider spreads than G10, and may be subject to capital controls or central bank intervention. Examples include BRL (Brazilian Real), MXN (Mexican Peso), ZAR (South African Rand), INR (Indian Rupee), and CNY (Chinese Renminbi).
Exotic
Thinly traded currencies with wide bid/offer spreads and limited liquidity outside their domestic market. Forward markets may be shallow or absent. Examples include currencies of smaller African, Central Asian, or Pacific island nations.
Frontier
Currencies from frontier markets with limited or restricted convertibility. These may be pegged to a major currency, subject to official exchange rates, or carry transfer restrictions that make them impractical for cross-border settlement. Examples include currencies from markets classified as frontier by MSCI or FTSE Russell.
Historical
Currencies no longer in active use. This includes legacy eurozone currencies superseded by the Euro (DEM, FRF, ITL, ESP, and others), as well as currencies from defunct states or monetary unions. Historical currencies are retained in the system for back-office reconciliation and historical analytics on older trade populations.
Monetary Natures
Monetary nature classifies currencies by the underlying economic mechanism that gives them value. The classification matters for collateral eligibility, regulatory capital treatment, and the applicability of pricing models.
Open the Monetary Natures window from Reference Data → Classifications.

Figure 90: The Monetary Natures list showing all four standard values — synthetic, supranational, fiat, and commodity — with their display order and provenance.
Figure 91: The detail dialog for the synthetic monetary nature, showing the code, name, and description.
There are four standard values:
Fiat
Government-issued currency that derives its value from legal tender status rather than from a physical commodity. The issuing central bank or treasury manages supply through monetary policy. The overwhelming majority of currencies in the ISO 4217 standard are fiat — USD, EUR, GBP, JPY, and so on.
Commodity
Currency backed by or representing a claim on a physical commodity.
In practice this covers the ISO 4217 commodity codes: XAU (gold),
XAG (silver), XPT (platinum), and XPD (palladium). Pricing is
driven by spot commodity markets rather than interest rate differentials.
Synthetic
Artificially constructed currency or index that does not correspond to any single government or commodity. Examples include basket currencies and internal transfer pricing units used within large financial institutions.
Supranational
Currency issued by a multi-national authority rather than a single
sovereign. The primary example is XDR (Special Drawing Rights),
issued by the International Monetary Fund as an international reserve
asset and valued as a basket of USD, EUR, CNY, JPY, and GBP —
reviewed and revised by the IMF every five years.
Shell commands
The ORE Studio interactive shell provides quick currency access without opening the Qt UI:
# List all currencies (paginated)
currencies get

# Add a new currency:
#   <iso_code> <name> <numeric_code> <symbol> <fractions_per_unit>
#   <change_reason_code> <change_commentary>
currencies add XTS "Test Currency" 963 T$ 100 system.test "manual example"

# Delete a currency by ISO code
currencies delete XTS

# Show history for a currency
currencies history USD
CLI commands
The ores.cli command-line tool provides a richer interface for
automation. All currency commands live under ores.cli refdata currencies:
# List all currencies as a table
ores.cli refdata currencies list --format table

# List a specific currency as JSON
ores.cli refdata currencies list --format json --key EUR

# Add a new currency
ores.cli refdata currencies add \
  --iso-code XTS --name "Test Currency" \
  --numeric-code 963 --modified-by operator \
  --currency-type fiat

# Delete a currency by ISO code
ores.cli refdata currencies delete --iso-code XTS

# Export all currencies to a file
ores.cli refdata currencies export --output currencies.json
Summary
This chapter documented the currency entity end to end. ISO 4217 provides the standard identity — code, numeric code, name, minor units — and OreStudio's extensions cover what the standard leaves out: market tiers, monetary natures for digital assets, display formatting, and rounding conventions. The Qt windows manage the records under the full data quality regime of the previous chapter, the three auxiliary classification tables govern the values a currency may reference, and the shell and CLI expose the same operations for scripted use. Currencies are the template: subsequent entity chapters follow this same shape.
See also
- ISO 4217 Currency Codes — the international standard for currency identification.
- SIX Financial Information — the ISO 4217 maintenance agency.
- MSCI Market Classification — framework for developed, emerging, and frontier market designations.
Footnotes:
GLEIF, the Legal Entity Identifier system and BIC codes are described in more detail in the What is Reference Data? section of the Reference Data chapter.